© Copyright 2014, Creative Playthings
MODEL PS18EAS
19862-600 Rev E (01-19)
Page 10
ASSEMBLY INSTRUCTIONS
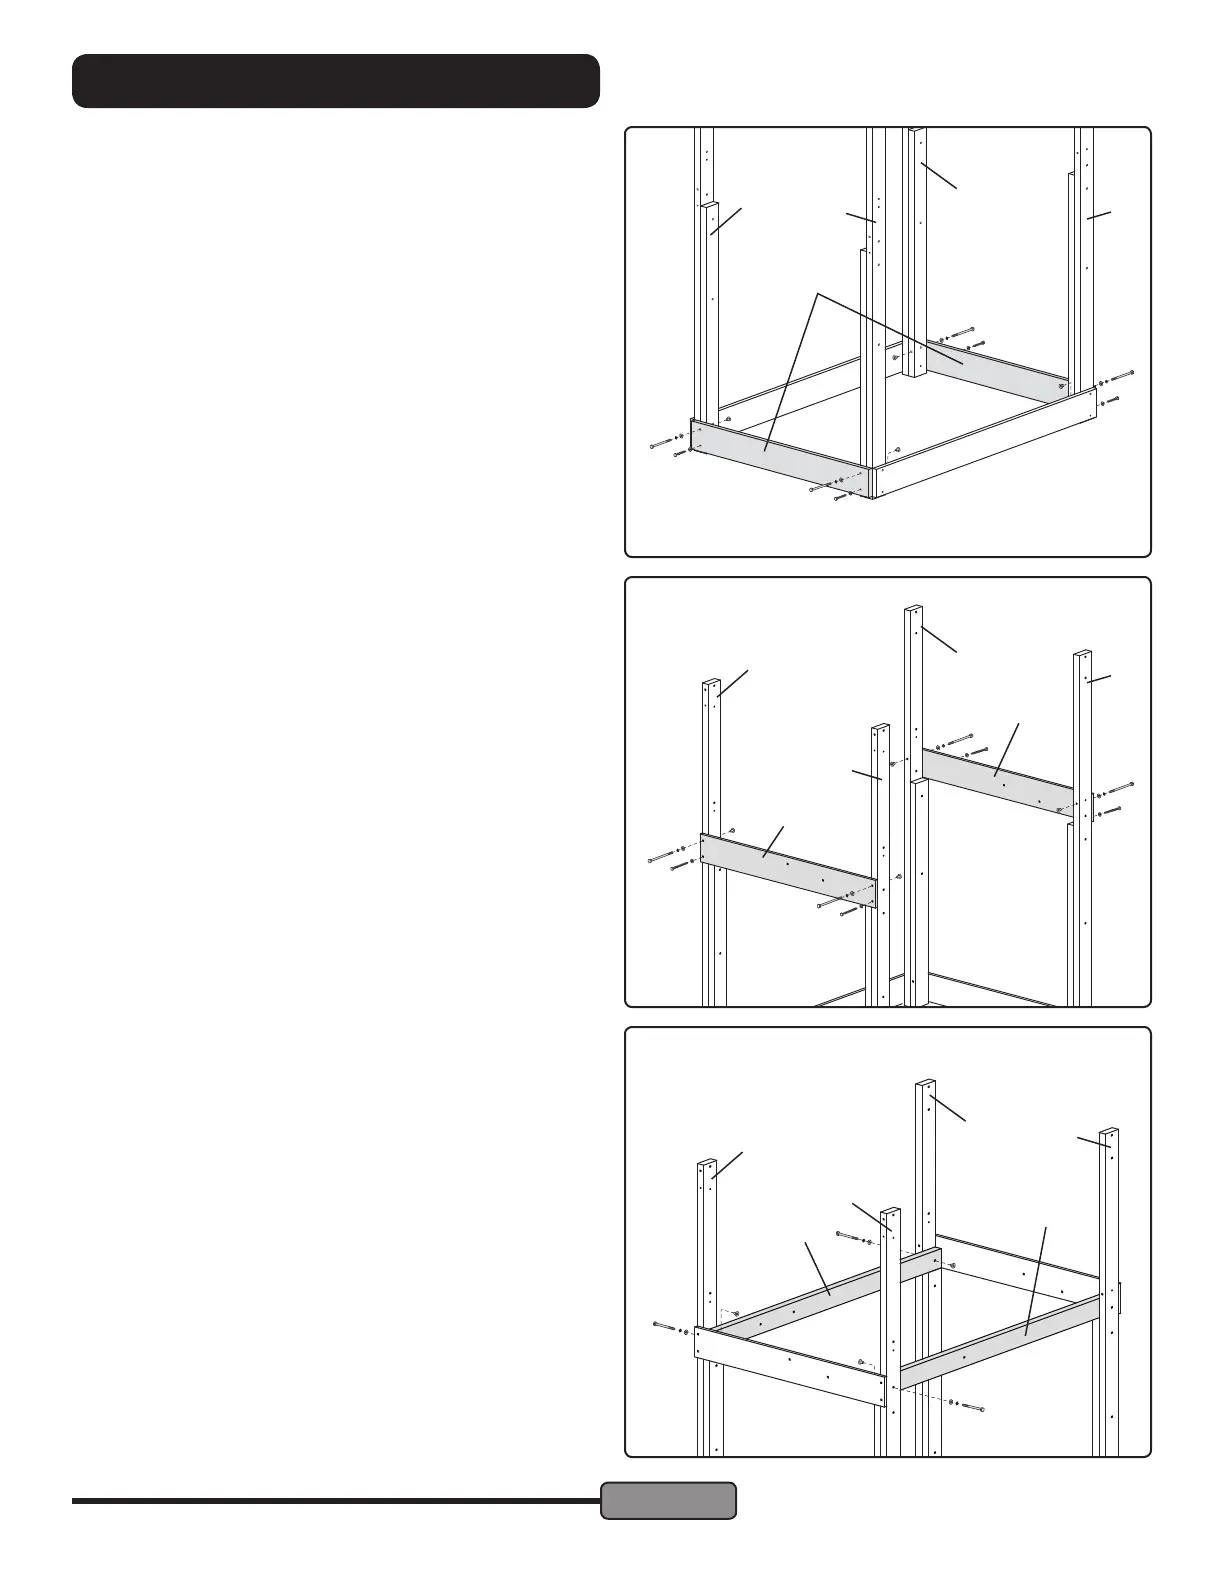
STEP 3 — Sandbox Ends:
Fasten one Sandbox End (AE) to the front of the Front Left
and Front Right Posts as shown at right. Use 1/4 x 4" Hex Bolt
Assemblies in the top holes and 1/4" x 2" Lag Screws with
1/4" Flat Washers in the bottom holes.
Fasten the other Sandbox End (AE) to the back of the Back
Left and Back Right Posts in the same way.
STEP 4 — Platform Ends:
Fasten the Platform Front (AF) to the Front Left and Front Right
Posts as shown at right. Use 1/4 x 4" Hex Bolt Assemblies in
the top holes and 1/4" x 2" Lag Screws with 1/4" Flat Washers
in the bottom holes.
Fasten the Platform Back (AG) to the middle post assemblies
in the same way.
2" Lag Screw in
Bottom Holes
2" Lag Screw in
Bottom Holes
AE
AG
AF
4" Hex Bolt
Assembly in top
holes
4" Hex Bolt
Assembly in top
holes
STEP 5 — Platform Sides:
Fasten the Platform Left (H) to the left posts in the orienta-
tion shown using two 1/4 x 3" Hex Bolt Assemblies.
Fasten the Platform Right (G) to the Front Right Post in the
orientation shown using one 1/4 x 3" Hex Bolt Assembly.
Rest the other end of the Platform Right in place to be fas-
tened in the following step.
G
H
Three 1/4 x 3" Hex
Bolt Assemblies
Note: Additional help is suggested for
steps 2 through 6 to support the Corner
Posts.
AA
AA
AA
AC
AC
AC
AB
AB
AB
AD
AD
AD