MODEL PS18EAS
19862-600 Rev E (01-19)
© Copyright 2014, Creative Playthings
Page 11
ASSEMBLY INSTRUCTIONS
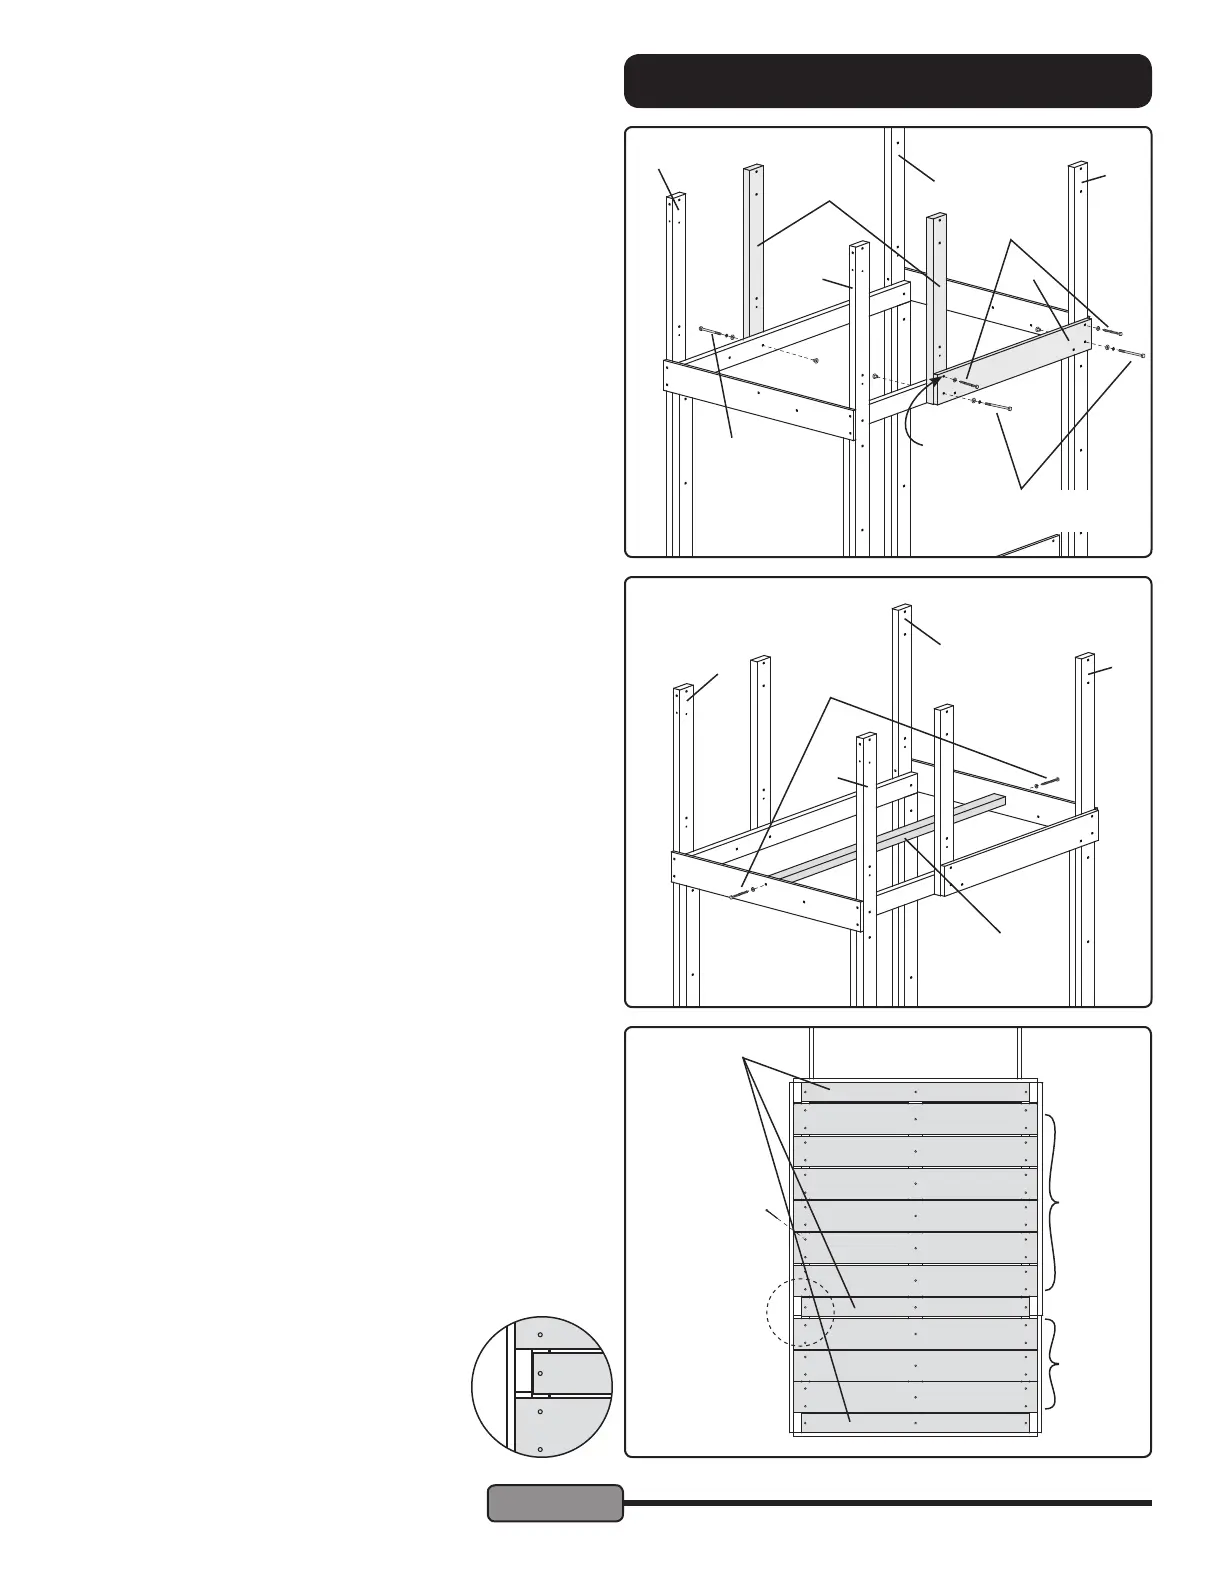
STEP 6 — Mid Posts & Rock Wall Mount:
Align one Mid Post (K) as shown. Fasten it to the Platform
Left using one 1/4 x 3" Hex Bolt Assembly.
Fasten the Rock Wall Mount (W) to the Back Right Post and
the Platform Right using one 1/4 x 3-1/2" Hex Bolt Assembly
in the lower right hole.
Fasten the other end of the Rock Wall Mount to the right Mid
Post (K) and the Platform Right using one 1/4 x 3-1/2" Hex
Bolt Assembly in the lower left hole.
Fasten one 1/4 x 2" Lag Screw and Flat Washer through the
top right hole of the Top Rope Support and into the Back
Right Post
Use a level to assure that the right Mid Post is plumb. Drill
a 3/16" diameter pilot hole 1-1/4" into the right Mid Post
through the top right hole in the Rock Wall Mount. Secure
using one 1/4 x 2" Lag Screw and Flat Washer.
STEP 7 — Stringer:
Fasten the Stringer (B) to the Platform Front and Platform
Back using two 1/4 x 3" Lag Screws and Flat Washers as
shown.
3-1/2" Hex Bolt
Assembly
3" Hex Bolt
Assembly
K
W
B
3/16"
pilot drill
3" Lag
Screw
2" Lag
Screw
STEP 8 — Deck Boards:
Locate the nine Deck Boards (AH) and three Narrow Deck
Boards (L) and lay them across the platform supports and
Stringer in the arrangement shown at right. Align the ends of
the Deck Boards; the Narrow Deck Boards t between the
uprights.
Starting at the front of the gym fasten each board using #8 x
1-5/8" Screws. For the rst four boards, leave a gap of 1/8"
or less to limit the possibility of clothing being snagged when
children use the slide. Space the rest of the boards evenly.
Note that the Narrow Deck Board between the Mid Posts
need not align exactly with the Mid Posts.
AH
AH
L
#8 x 1-5/8"
Screws
< 1/8" gap between
1st four boards
Evenly space the
back eight boards
AA
AC
AB
AD
AA
AC
AB
AD
 Loading...