© Copyright 2014, Creative Playthings
MODEL PS18EAS
19862-600 Rev E (01-19)
Page 14
ASSEMBLY INSTRUCTIONS
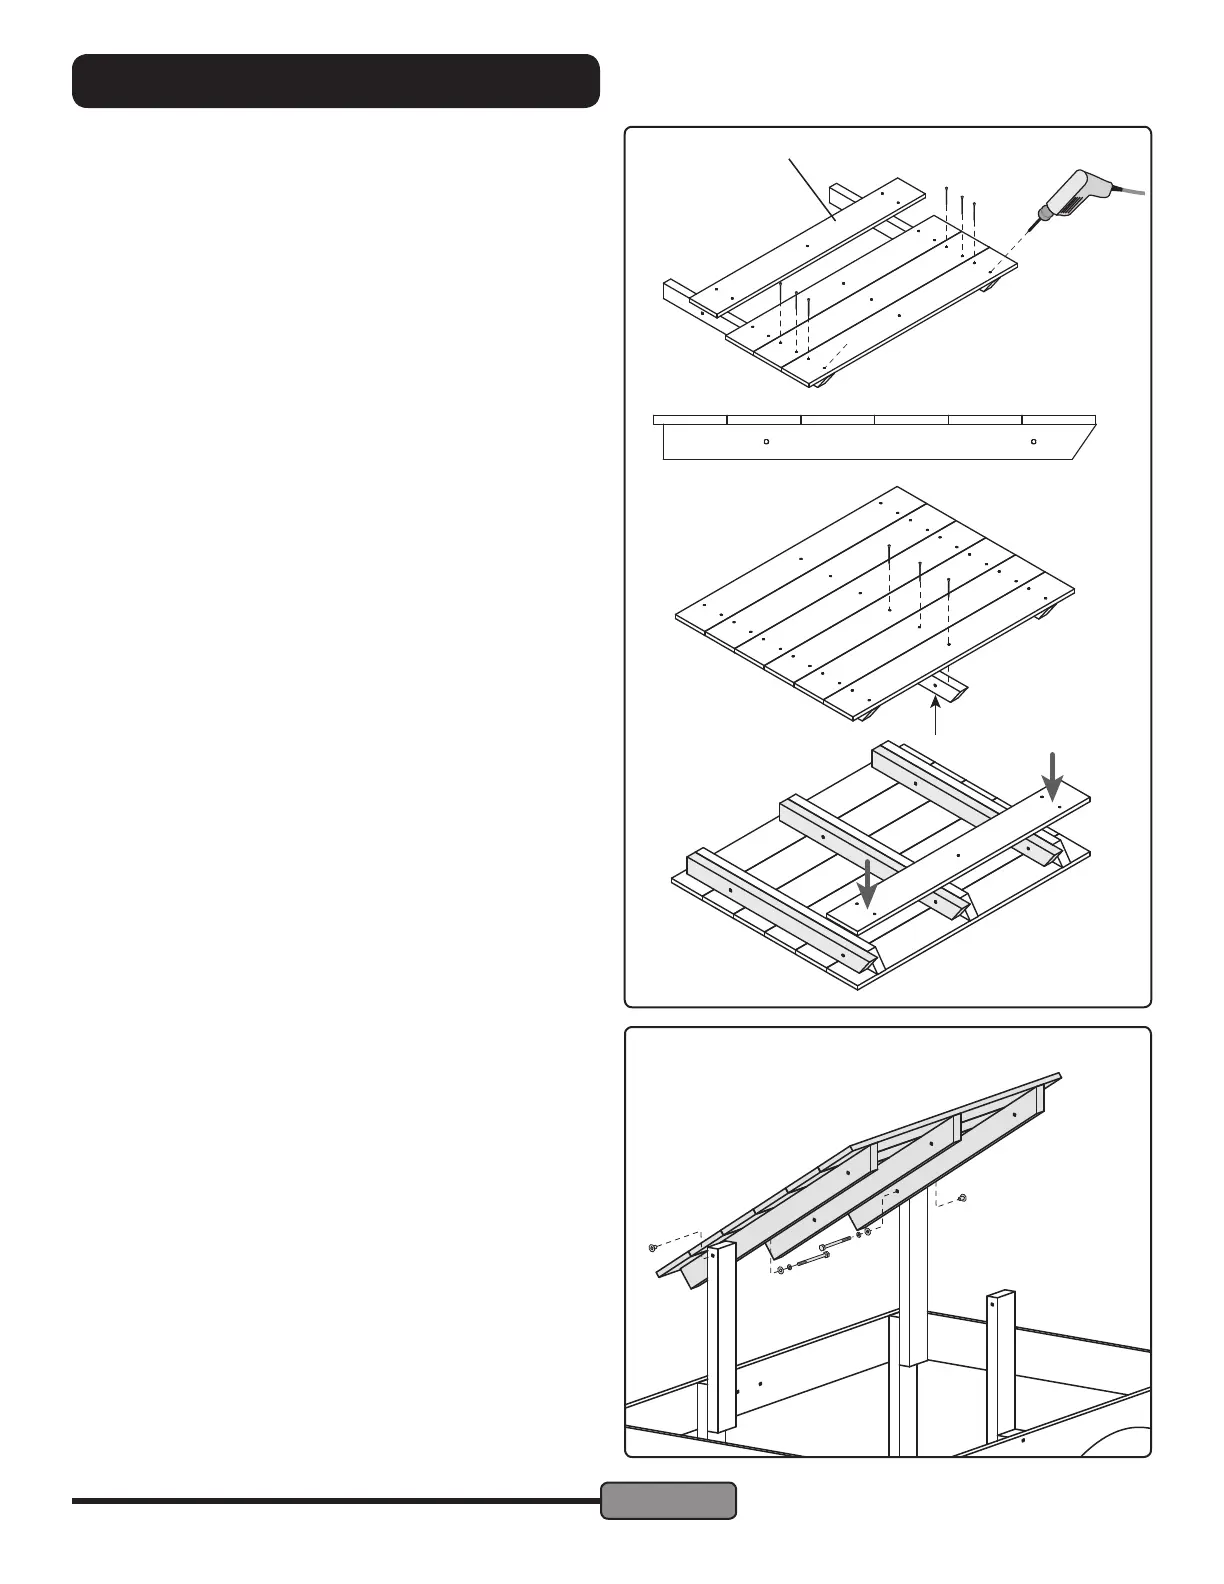
Fasten Roof Boards:
Start at the angled end of the Roof Rafters. Rest one Roof
Board (AL) on top of the Rafters ush to the angled end. Use
a 1/8" diameter drill to make pilot holes before fastening the
Roof Board to the Rafter using four #8 x 1-5/8" Screws. Drill
and screw the rst hole at an angle, as shown, to avoid the
angled cut of the rafter.
Continue with the next three Roof Boards, setting each
against the previous Roof Board and fastening them. Once
the position of the Rafters is stable, lay the rest of the Roof
Boards in place. The sixth Roof Board should overhang the
end of the Rafters by approximately 1/2". If the overhang
is less than 1/2", evenly space the Roof Boards to achieve
an overhang. If the overhang is greater, alternative holes
should be made in the nal Roof Board. Fasten the Roof
Boards using #8 x 2" Screws.
Center Roof Rafter:
Find the center of the Roof Panel Assembly, halfway be-
tween the Rafters. Align the a Roof Rafter (V) to the center
of the Roof Panel and fasten it in place using 1/8" pilot holes
and #8 x 1-5/8" Screws as with the other Rafters.
Assemble Second Roof Panel:
Flip the rst Roof Panel to use it as a template to assemble
the remaining Roof Panel. Place the remaining Rafters tight
against the Rafters on the assembled panel. Align the ends.
Fasten Roof Boards to the Roof Rafters using 1/8" diam-
eter pilot holes and #8 x 1-5/8" Screws as with the rst Roof
Panel.
STEP 15 — Roof Panels to Roof Uprights:
Fasten one Roof Panel assembly to the left Roof Uprights
using 1/4 x 4-1/2" Hex Bolt Assemblies.
Repeat with the other Roof Panel on the right uprights. Rest
the angled ends Roof Panels against each other.
AL
1/4 x 4-1/2"
Hex Bolt
 Loading...