MODEL PS18EAS
19862-600 Rev E (01-19)
© Copyright 2014, Creative Playthings
Page 15
ASSEMBLY INSTRUCTIONS
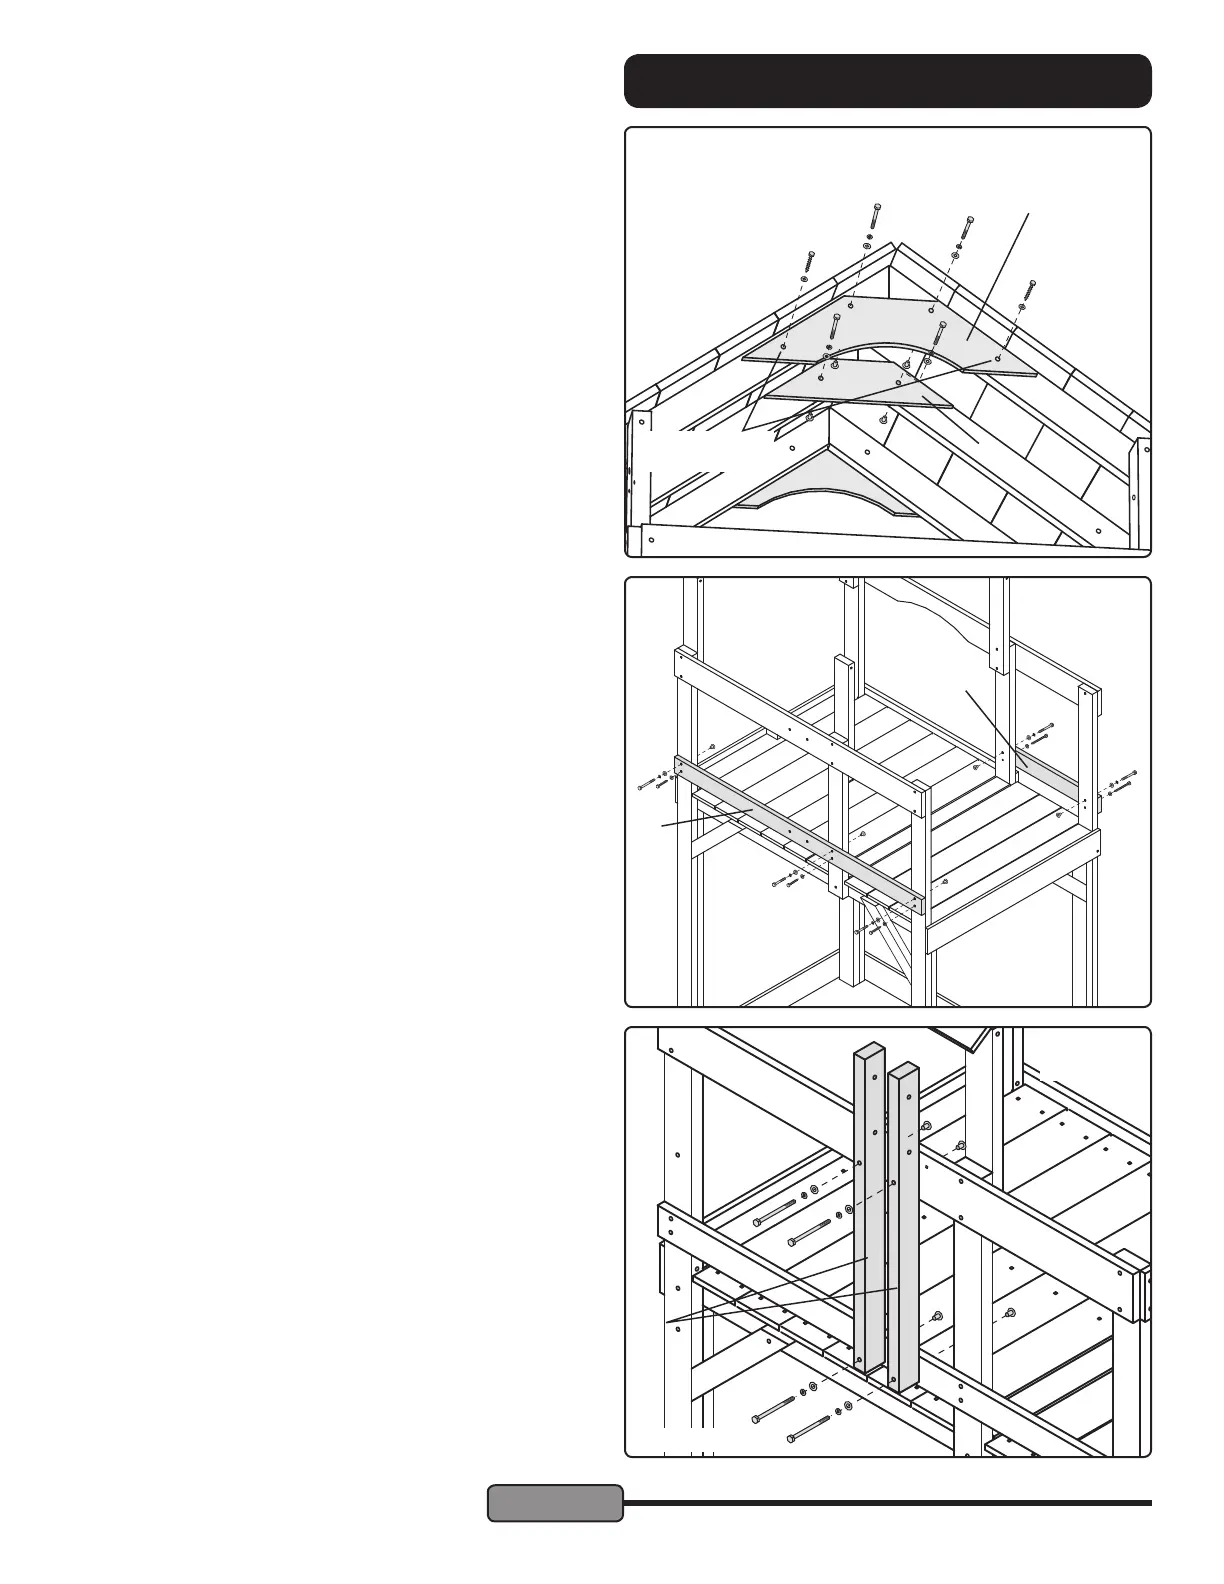
STEP 16 — Ceiling Joists:
Adjust the Roof Panels so that the angled ends are even
with each other. Fasten an End Joist (X) to the outside of the
Rafters on each end. Use two 1/4 x 2" Hex Bolt Assemblies
through the upper holes of each End Joist.
Fasten the Ceiling Joist (D) to the center Rafters using two
1/4 x 2" Hex Bolt Assemblies.
Adjust the Roof so it looks even. Adjust the End Rafters to
look straight and centered in place. Use a 3/16" diameter drill
to make pilot holes in the Rafters through the lower holes in
the End Rafters. Secure the End Joists to the Rafters using
1/4 x 2" Lag Screws and Flat Washers through the bottom
holes.
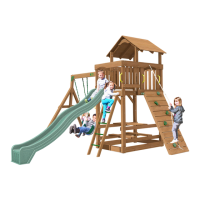
STEP 17 — Lower and Short Wall Supports:
Fasten the Lower Wall Support (N) to the Back Left Post,
left Mid Post and Front Left Post using 1/4 x 2" Hex Bolt As-
semblies through the upper holes. Secure the three lower
holes in the Lower Wall Support using 1/4 x 2" Lag Screws
and Flat Washers.
Fasten the Short Wall Support (Y) to the right Mid Post and
Front Right Post using 1/4 x 2" Hex Bolt Assemblies through
the upper holes. Secure the lower holes using 1/4 x 2" Lag
Screws and Flat Washers.
Drill 3/16" diam-
eter pilot holes.
D
X
N
Y
STEP 18 — Swing Mounts:
Fasten the two Swing Mounts (AO) to the Left Wall Support
and Lower Wall Support using two 1/4 x 3-1/2" Hex Bolts
each. Be sure to orient the Swing Mounts so the holes on the
sides are near the top.
Hint: if the holes don't line-up, go back to the last step and
ip the Lower Wall Support.
3-1/2" Hex Bolts
AO
Parts omitted
for clarity