© Copyright 2014, Creative Playthings
MODEL PS18EAS
19862-600 Rev E (01-19)
Page 16
ASSEMBLY INSTRUCTIONS
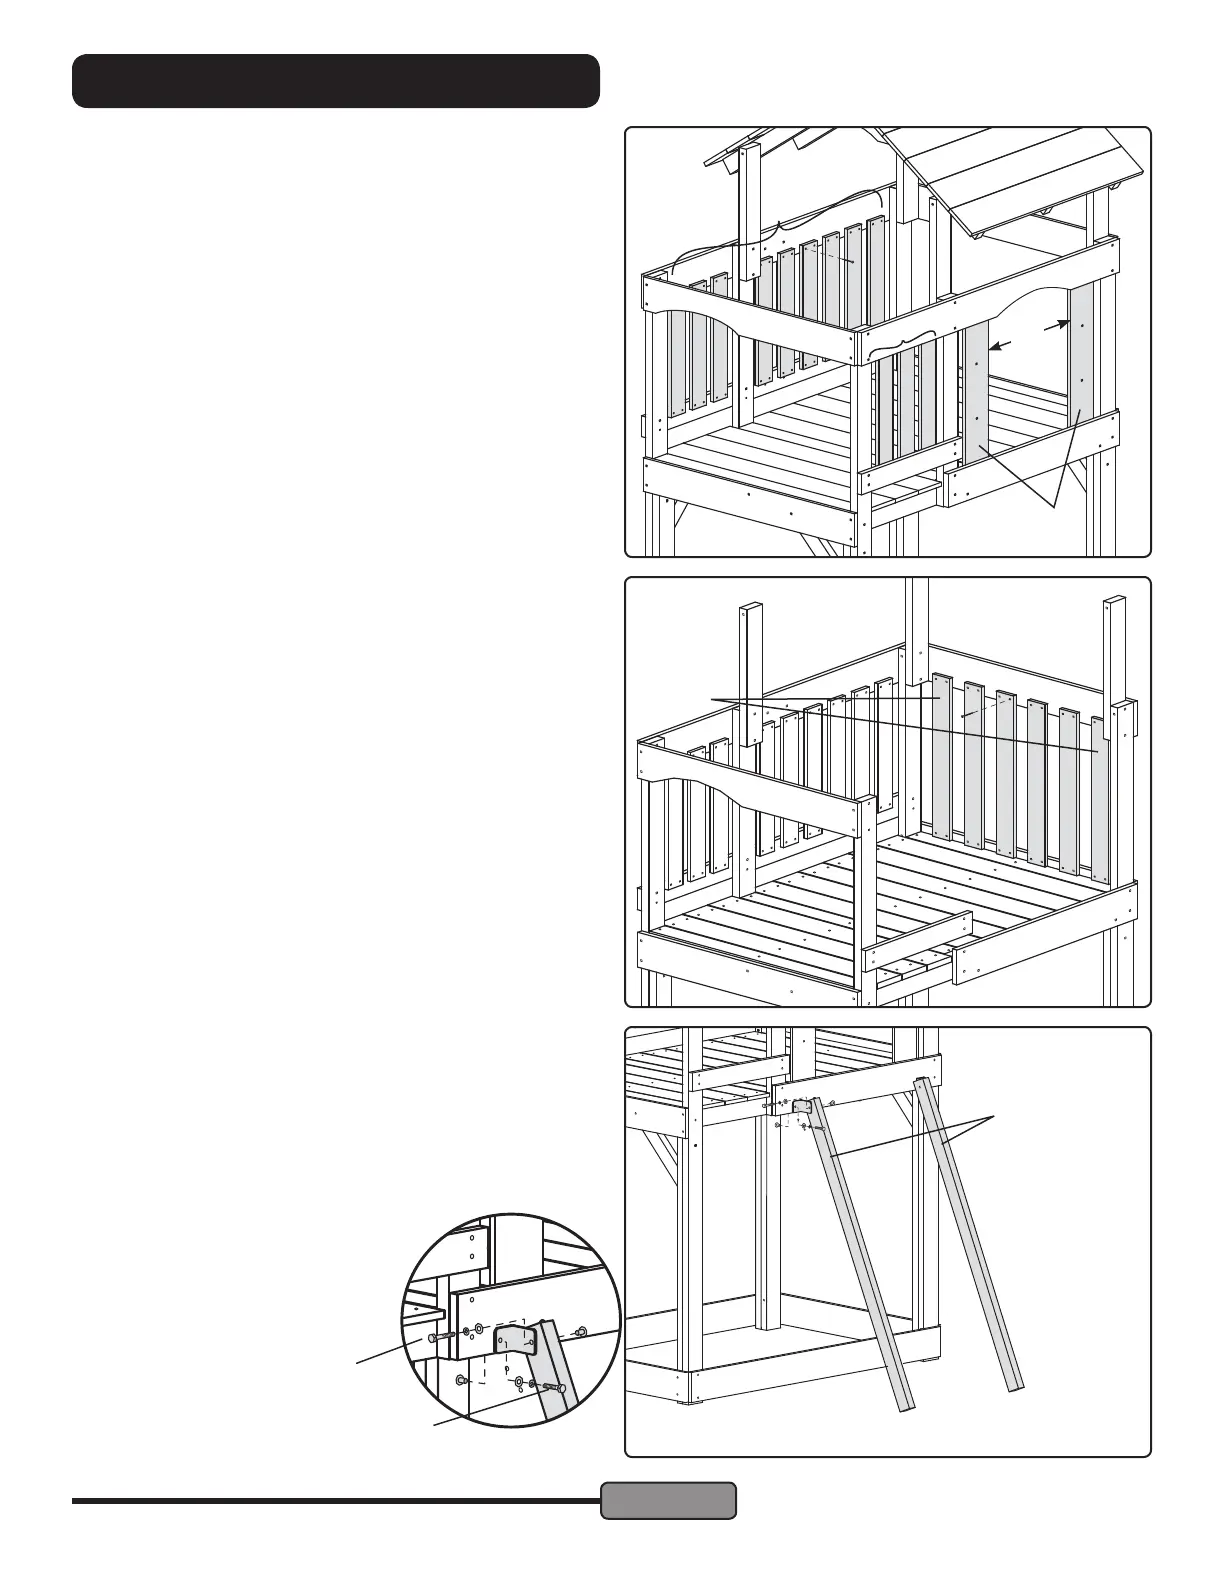
STEP 19 — Short Wall Slats & Entrance Slats:
Fasten three Short Wall Slats (S) to the Left Wall Support and
Lower Wall Support using four #8 x 1-1/4" Screws each. Even-
ly space the Slats between the front left post and the left Mid
Post. The gap between the Slats will be approximately 1-5/8".
Fasten six Short Wall Slats (S) to the Left Wall Support and
Lower Wall Support using four #8 x 1-1/4" Screws each. Even-
ly space the Slats between the back left post and the left Mid
Post. The gap between the Slats will be approximately 1-7/8".
Fasten three Short Wall Slats (S) to the Right Top Support and
Short Wall Support using four #8 x 1-1/4" Screws each. Evenly
space the Slats between the front left post and the left Mid Post.
The gap between the Slats will be approximately 1-5/8".
Fasten the Entrance Slats (AJ) to the inside of the Right Wall
Support and Rock Wall Mount using #8 x 1-5/8" Screws. Leave
a gap of 19" between the Entrance Slats.
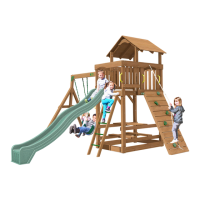
STEP 20 — Narrow Wall Slats:
Fasten six Narrow Wall Slats (Z) to the Platform Back and End
Support using four #8 x 1-1/4" Screws each. Evenly space the
Slats between the Back Left Post and Back Right Post. The gap
between the Slats will be approximately 2-3/4".
STEP 21 — Climber Rails:
Fasten one Access Bracket to the top of each Climber Rail
(N) using one 1/4 x 1-1/2" Hex Bolt Assembly.
Fasten each Bracket-Rail assembly to the Rock Wall Mount
using one 1/4 x 1" Hex Bolt Assembly.
Parts omitted
for clarity
S
S
Z
AJ
19"
1/4 x 1" Hex Bolt
1/4 x 1-1/2" Hex Bolt
N