● Use quarter coin to space lid from top of kiln when replacing screws in hinge mount.
H) Test kiln with ohm meter to insure no short circuit exists. Check Kiln Sitter
® adjustments
and operation.
5. If damaged brick is terminal brick:
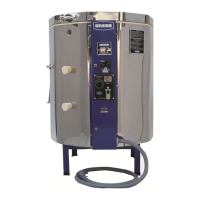
A) Remove six screws holding control box cover to the stainless steel jacket. Pull panel
carefully away, being careful not to put side pressure on the Kiln Sitter
® tube assembly.
B) Unplug (element to switch) jumper wires from switch and relay(s) to release panel from
wiring on kiln.
C) Unbolt the elements under the control box cover and straighten element wire ends so that
they can be pulled through holes in brick.
D) Remove sheet metal screws from control panel chimney. This chimney protects the
wiring from excessive heat damage.
E) Remove four straight pins at the ends of the damaged brick from the element grooves.
F) Very gently lift out brittle elements from element grooves with long-nose pliers. Lift
elements out just enough to release brick.
G) Remove damaged brick and install a new brick. Install with element trough down.
Remember that elements are brittle.
H) Place elements back into grooves and replace straight pins.
I) If brick is in top of liner, use a piece of sandpaper over a woodblock to sand the new
brick down level to the top of the adjoining bricks.
J) Replace bolt ties, screws, hinge mount, lid brace, etc. removed for wall brick repair.
Replace control panel being careful to push the control box straight in to avoid damage to
the brick from the Kiln Sitter
® tube. Replace screws. Do not over tighten as screws will
easily strip.
K) Test the kiln with an ohm meter to insure there are no short circuits. Check the Kiln Sitter
adjustments. Check to see that the lid brace is working properly. Replace the lid brace if
not in perfect working order.
Element Replacement
1. Remove sheet metal screws in the control panel box to release the control panel box for
access to element connections. Pull panel straight horizontally very gently being careful not
to bump Kiln Sitter
® tube on brick liner.
2. Tag and pull off “plug on terminal” wires which come from elements to the control
box.
3. Unbolt damaged elements only from connection wires.
4. Straighten unbolted element ends and cut off at end of porcelain bushing.
5. Remove porcelain bushing. Remove pins at each corner of each groove.
6. Gently lift out defective elements only and pull element ends into the interior of the kiln.
7. Install new formed elements in grooves and push element ends through holes to exterior
kiln. Replace porcelain bushing.
8. Cut element ends so that they extend 1 ¼” out from porcelain bushing.
9. Form 3/8” loop on each element end. Loop must be snug against porcelain bushing.
10. Bolt elements back on leads as they were originally.
11. Reconnect “push-on-terminals” to control panel. See the wiring diagram in the appendix if
your tagged wires did not stay tagged.
12. Replace control panel box being careful to push the control box straight in to avoid damage
to the brick from the Kiln Sitter
® tube. Replace screws. Do not over tighten as screws will
easily strip.