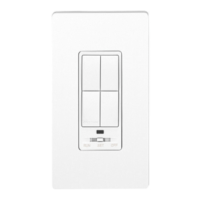
CLW-DIM1, DIMS1, & SLVD1(W/A/B)
Wiring a -DIMS1 with One or More
-SLVD1s
“Wiring a -DIMS1 with One or More
-SLVD1s”.
Wiring a -DIM(S)1 (No Slaves)
NOTE: The -DIMS1 must be installed in the same
wallbox that contains the connections to the load.
The following describes the installation of a stand-alone
-DIM1 or -DIMS1.
The following describes installation of a -DIMS1 master
with a -SLVD1 slave.
1. Turn power off at the circuit breaker.
2. Pull Class 2 low voltage wires through a hole in
the drywall located outside of the electrical box,
to the Crestron control system or a Crestron
connection block device. Leave wires outside of
the wallbox for connection to the -DIM1 or
-DIMS1.
1. Turn power off at the circuit breaker.
2. Pull Class 2 low voltage wires through a hole in
the drywall located outside of the electrical box,
to the Crestron control system or a Crestron
connection block device. Leave wires outside of
the wallbox for connection to the -DIM1 or
-DIMS1.
NOTE: Alternate wiring methods may be used
for the Class 2 wiring connection. Refer to
section 725-55, Part D of the 2002 National
Electric Code.
NOTE: Alternate wiring methods may be used
for the Class 2 wiring connection. Refer to
section 725-55, Part D of the 2002 National
Electric Code.
3. Wire the dimmer as shown in Figure 1 on
page 8.
3. Wire the dimmers as shown in Figure 4 on
page 9.
NOTE: The RED (Load) and BLACK (Hot)
wires are #14 AWG. The BLUE (Slave) and
WHITE (Neutral) wires are #18 AWG. The
GREEN (Ground) wire is #16 AWG. The GRAY
(Cresnet) wires are #22 AWG. The BLACK wire
(Cresnet ground) paired with the GRAY
(Cresnet) wires is #22 AWG.
NOTE: Do not connect the BLUE (Slave) wire
to the Black (Hot) or RED (Load) wires.
NOTE: The RED (Load) and BLACK (Hot)
wires are #14 AWG. The BLUE (Slave) and
WHITE (Neutral) wires are #18 AWG. The
GREEN (Ground) wire is #16 AWG. The GRAY
(Cresnet) wires are #22 AWG. The BLACK wire
(Cresnet ground) paired with the GRAY
(Cresnet) wires is #22 AWG.
NOTE: Since the -DIMS1 is installed without a
-SLVD1, the BLUE lead (Slave) should be
capped.
Alternative Wiring
NOTE: If a -DIMS1 is installed without a
-SLVD1, the BLUE lead (Slave) should be
capped.
For situations where a neutral is not present or
other scenarios that may be encountered during
installation, refer to the “Stand-Alone
Installations” section of “Appendix: Wiring
Diagrams” on page 8.
NOTE: The WHITE (Neutral) connection on
the -SLVD1 is optional and is only required for
operation of the LED. If the neutral is not
available, the white lead should be capped off.
4. Splice the gray wires of the -DIM1 or -DIMS1 to
the Class 2 low voltage wires connected to the
Crestron control system or a Crestron connection
block device. Push the wires and the splices into
a hole in the drywall to provide the necessary
separation.
Alternative Wiring
For situations where a neutral is not present or
other scenarios that may be encountered during
installation, refer to the “Master-Slave
Installations” section of “Appendix: Wiring
Diagrams” on page 9.
5. Push all power wires back into the wallbox and
fasten the device to the wallbox with the
provided screws.
4. Splice the gray wires of the -DIMS1 to the Class
2 low voltage wires connected to the Crestron
control system or a Crestron connection block
device. Push the wires and the splices into a hole
in the drywall to provide the necessary
separation.
6. Attach decorative faceplate.
7. Restore power at the circuit breaker.
Installation Guide – DOC. 6250A Stand Alone Wall Box Dimmer: CLW-DIM1, DIMS1, & SLVD1 • 5
 Loading...