quickstart guide
TST-600
www.crestron.com
888.273.7876 201.767.3400
Specifications subject to
change without notice.
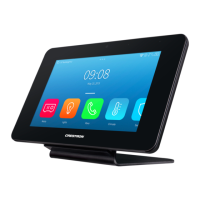
TST-600
5.7” Wireless Touch Screen
2
4
Networking Setup
QUICKSTART DOC. 7381E (2034457, Sheet 1 of 2) 09.14
For regulatory compliance information, refer to Doc. 7382.
From the main menu, touch Networking Setup to display the
Networking Setup - Choose WiFi or LAN menu.
Out of the box, LAN access is turned on. To switch to Wi-Fi
®
access, touch On under
WiFi Access, then touch Reboot Required to Apply Networking Changes to
reboot the TST-600.
To set up Wi-Fi, proceed to the next column.
The TST-600 ships with DHCP enabled
by default. To enter static IP settings,
touch LAN Setup to display the
Ethernet Setup menu.
From the Ethernet Setup menu, touch
Set Static IP Address Settings to
display the Ethernet Setup - Static IPs
menu.
The Ethernet Setup - Static IPs menu
is used to edit Static IP address,
Static Subnet Mask, Static Default
Router, Preferred DNS and Alternate
Preferred DNS settings. Touch each to
display a keypad for entering the new
setting.
Touch Reboot Required to Apply IP
Changes to save the new settings and
reboot the TST-600.
To enter Wi-Fi settings, from the
Networking Setup - Choose WiFi or
LAN menu, touch WiFi Setup to
display the WiFi Setup menu.
If a static IP address is preferred, from
the WiFi Setup menu, touch
Set Static IP Address Settings to
display the WiFi Setup - Static IPs
menu. To stay with DHCP, skip to the
bottom of this column to connect to a
WiFi access point.
The WiFi Setup - Static IPs menu is
used to edit Static IP address, Static
Subnet Mask, Static Default Router,
Preferred DNS and Alternate
Preferred DNS settings. Touch each to
display a keypad for entering the new
setting.
Touch to return to the WiFi
Setup menu.
From the WiFi Setup menu, touch
Select a WiFi Access Point to display
the Connect to a WiFi Access Point:
1-2-3 menu.
The left side of the Connect to a WiFi
Access Point: 1-2-3 menu displays a
list of available access points. Touch
the name of the desired access point.
The name and security type for the
selected access point are displayed on
the right side of the screen.
Touch the area below the word
Password to display a keyboard for
password entry.
Enter the password for the access
point and touch Save.
The password will appear below the
WAP Name and Security entries on
the right side of the screen.
Touch Step 3 - Make this my Access
Point.
Touch Reboot Required to Apply IP
Changes to save the new settings and
reboot the TST-600.