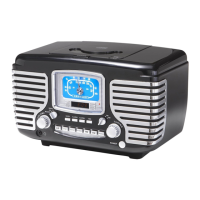
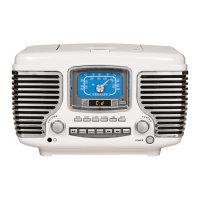
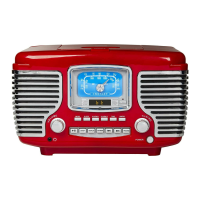
The Crosley CR612D "The Corsair" is a retro-styled AM/FM radio and CD player with modern features like Bluetooth connectivity and dual alarms. This instruction manual details its operation, maintenance, and safety guidelines.
Function Description:
The CR612D serves as a multi-functional audio device, combining traditional radio listening with CD playback and wireless audio streaming. It features a built-in clock with dual alarm functions, allowing users to set two separate wake-up times. Alarms can be set to wake the user to radio, CD, or a buzzer sound. A battery backup system ensures that clock and alarm settings are retained during power outages, defaulting to buzzer mode if power is interrupted. The unit also includes a sleep function, which automatically turns off the radio or CD player after a user-defined period, making it suitable for bedtime listening. For private listening, a headphone jack is provided, which disables the internal speakers when in use.
Important Technical Specifications:
- Frequency Range:
- AM: 530 - 1710 KHz
- FM: 88 - 108 MHz
- Power Supply: AC 120V ~ 60Hz
- Power Consumption: 18W
- Speaker: 3" 8 Ohm 5W x 2
- Battery Backup: Requires one 9V battery (not included) for clock and alarm retention during power failures.
- Bluetooth: Compatible with Bluetooth-enabled devices (e.g., Android® Smartphones, Apple iPhone®) for wireless audio streaming.
- CD Player: Supports standard audio CDs with programmed play (up to 20 tracks) and various play modes (Normal, Repeat 1, Repeat All, Random).
Usage Features:
Getting Started:
- Unpacking: Remove all packing materials, including the plastic bag covering the unit and AC power cord, and the cardboard shipping card from the CD player. Unwind the FM antenna and allow it to hang straight down.
- Setup: Plug the AC cord into an appropriate outlet. The unit is equipped with a polarized plug for safety. Install a 9V battery in the battery compartment for clock backup.
Radio Operation (AM/FM Tuning):
- Press the POWER BUTTON (5) to turn the unit on.
- Turn the FUNCTION SWITCH (8) to the Radio position.
- Turn the AM/FM SWITCH (7) to the desired tuning band (AM or FM).
- Rotate the TUNING KNOB (6) to tune in the desired station. The FM STEREO INDICATOR (3) will illuminate when an FM station reaches its strongest frequency.
- Rotate the VOLUME KNOB (9) to set the desired volume level.
- Reception Hints: For FM, ensure the FM WIRE ANTENNA (24) is fully extended. For AM, rotate the unit slightly to improve reception as it uses an internal AM antenna.
CD Player:
- Press the POWER BUTTON (5) to turn the unit on.
- Turn the FUNCTION SWITCH (8) to the CD position.
- Press the CD DOOR OPEN BUTTON (23) to open the CD door.
- Load the desired CD with the label side facing up and close the CD door. The LED DISPLAY (2) will show the total number of tracks.
- Press the PLAY/PAUSE BUTTON (21) to begin playing.
- Skipping Tracks: Press FORWARD SKIP (16) or BACKWARD SKIP (17) to navigate tracks.
- Fast Forward/Reverse: Press and hold FORWARD SKIP (16) or BACKWARD SKIP (17) to fast forward or reverse through a track.
- Pause: Press PLAY/PAUSE BUTTON (21) to pause; press again to resume.
- Stop: Press the STOP BUTTON (20).
- Play Mode: Press the CD MODE (18) button to cycle through Normal, Repeat 1 (repeats current song), Repeat All (repeats entire CD), and Random play. Pushing STOP (20) clears Random and Repeat functions.
- Programmed Play:
- In CD Mode with a CD inserted and play stopped, press the PROGRAM BUTTON (15).
- Use skip buttons to select a track, then press PROGRAM BUTTON (15) again to store it. Repeat for up to 20 tracks.
- Press PLAY/PAUSE BUTTON (21) to begin playback of programmed tracks.
- To clear programming, press the STOP button or open the CD door.
Bluetooth Usage:
- Press the POWER button to turn the unit on.
- Turn the FUNCTION SWITCH (8) to the Bluetooth mode.
- The LED Display indicator will flash, indicating it's searching for a Bluetooth device.
- On your Bluetooth-enabled device, search for "CR612D" and connect. No PIN is required.
- Once connected, the indicator light will stop flashing and continuously illuminate.
Clock & Alarm Operation:
- Setting the Clock:
- Press the TIME (14) button; the display will flash.
- Press FORWARD SKIP (16) to set the hour (PM indicator for PM hours).
- Press BACKWARD SKIP (17) to set the minutes.
- Press TIME (14) again to store the time.
- Press and hold TIME (14) to switch between 12H and 24H modes.
- Setting the Alarm (Alarm 1 & Alarm 2):
- Press ALARM 1 (12) or ALARM 2 (13); the display will show alarm time and flash. The corresponding LED will light.
- Use FORWARD SKIP (16) to set the hour (PM indicator for PM hours).
- Use BACKWARD SKIP (17) to set the minutes.
- Press ALARM 1 or ALARM 2 again to turn the alarm on; the LED will stay lit.
- To turn the alarm off, press ALARM 1 or ALARM 2 again; the LED will go off.
- The alarm will sound for 60 minutes if not stopped manually.
- To stop an sounding alarm, press ALARM 1 or ALARM 2.
- Wake-up Mode: The alarm can wake you to Radio, CD, or Buzzer. Set the FUNCTION SWITCH to your desired wake-up mode. During a power outage with battery backup, the alarm defaults to Buzzer.
- Snooze Function: When an alarm is active, press the SNOOZE button (22) to temporarily turn off the alarm for 6 minutes. The snooze LED will light, and the alarm LED will continue to flash. The alarm will reactivate after 6 minutes.
- Sleep Function:
- With the unit on or off, press the SLEEP button (11). The display will show "90" (for 90 minutes), and the Sleep LED will light.
- Press SLEEP again to cycle through sleep durations: 90, 60, 30, and 15 minutes.
- Once a time is selected, the unit enters sleep mode and will turn off after the set period.
- Note: If the power is off and the unit is in CD mode, pressing Sleep will automatically start CD playback. If the power is on, you must manually start the CD.
Maintenance Features:
- Compact Disc Care:
- Handle discs by the edges.
- Wipe fingerprints and dust from the recorded surface with a soft, lint-free cloth, wiping in a straight line from the inside to the outside.
- Do not use liquid or abrasive cleaners. A CD cleaning kit can be used if necessary.
- Never write on or affix labels to the disc surface.
- Cabinet Care:
- Wipe the cabinet with a soft, dry dust cloth.
- Do not use wax, polish sprays, or abrasive cleaners.
- Never allow water or other liquids inside the unit during cleaning.
- Battery Backup Maintenance: The 9V battery should be replaced every 9-12 months, as its life depends on the frequency and length of power outages.