EasyManua.ls Logo

Crunch PZX750.2 User Manual

Crunch PZX750.2
2 pages
To Next Page IconTo Next Page
Page #1 background imageLoading...
Page #1 background image
Place terminal in a secure
position so that it won’t
accidentally contact the
negative battery post
Power / Ground
cable size
It is critical to use the proper
power and ground cable. Select
the size listed here for your
amplier model. Always use high
quality copper cable.
Cable size recommendations for
multi amp systems are available
on our website.
Properly route power,
speaker and RCA cables
through the vehicle.
Choose a mounting location
that will provide adequate air
ventilation. Mount the amplier to
a secure surface. Do not mount
the amplier upside down.
Using spade terminals, connect the
+12V to the power cable from the
battery, the REM to the source unit
turn-on wire and the GND to the
chassis ground..
Strip each cable back approx 1/2”,
connect the +12V to the power
cable from the battery, the REM to
the source unit turn-on wire and the
GND to the chassis ground..
Bare metal
Connect the RCA cables to
the INPUT connectors. The
OUTPUT can be used to
provide input for a second
amplier.
The HI INPUT is for use with
source units that do not offer
RCA outputs. Use the supplied
harness to connect to the
source unit’s speaker output.
Connect the power cable to the
positive battery terminal. The
power cable must be fused
within 18 inches of the battery
terminal.
Re-connect the negative
battery terminal making sure it
is securely tightened.
Using spade terminals,connect
the speaker cables to the speaker
output connectors. Follow the
diagram below that best ts your
speaker conguration.
The chassis ground connection
is critical to the performance
of the amplier. Choose a
location that is close to the
amplier. Completely scrape
away the paint and use a nut
and bolt if possible.
DO NOT USE AN EXISTING
FACTORY BOLT!
Disconnect
negative battery
terminal
Run Cables
Mount Amplier
Power
Connections
Smaller amps
Signal Input
Low Level RCA
Power
Connections
Larger amps
Signal Input
High Level
Positive Battery
Connection
Re-connect
Negative Battery
Terminal
Speaker
Connections
Chassis Ground
Be prepared to disarm your vehicle’s alarm and
to enter your radio / source unit code.
Stereo
Installation
Before you start
Monoblock
single woofer Monoblock multiple woofers
Bridged
CAUTION
Many new and factory radios require a reset code when
disconnected from battery power. This is an anti-theft
feature. Before unplugging power, you must determine if
your radio/source unit requires a reset code. Check the
operation manual for your vehicle or contact the dealer.
1
2
3
5
a
5b
6
7
10
11
94
Turn the LEVEL control completely
counter-clockwise to minimum.
Level Control
8
9V 0.2V
INPUT
LEVEL
PHASE
0 180
BASS EQ
0 10dB
15 35Hz
SUBSONIC
35 250Hz
LPF
FULL
LP
HP
XOVER
MONO STEREO
MODE
60 1.3KHz
HPF
SPEAKER OUTPUT
SPEAKER OUTPUT
SPEAKER
LEFT RIGHT
BRIDGED
OUTPUT
SPEAKER
LEFT
RIGHT
BRIDGED
OUTPUT
SPEAKER
LEFT RIGHT
BRIDGED
OUTPUT
SPEAKER OUTPUT
SPEAKER OUTPUT
SPEAKER OUTPUT
SPEAKER
LEFT RIGHT
BRIDGED
OUTPUT
SPEAKER
LEFT RIGHT
BRIDGED
OUTPUT
SPEAKER
LEFT RIGHT
BRIDGED
OUTPUT
SPEAKER OUTPUT
SPEAKER OUTPUT
SPEAKER OUTPUT
SPEAKER
LEFT RIGHT
BRIDGED
OUTPUT
SPEAKER
LEFT RIGHT
BRIDGED
OUTPUT
SPEAKER
LEFT RIGHT
BRIDGED
OUTPUT
SPEAKER OUTPUT
SPEAKER OUTPUT
SPEAKER OUTPUT
SPEAKER
LEFT
RIGHT
BRIDGED
OUTPUT
SPEAKER
LEFT RIGHT
BRIDGED
OUTPUT
SPEAKER
LEFT RIGHT
BRIDGED
OUTPUT
SPEAKER OUTPUT
Right + (gray) 4CH REAR
Ch3 Right + (orange)
Ch3 Right - (pink)
Chassis Ground (black)
Ch4 Left + (blue)
Ch4 Left - (yellow)
Connect to factory speater wire directly
Right - (brown)
Left - (green)
Left + (white)
Chassis ground (black)
4ga
8ga
Model Fuse Size Cable Size
750.2
900.4
1000.2
1200.4
1300.2
1800.2
1800.4
2000.1
3500.1
4000.4
5000.1
1-30A atc
1-30A atc
1-40A atc
1-30A atc
2-30A atc
2-40A atc
2-30A atc
2-30A atc
2-40A atc
2-40A maxi
3-40A atc
Question and Answer IconNeed help?

Do you have a question about the Crunch PZX750.2 and is the answer not in the manual?

Crunch PZX750.2 Specifications

General IconGeneral
BrandCrunch
ModelPZX750.2
CategoryAmplifier
LanguageEnglish

Summary

Pre-Installation Warnings and Cable Sizing

Radio Reset Code Caution

Warns about potential radio reset codes needed after battery disconnection, advising to check the operation manual or dealer.

Power and Ground Cable Sizing Guide

Provides a table specifying recommended power/ground cable sizes and fuse ratings for different amplifier models.

Core Installation Steps

Disconnect Battery Terminal

Safely disconnect and secure the negative battery terminal to prevent accidental contact.

Route Cables

Properly route power, speaker, and RCA cables through the vehicle.

Mount Amplifier

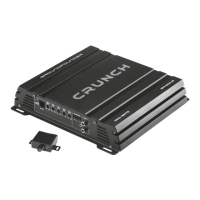
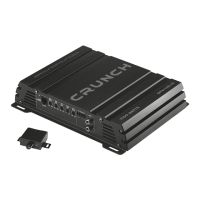
Mount the amplifier securely in a location with adequate ventilation, avoiding upside-down placement.

Key Connections and Settings

Chassis Ground Connection

Ensures a critical, clean, bare-metal connection close to the amplifier for optimal performance.

Power Connections

Connects +12V and REM wires for smaller and larger amplifier models.

Signal Input (Low Level RCA)

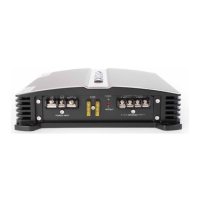
Connects RCA cables to the amplifier's input connectors for audio signal input.

Signal Input (High Level)

Connects speaker outputs from source units without RCA outputs using a supplied harness.

Level Control Adjustment

Set the LEVEL control to minimum before adjusting amplifier gain.

Speaker Output Connections

Connects speaker cables to the amplifier's output connectors based on stereo, bridged, or monoblock configurations.

Positive Battery Connection

Connects the fused power cable to the positive battery terminal, ensuring fuse placement within 18 inches.

Re-connect Negative Battery Terminal

Re-connects the negative battery terminal securely after installation is complete.

System Setup and Configuration

Input Mode Setup

Configures input signal mode (STEREO/MONO) for optimal bass performance with subwoofers.

Crossover Mode Setup

Sets the type of crossover (FULL, LPF, HPF) for channel sets on 4-channel models.

High Pass Filter (HPF) Adjustment

Limits output below a selected frequency to protect speakers and transition smoothly with subwoofers.

Low Pass Filter (LPF) Adjustment

Limits output above a selected frequency for smooth transitions to higher frequency speakers.

Bass Boost Adjustment

Increases output at 45Hz for more pronounced bass, advising caution and small adjustments.

Remote Level Control

Provides an option to adjust bass levels remotely, advising against adjustment while operating the vehicle.

Level Setting Procedure

Critical step to match amplifier signal output to source unit, adjusting gain without distortion.

Related product manuals