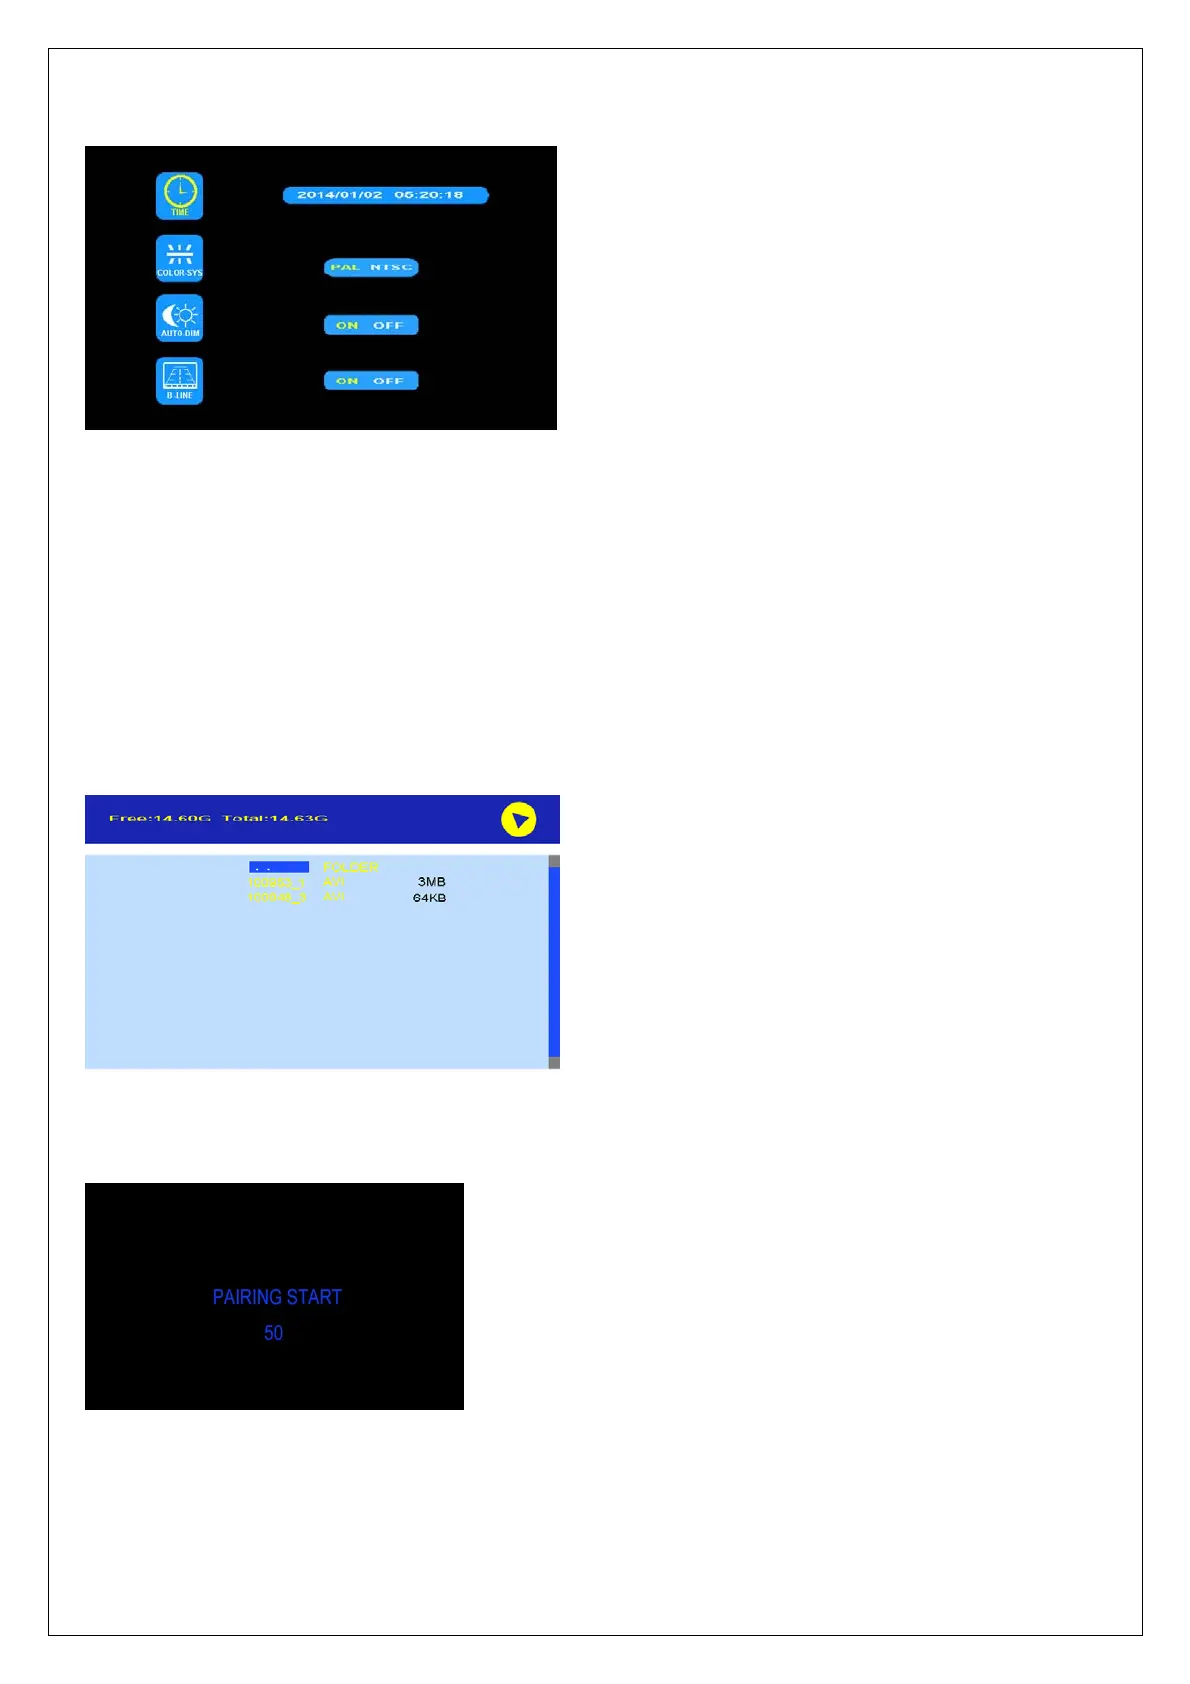
6. SYSTEM
Press < or > to select SYSTEM and press OK to enter.
TIME: Press < or > to select TIME and press OK to set. Press < or > to set the time. Press OK to continue to the
next setting.
COLOR-SYS: Press < or > to select COLOR-SYS and press OK to enter. Press < or > to select NTSC/PAL.
AUTO-DIM: Press < or > to select AUTO-DIM and press OK to enter. Press < or > to select ON/OFF. When auto
dim is on, the monitor will automatically turn darker when it is placed in dark environment for 5 s.
ELETRONIC DISTANCE LABEL: Press < or > to select ELETRONIC DISTANCE LABEL and then press OK to
enter. Press < or > to select ON/OFF to open or close the electronic distance label. When it is on, the electronic
distance label will be displayed in back channel.
7. PLAY
Press < or > to select PLAY and press OK to enter.
Press < or > to select recording file and then press OK to enter the playback mode.
8. PAIRING
Press < or > to select PAIRING and press OK to enter. Press OK for 3 seconds to start PAIRING.
AUTO PAIRING:
1. Choose the channel that needs to be set up. The monitor displays the message “PAIRING START 50” and a
counter that counts down 50 s.
2. Switch on the camera during countdown.