TM
DryGuard
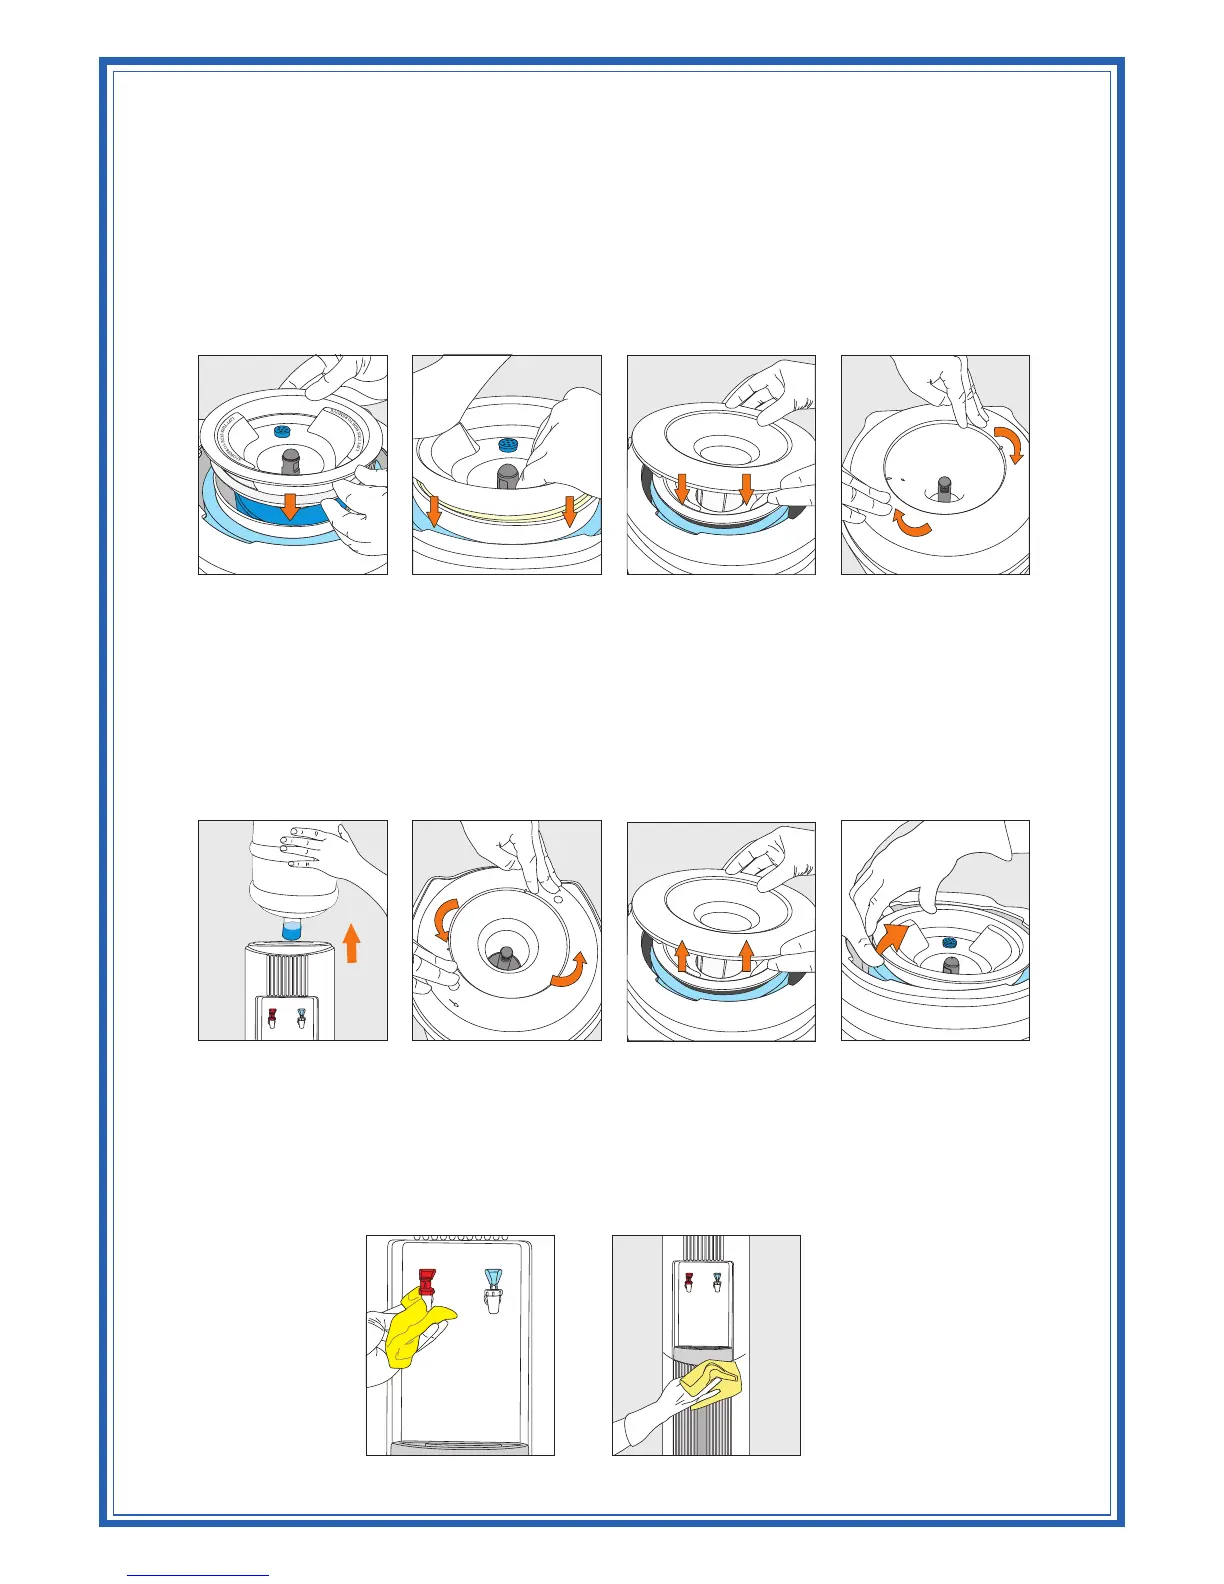
Installation (See Figure 49)
TM
1. Place the Inner DryGuard Cone assembly onto the center of the cold water reservoir; make sure the
words "LIFT THIS SIDE TO REMOVE" is aligned with the sides of the cooler and that the filter cap
is positioned towards the rear of the cooler (Figure 39).
TM
2. Using the palms of both hands, push the DryGuard straight down into the reservoir (Figure 40).
TM
3. Install the Outer DryGuard Cover onto the cooler in the proper position on the body and lock into
place by turning clockwise until it fits tightly (Figure 41 and Figure 42).
Removal (See Figure 49)
1. Remove the bottle from the cooler (Figure 43).
TM
2. Loosen and remove the Outer DryGuard Cover from cooler's body by pressing the fingertips of
both hands onto lid and turning it counter clockwise until it is free from the cooler opening (Figure
44 and Figure 45).
3. Approaching the cooler from left (or right), Place one palm onto the top of the cooler on the side
furthest from you, and using your thumb, press downwards on the reservoir Insulation. Using your
TM
other hand, grip the edge of the Inner DryGuard Cone and pull it up slowly to remove (Figure 46).
CLEANING
Do Not Immerse the Unit in Water for Cleaning
Remove any dust or contaminants from the cooler by rinsing the cold water reservoir and
faucets with clean water prior to use (Figure 47 and Figure 48). Use only mild dishwashing
liquid detergent for cleaning the exterior surfaces. DO NOT USE bleach or abrasive cleaners.
Figure 47 Figure 48
Figure 39 Figure 40 Figure 41 Figure 42
Figure 43 Figure 44 Figure 45 Figure 46

 Loading...