EasyManua.ls Logo

CTEK battery charger User Manual

CTEK battery charger
6 pages
To Next Page IconTo Next Page
Page #1 background imageLoading...
Page #1 background image
EN
EN • 3
MODE
RECONDAGM
12V/5A
MXS 5.0
CONGRATULATIONS
to the purchase of your new professional switch mode battery charger. This charger is
included in a series of professional chargers from CTEK SWEDEN AB and represents the
latest technology in battery charging.
CTEK COMFORT CONNECT eyelet M6
CTEK COMFORT CONNECT
MAINS CABLE
CTEK COMFORT CONNECT clamp
CHARGE CABLE
SUPPLY PLUG*
* Supply plugs may differ to suit your wall socket.
SMALL
BATTERY
PROGRAM
ERROR LAMP
NORMAL
BATTERY
PROGRAM
FULLY CHARGEDREADY TO USE
AGM
OPTION
RECOND
OPTION
POWER LAMP
HOW TO CHARGE
1. Connect the charger to the battery.
2. Connect the charger to the wall socket. The power lamp will indicate that the mains
cable is connected to the wall socket. The error lamp will indicate if the battery clamps
are incorrectly connected. The reverse polarity protection will ensure that the battery or
charger will not be damaged.
3. Press the MODE-button to select charging program.
SMALL BATTERY PROGRAM NORMAL BATTERY PROGRAM
Continue to press the MODE-button to combine charging program with charging options.
AGM OPTION
RECOND OPTION
Press the MODE-button several times until the desired combination of charging program and
options are lit.
4. Follow the 8-step display through the charging process.
The battery is ready to start the engine when STEP 4 is lit.
The battery is fully charged when STEP 7 is lit.
5. Stop charging at any time by disconnecting the mains cable from the wall socket.
MODE BUTTON
MANUAL
AGM

Other manuals for CTEK battery charger

Question and Answer IconNeed help?

Do you have a question about the CTEK battery charger and is the answer not in the manual?

CTEK battery charger Specifications

General IconGeneral
BrandCTEK
Modelbattery charger
CategoryBattery Charger
LanguageEnglish

Summary

How to Charge

Connecting the Charger

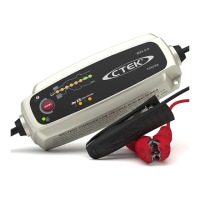
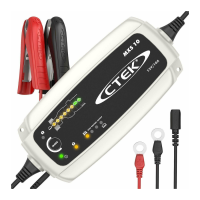
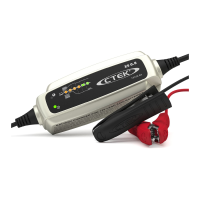
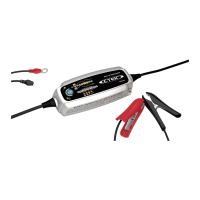
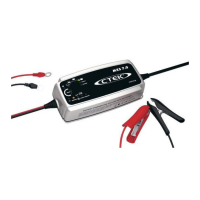
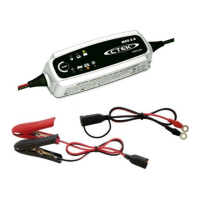
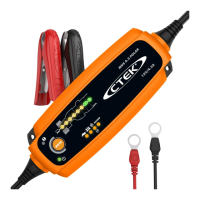
Connect the charger to the battery and then to the wall socket.

Selecting Charging Program

Press the MODE-button to select program and options like AGM or Recond.

Charging Process Steps

Follow the 8-step display; battery ready for engine start at STEP 4, fully charged at STEP 7.

Charging Programs Explained

Small Battery Program

For smaller batteries, 1.2-14Ah, 14.4V/0.8A, Temp range -20°C to +50°C.

Normal Battery Program

For WET, MF, Ca/Ca, AGM batteries, 14-160Ah, 14.4V/5A.

AGM Option

For AGM batteries like Optima/Odyssey, 14-160Ah, 14.7V/5A.

Recond Option

For empty WET/Ca/Ca batteries, 14-160Ah, 15.8V/1.5A.

Troubleshooting and Indicators

Error Lamp Status

Check connections, battery type, and charging interruptions for error lamp.

Power Lamp Status

Steady light indicates mains connection; flashing light means energy save mode.

Charging Stage Details

Step 1: Desulphation

Detects and removes sulphate from lead plates to restore battery capacity.

Step 2: Soft Start

Tests if the battery can accept charge, preventing charging of defective batteries.

Step 3: Bulk

Charges with maximum current until approximately 80% battery capacity.

Step 4: Absorption

Charges with declining current to maximize up to 100% battery capacity.

Step 5: Analyse

Tests if the battery can hold charge; identifies batteries needing replacement.

Step 6: Recond

Increases voltage for controlled gassing, mixing acid and restoring energy.

Step 7: Float

Maintains battery voltage at maximum level with a constant voltage charge.

Step 8: Pulse

Maintains 95-100% capacity by pulsing when voltage drops.

Connecting and Disconnecting

Connecting to Battery

Connect red clamp to positive pole, black clamp to chassis, then to wall socket.

Disconnecting from Battery

Disconnect from wall socket first, then black clamp, then red clamp.

Positively Earthed Batteries

Connect black clamp to negative pole, red clamp to chassis for positive earth systems.

Technical Specifications

Model and Voltage

Model 1075, 220-240VAC, 50-60Hz.

Charging Parameters

Charging voltage (14.4V/14.7V/15.8V), min battery voltage 2.0V, max 5A current.

Battery Compatibility

Supports 1.2-110Ah (up to 160Ah for maintenance) lead-acid batteries.

Physical Characteristics

Dimensions 168x65x38mm, IP65 insulation, 0.6kg weight.

Safety Precautions

General Safety Guidelines

Use only for intended purpose, check cables, avoid charging damaged/frozen batteries.

Charging Environment

Ensure ventilation, avoid covering charger, prevent sparks near battery.

Handling Battery Acid

Battery acid is corrosive; rinse immediately with water if contact occurs.

Long-Term Charging

Check for STEP 7 within 50 hours; manually disconnect if not reached.

Warranty and Support

Limited Warranty Terms

5-year warranty for manufacturing faults/material defects from purchase date.

How to Obtain Support

Contact CTEK via website, email (info@ctek.se), or phone (+46(0) 225 351 80).

Related product manuals