CTI 2500-VP15xx Quick Start Manual V1.7
TABLE OF CONTENTS
CHAPTER 1 HARDWARE OVERVIEW AND INSTALLATION ...............................5
1.1 Introduction ............................................................................................................. 5
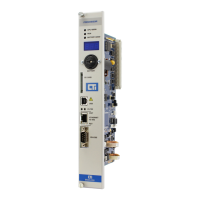
1.2 Visualization Panel Features ................................................................................. 5
1.2.1 Hardware Specifications 5
1.2.2 IO Connections Diagram 6
1.3 HMI Installation in Control Panel ........................................................................... 7
1.4 Connecting Power to HMI Panel ............................................................................ 8
1.5 Ethernet Connectivity ............................................................................................. 9
1.6 Setting the IP address ............................................................................................ 9
CHAPTER 2 ZENON EDITOR INSTALLATION ....................................................13
2.1 Installation of the zenon Editor Software .............................................................13
2.1.1 Computer Considerations 13
2.1.2 Starting the Installation 13
2.2 Connecting USB License Dongle ........................................................................16
2.3 Licensing the zenon Editor Software ...................................................................17
CHAPTER 3 USING THE ZENON EDITOR ...........................................................18
3.1 Starting the Editor.................................................................................................18
3.2 Creating a New Project ........................................................................................19
3.2.1 Definitions of a Project and a Workspace 19
3.2.2 Naming a Project and Creating a Workspace 20
3.2.3 Storing Projects on a Server 20
3.3 Learning the zenon Editor Layout ........................................................................21
3.4 Required zenon Project Settings for the 2500-VPxx Panel ................................22
3.4.1 Setting Properties Window Format 22
3.4.2 Adding a PLC Driver to the Project 22
3.4.3 Configuring zenon Runtime Graphical Settings 26
3.5 Starting a New Project Using the CTI Project Template .....................................29
3.6 Building a Project with the zenon Editor ..............................................................33
3.6.1 Adding Frames and Screens 33
3.6.1.1 Adding a Frame 34
3.6.1.2 Adding a Screen 36
3.6.1.3 Setting the Project Start Screen 39
3.6.2 Adding Variables to Your Project 40
3.6.2.1 Creating a New Variable 42
3.6.2.2 Selecting a Secondary Object Type 44
3.6.2.3 Setting the Variable Offset 45
3.6.2.4 Setting Variable Limits 46
3.6.3 Creating Functions 49
3.6.4 Creating Buttons 52
3.6.5 Adding Graphical Symbols 53
3.6.5.1 Linking a Variable to a Graphics Symbol 55
3.6.6 Adding Numerical Displays 56
3.6.7 Adding a Trend Element 59
3.6.8 Testing your Runtime Project 61
3.7 Transferring a Project Runtime to the Panel .......................................................62
 Loading...