12 Section 2— ASSembly & Set-Up
Install Roll Over Protective System (ROPS)
The Roll Over Protective System (ROPS) has not been installed
on your unit for shipping purposes. Using the hardware found in
the Roll Over Protective System container, install it on your unit
as follows:
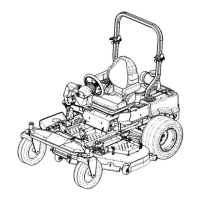
1. Insert each of the lower section ROPS tubular posts into the
brackets welded to the tractor main frame. See Figure 2-3.
ROPS Lower
Sections
Carriage Bolt
Flat Washer
Flat Washer
Reinforced Plate
Flange Lock Nut
Figure 2-3
2. Insert the hex screws (one per side) through the flat washer
then into the frame brackets and ROPS posts from the rear
toward the front. See Figure 2-3. Alternately from the front
toward the rear if access is restricted.
NOTE: The mounting hardware is accessible from the rear of
the machine with the use of extensions. Also, access can be
gained by reaching in from the sides over the tires fuel tanks.
3. Install the reinforced plates and flange lock nuts, but do
not tighten. See Figure 2-3.
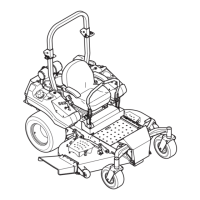
4. Install the upper ROPS section onto the lower ROPS “posts”.
Install the bolts and nuts. See Figure 2-4.
Bolt
Retaining
Washer
Lock Nuts
Bolt
Retaining
Washer
Figure 2-4
5. Tighten upper ROPS section bolts after both RH & LH
hardware is installed.
6. Tighten the frame mounting hardware to 80-90 lb.-ft.
torque. See Figure 2-3.
NOTE: Make sure tubular upright posts are absolutely
tight within welded bracket. If the ROPS is not absolutely
tight after tightening hardware to 80-90 ft-lbs, additional
tightening is needed.
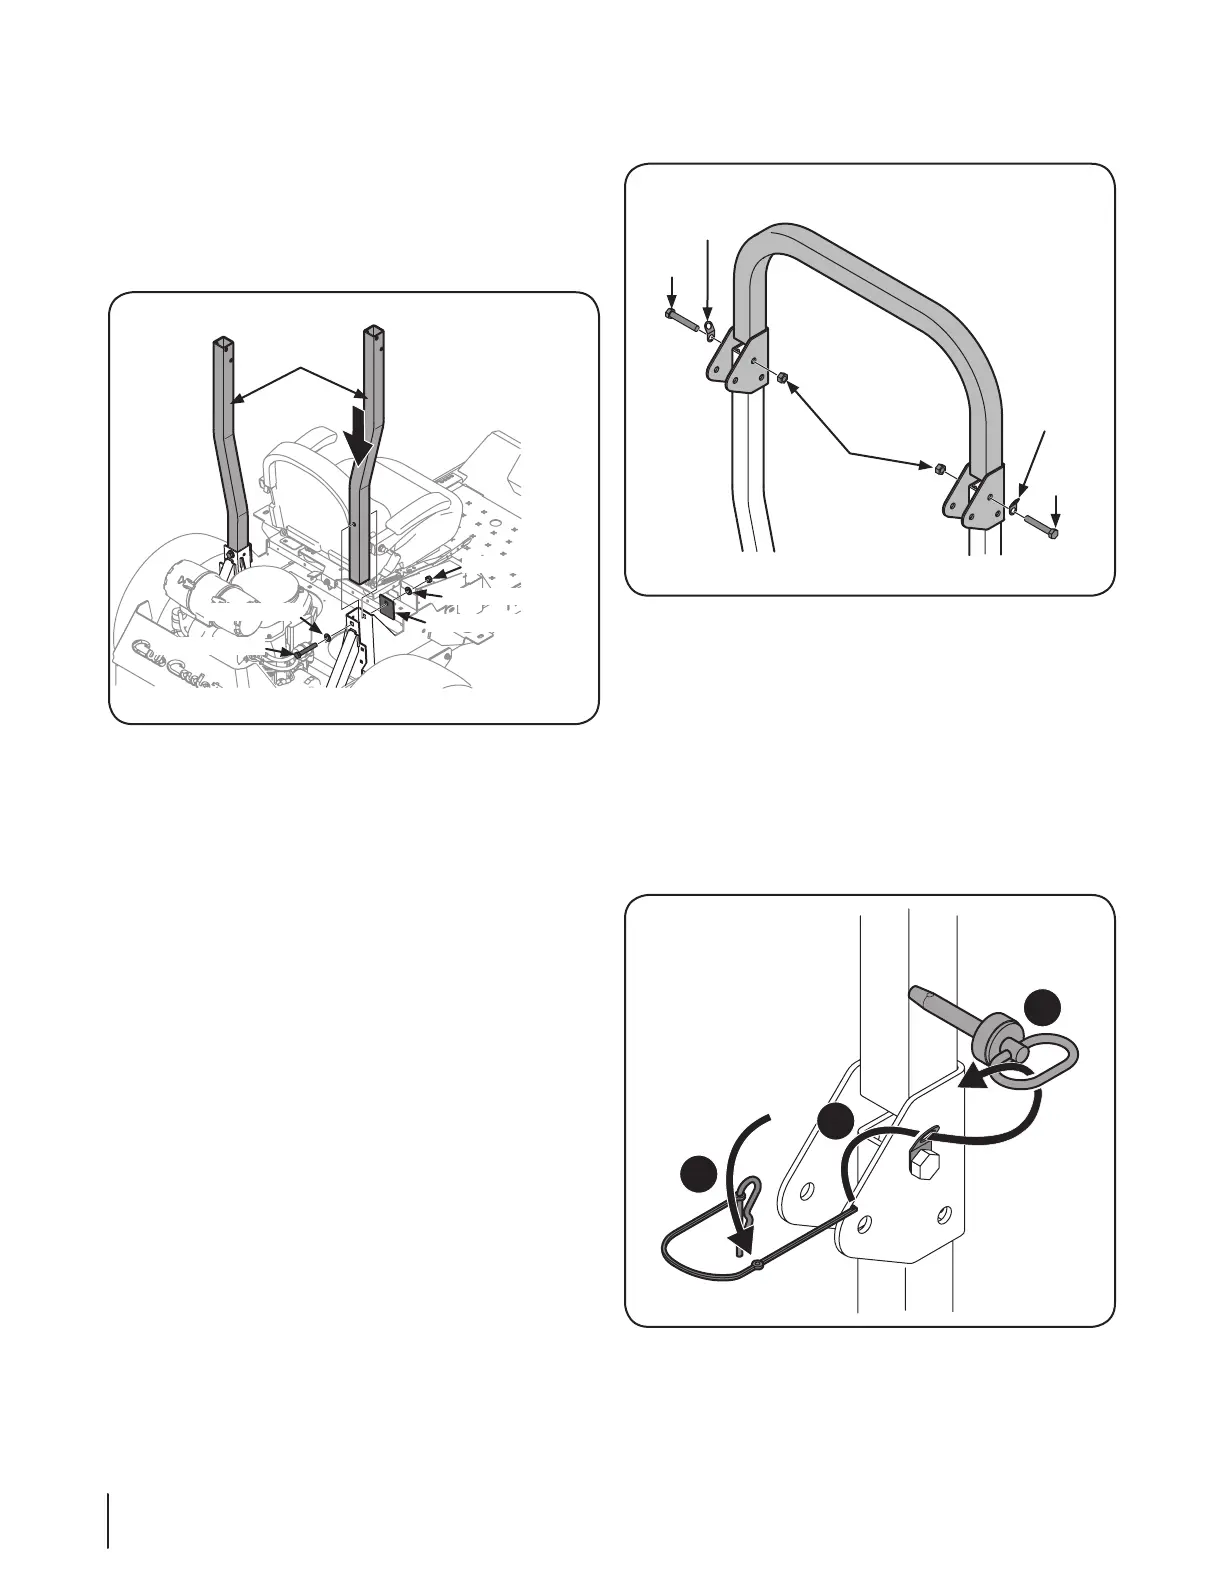
7. Route the nylon lanyard as shown in Figure 2-5. Be sure to
secure the lanyard to the retaining clip and clevis pin.
Figure 2-5
 Loading...