33se c t i O n 6 — Ma i n t e n a n c e & ad j u s t M e n t s
The right front blade tip height is fixed so you must adjust 5.
6.
jam nut.
Front to Back Leveling
Measure the blade-to-ground height at the right rear blade
tip. Again be sure to measure at the blade tip at the rear of
the right blade when aligned along the mower centerline.
The blade-to-ground height at the rear of the blade tip
should be ⁄” to ⁄” higher than the front tip. This is referred
to as blade pitch. The same height difference should be
true for the left blade, measured front and back. The pitch
should not exceed ⁄⁄”.
Loosen the inner jam nuts at the rear left and right of the 2.
6.
ensure engine is operating properly.
Drive the tractor without a load to make certain all the 7.
tractor systems are functioning properly.
Adjustments
Adjusting the Seat
adjusting the seat.
Adjusting Drive Control Levers
adjusting the drive control levers.
Leveling the Mower Deck
When correctly adjusted the mower deck should be level side to
side, and the front of the deck should be approximately ⁄” lower
than the rear of deck.
NOTE:
inflation pressures.
Side to Side Leveling
parking brake, shut off the engine, remove the key from the
ignition switch, disconnect the spark plug wires and using
the power implement lift, position the mowing deck into
the 4” height of cut position. (The 4” height of cut position
is recommended in order for one to see and obtain a
measurement. Any height of cut position is acceptable as
long as a proper measurement can be taken.)
Measure blade-to-ground height at the front tip of the 2.
right blade. To obtain an accurate measure, align blades in
parallel with mower centerline, (i.e. front to back).
Measure blade-to-ground height at the front tip of the left
arranged in proper position.
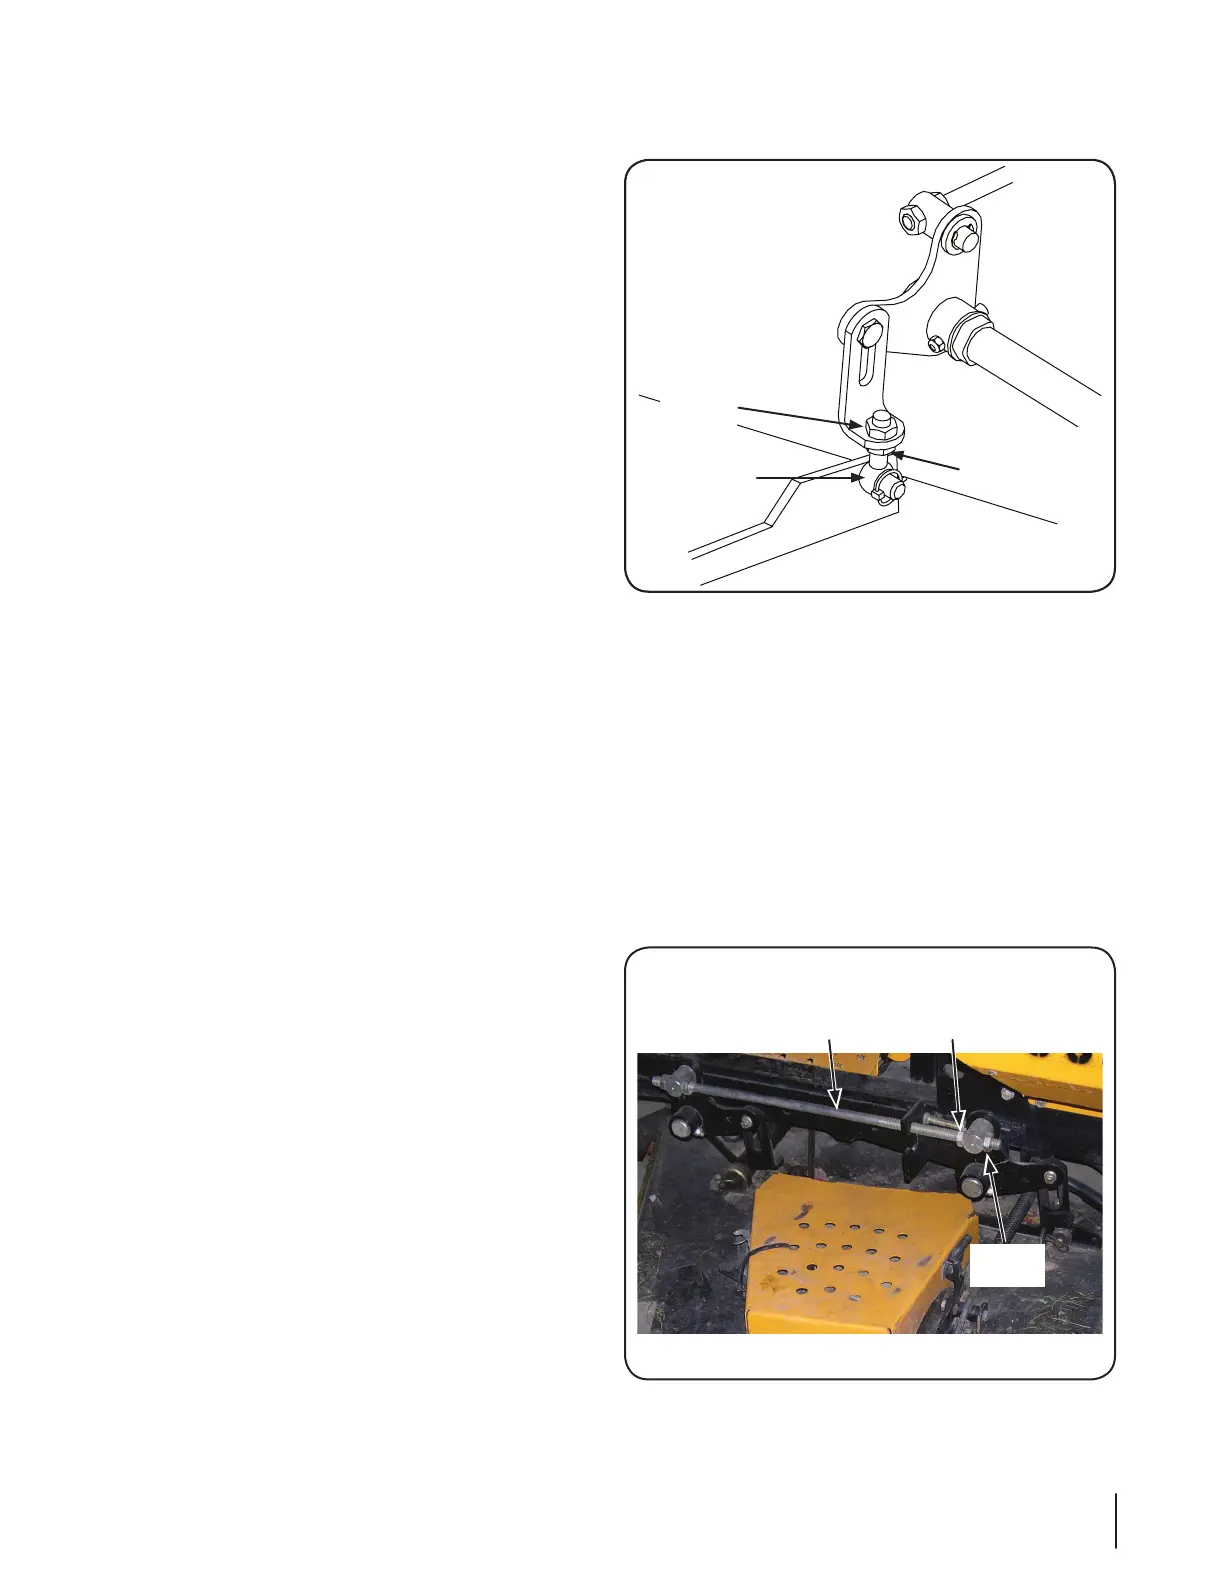
Adjust the eyebolt at the left front of the deck so that the 4.
blade-to-ground height at the right front blade tip matches
that of the left front blade tip. This is done by loosening the
jam nuts on the eyebolt and tightening the upper nut to
raise the deck and loosening the nut to lower the deck.
Left Front of the Deck
Eye Bolt
Upper
Jam Nut
Lower Jam Nut
Figure 6-5
Inner
Jam Nut
Outer
Jam Nut
Horizontal
Threaded Rod
Figure 6-6
 Loading...