38 se c t i O n 7— se r v i c e
Seat Switch
With the speed control pedals in the neutral position, the
position, start the engine. Now release the parking brake,
stop. If the engine does not stop, the seat switch must be
With the speed control pedals in the neutral position,
the parking brake engaged and the blade clutch switch
the blades should start to rotate. Raise up slightly off the
dealer.
Electric PTO Clutch
This clutch operates when the engine is running, the operator is
This electric clutch is a fairly trouble free device. If a problem
ignition switch and the hour meter and then investigate the
wiring harness and the connections to the seat switch, the blade
clutch switch and the electric blade clutch. Then check the seat
dealer.
Deck Removal
Remove the mower deck from the tractor as follows:
Lower the deck to the ground. Capture the deck lift by
placing the clevis pin behind the lowest position.
Apply the parking brake. Remove ignition key and both 2.
spark plug caps.
NOTE: There is a certain amount of spring tension due to
the weight of the deck. When removing the lift linkage
from the deck the tension of the springs will go from the
deck to the deck lift pedal. Not capturing the deck lift pedal
while removing the lift linkage from the deck will cause it
to snap back.
Detach the mower drive belt.4.
Remove the six linch pins from the right and left side of the 5.
mower and from the front of the mower.
Turn front wheels as if to make a pivot turn.6.
7.
and remove.
To install reverse the process.8.
WARNING! The muffler at the rear of the tractor
may be extremely hot, and could cause serious
burns. Use extreme caution when near the muffler.
Allow the muffler to fully cool before removing the
Replacing the Deck Belt
plug caps.
2.
covers to unlatch and remove both covers.
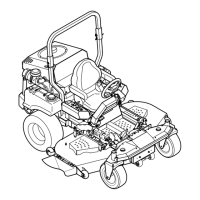
Using a ⁄” socket breaker bar or socket ratchet insert the
male end into the ⁄” square opening in the lower idler
While holding the idler arm back, loosen the deck belt from
the pulley and slide the belt away from the pulley.
4.
5.
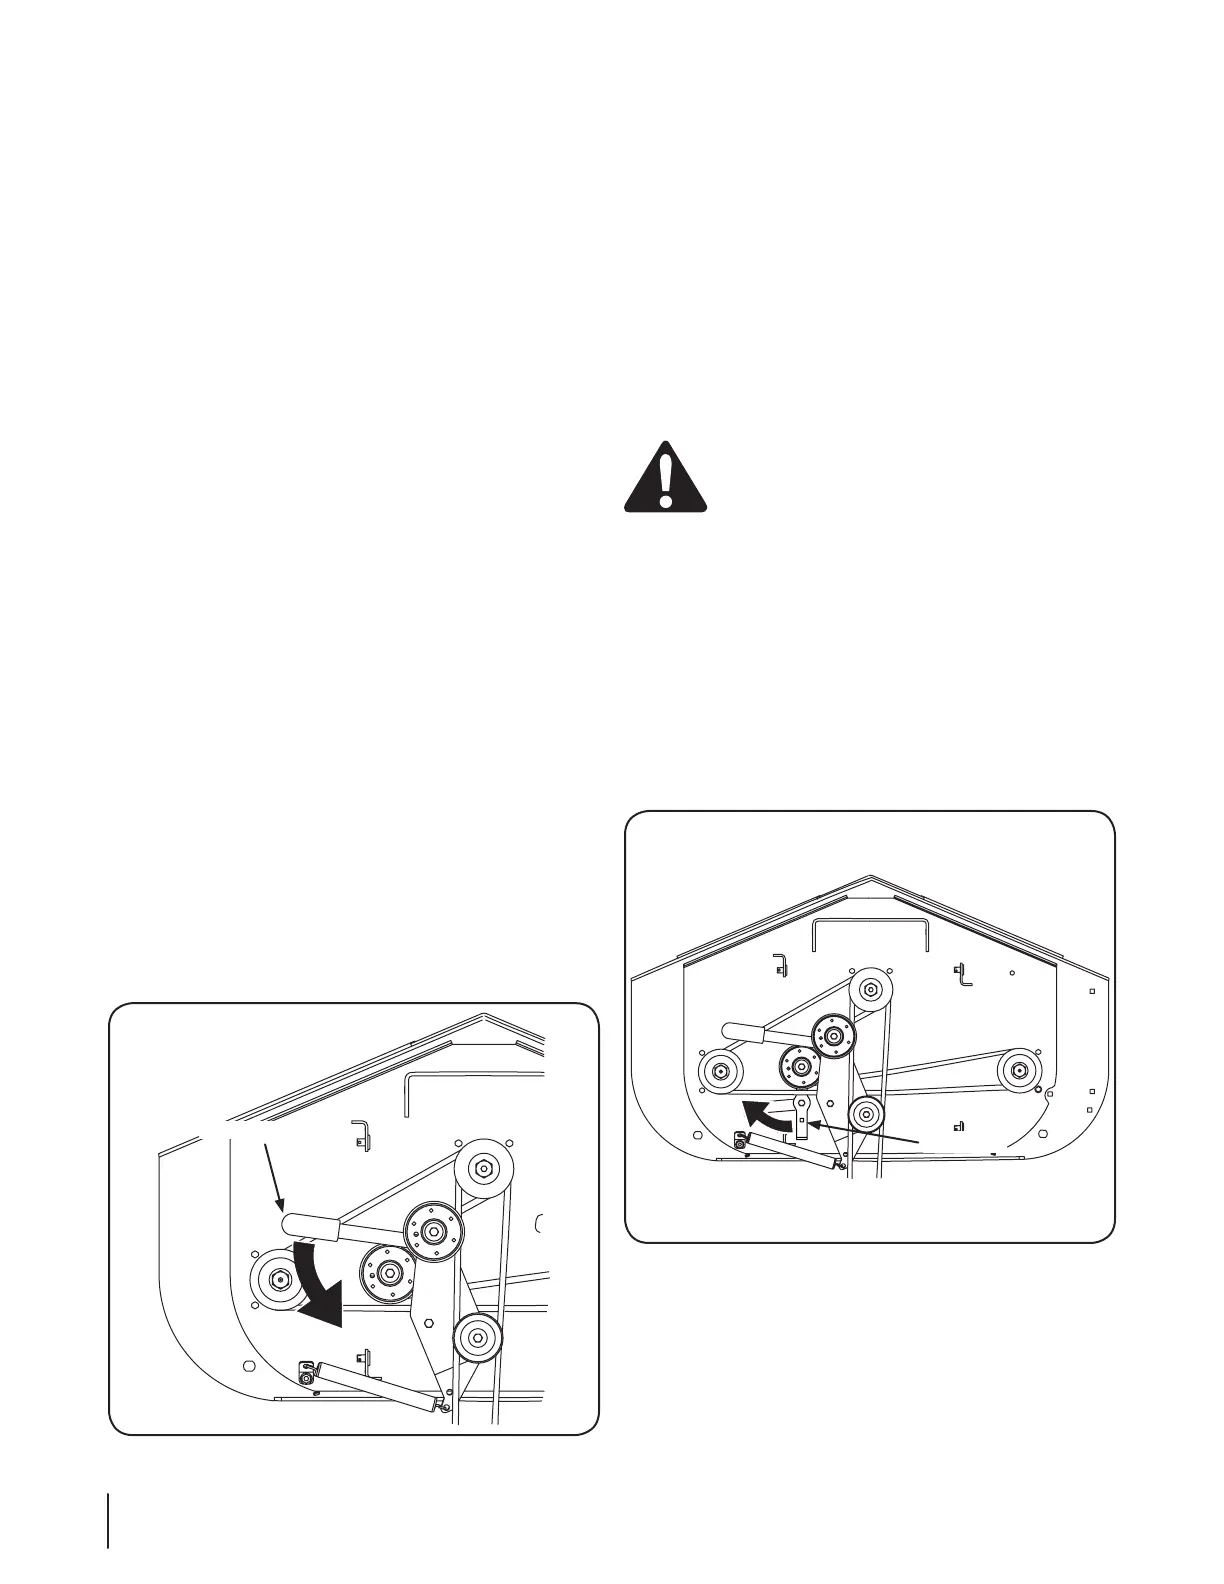
Reverse the process to install the belt.6.
NOTE: When replacing belts do not overtighten. Adjust
the idler pulley so that a ten-pound pull with a spring scale
between two pulleys deflects the belt about ⁄”.
Figure 7-2
Figure 7-3
 Loading...