31Section 7 — Service
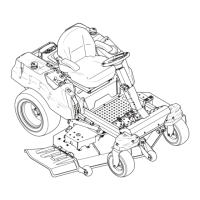
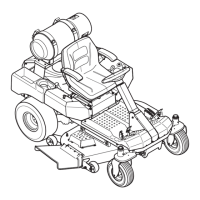
6. Locate the LH and RH deck release pins on each side of the
deck. Pull the release pins outward and release the deck
from the LH and RH deck lift arms. See Figure 7-6.
Figure 7-6
CAUTION: There is a certain amount of spring tension
due to the weight of the deck. When removing the lift
linkage from the deck the tension of the springs will go
from the deck to the deck lift handle and snap back.
7. Slide the front deck lift rod off the hanger brackets on the
front of the deck
8. Place the deck lift handle into the highest mowing position
and slide the deck out from the right side of the tractor.
Deck Installation
Install the deck on the tractor as follows:
Place the deck lift handle in the highest mowing position See
2. Slide the deck under the tractor on the right side of the
tractor lining up the deck hanger brackets and the deck lift
arms.
handle to the lowest mowing position.
NOTE: To line the brackets up properly, it may be necessary to
place a small block of wood under each side of the deck.
4. Hook the front deck lift rod onto the hanger brackets on the
front of the deck.
5. Pull the deck release pins outward and maneuver the deck
as necessary to align the holes in the deck lift arms with the
pins. Refer to Figure 7-6.
6. When aligned, push each pin fully inward through the lift
arms to secure the arms in the rear hanger bracket slots.
7.
deck; then route the belt rearward beneath the tractor
the bottom of the engine.
8. Using the deck lift handle, raise the deck to the position
that provides the most horizontal run of the belt between
the engine.
9. Make certain the belt is in the spindle pulleys of the deck,
and that the backside of the belt is against both the fixed
and movable idler pulleys.
Sitting behind the tractor, facing forward, make certain the
belt is not twisted; then reach beneath the tractor to grasp
WARNING! Use caution to avoid pinching your
Pull the right side of the belt rearward and place the
7-5.
While holding the belt and pulley together, rotate the pulley
to the left (See Figure 7-5). Continue holding and rotating the
NOTE: Before using the tractor double-check the belt
routing to make sure that the belt has been routed properly.
Replacing the Belt
Remove the deck from beneath the tractor, (refer to Deck
Removal on page 28).
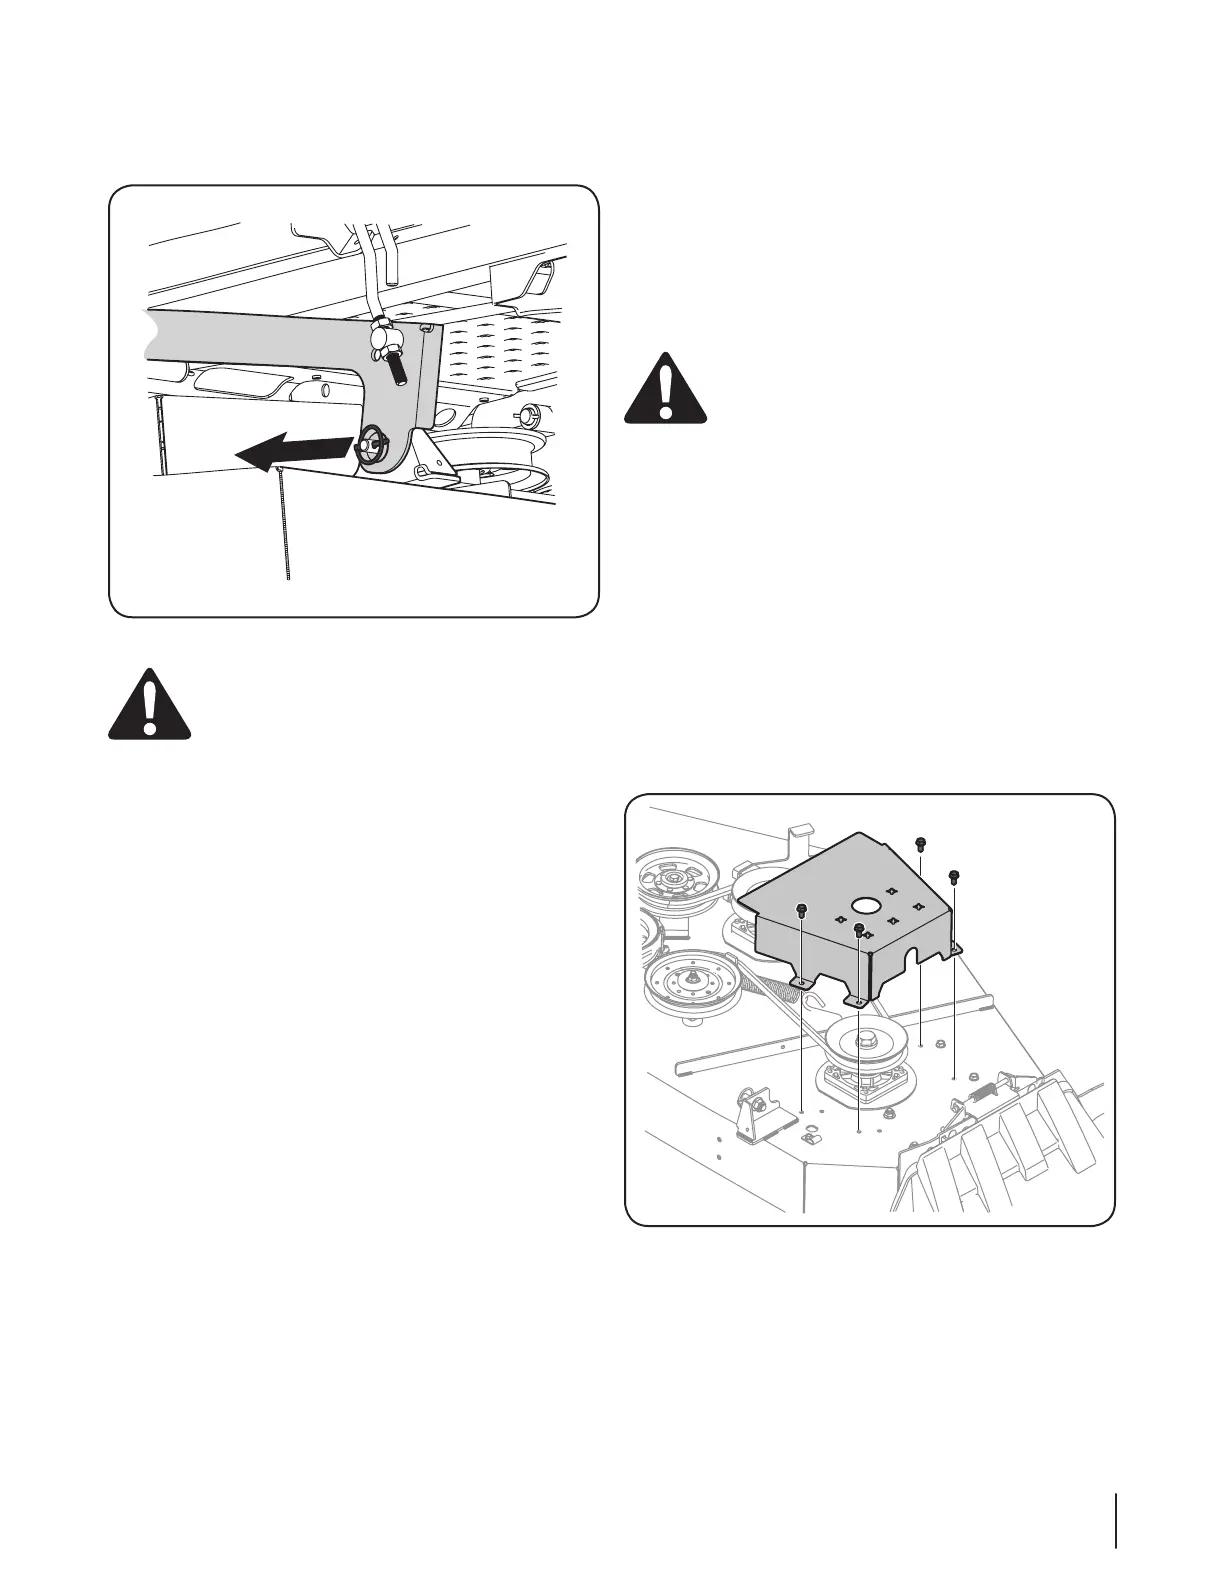
2. Remove the hex washer screws securing the belt covers to
the deck. See Figure 7-7.
Figure 7-7
 Loading...