Do you have a question about the Cuisinart DCC-500 Series and is the answer not in the manual?
Essential first step for safe operation and to understand appliance features.
Covers proper unplugging, water contact, cord management, placement, and storage.
Details on safe carafe handling, cleaning, filter usage, and storage precautions.
Guidelines for using extension cords safely to prevent hazards like tripping.
Instructions for ensuring correct plug insertion to prevent electric shock.
Explains causes of clogging and precautions during brewing to prevent injury.
Discusses the importance of water quality for coffee flavor and the role of the charcoal filter.
Emphasizes using quality beans and buying fresh, whole beans for optimal flavor.
Explains how grind size affects extraction and recommends a medium-fine grind.
Advises on coffee-to-water ratios for desired strength and notes maximum capacity.
Describes the flip-back cover for easy filling and the water level indicator.
Explains water distribution for even brewing and the charcoal filter holder.
Details the filter basket's compatibility with paper or permanent filters and the nylon filter.
Allows pouring a cup mid-brew by temporarily stopping coffee flow from the basket.
Highlights the easy-pour carafe design and the scratch-resistant heating plate.
Mentions audible signals for cycle completion and short-term memory protection for programmed settings.
Shows the current time of day and programmed auto-on times.
Used for setting the time of day and auto-on time accurately.
Controls turning the coffeemaker on/off and setting the automatic shut-off time.
Initiates the cleaning cycle to remove calcium buildup.
Optimizes water heating for smaller batches to ensure piping hot coffee.
Used to set and activate the automatic brewing start time.
Signals the completion of the brewing cycle with audible beeps.
Recommendation to flush the system before the initial brew for optimal taste.
Step-by-step guide on how to set the current time on the clock display.
Instructions for setting a future time for automatic coffee brewing.
How to set the coffeemaker to automatically shut off after a specified time.
Guidance on using the 1-4 cup setting for smaller coffee brews.
Explanation of how programmed settings are retained during power interruptions.
Detailed steps for preparing and correctly inserting the charcoal water filter.
Instructions on how to fill the water reservoir to the desired level.
Steps for placing the filter and adding the correct amount of ground coffee.
How the Brew Pause feature works to allow mid-brew pouring.
Guidance on selecting the 1-4 cup setting and starting the brewing process.
Information on audible signals and waiting times after brewing finishes.
Instructions for washing the filter basket and carafe.
Methods for cleaning the exterior, base, and heating plate safely.
Explains calcium deposits and the importance of regular decalcification for performance.
Step-by-step guide to decalcify using vinegar and water.
Details on how the clean button works and how to cancel or exit the mode.
Details the terms and duration of the product warranty for consumers.
Specific options for California residents seeking warranty service.
Instructions and requirements for obtaining warranty service or repairs.
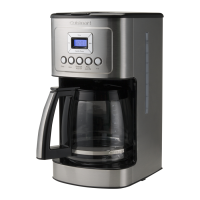
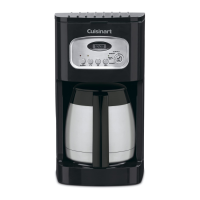
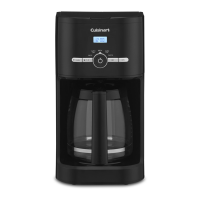
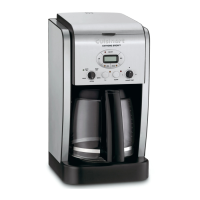
The Cuisinart DCC-500 Series is a 12-Cup Programmable Coffeemaker designed to deliver a high-quality coffee experience with convenience and ease of use. This appliance focuses on optimizing each element of coffee brewing, from water quality to grind and proportion, to ensure a perfect cup every time.
The primary function of the Cuisinart DCC-500 Series is to brew coffee automatically. It allows users to set the time of day, program an "Auto On" time for coffee to start brewing at a desired moment, and even set a variable "Auto Off" time, which can range from zero to four hours after the brew cycle is complete. This programmability offers flexibility for busy schedules, ensuring fresh coffee is ready when needed.
For smaller batches of coffee, the coffeemaker includes a "1-4 Cup Setting." When activated, this feature double-heats the water, ensuring that even small amounts of coffee are piping hot, maintaining optimal temperature and flavor.
A "Brew Pause™" feature is integrated, allowing users to temporarily stop the flow of coffee from the basket to pour a cup mid-brew. However, it's important to note that removing the carafe for more than 20 seconds may cause the filter basket to overflow, and using this feature can slightly weaken the flavor strength of the finished pot due to the interruption in the brewing cycle.
The coffeemaker is also equipped with a "Power Loss Back-up System," which provides one-minute protection in case of a power interruption (e.g., a breaker trip, unplugging, or power failure). This system retains all programmed information, including the time of day, auto on time, and auto off time, preventing the need for reprogramming after a brief power loss.
An audible tone signals the completion of the brewing cycle with five beeps, letting the user know when their coffee is ready. Coffee will continue to stream from the filter for a few seconds after the tone.
To ensure the purest coffee flavor, the Cuisinart DCC-500 Series incorporates a charcoal water filter. This filter is designed to remove chlorine, bad tastes, and odors from tap water. Before first use, and periodically thereafter, the system should be flushed by filling the reservoir with water and running a brew cycle without coffee.
Filling the water reservoir is made easy with a flip-back reservoir cover and a water level indicator window, allowing users to pour in the desired amount of water accurately. The coffeemaker uses a showerhead design to distribute water evenly over the coffee grounds, which helps reduce temperature loss during brewing.
For coffee grounds, the unit accommodates either a #4 paper filter or a permanent nylon commercial-style filter. Users can insert their preferred filter into the filter basket. The recommended proportion is one level scoop (one tablespoon) of ground coffee per cup, with a maximum capacity of 15 scoops for the 12-cup coffeemaker to prevent overflow, especially if the coffee is too finely ground. After adding coffee, the filter basket should be securely replaced in its holder.
Operating the coffeemaker is straightforward with its control panel. The "Hour" and "Minute" buttons are used to set the current time and program the "Auto On" and "Auto Off" times. The "Brew/Off" button initiates the brewing process and also serves to turn the coffeemaker off. The "PROG AUTO ON" button activates the programmed auto-on function, indicated by a green light. The "1-4" button activates the small-batch brewing feature, and its indicator light confirms selection.
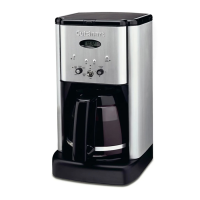
The glass carafe is designed for easy pouring with a no-drip spout and an ergonomic handle. It features markings for two to twelve cups, making it easy to measure brewed coffee. The heating plate beneath the carafe is scratch-resistant with a black, nonstick coating, designed to keep coffee warm after brewing.
Regular cleaning and maintenance are crucial for the longevity and optimal performance of the Cuisinart DCC-500 Series. Before cleaning, the coffeemaker should always be turned off and unplugged from the electrical outlet.
The paper filter and used coffee grounds should be removed and discarded after each use. The filter basket can be washed in warm, soapy water and rinsed thoroughly, or it can be cleaned in the upper rack of a dishwasher. All parts should be dried after washing. It's important not to put water into the unit once the filter basket has been removed; instead, the area under the filter basket should be wiped with a damp cloth.
The glass carafe and its lid are also dishwasher-safe (upper rack only) or can be washed in warm, soapy water and rinsed thoroughly. The base unit should never be immersed in water or other liquids. To clean the base, a clean, damp cloth should be used, followed by drying. Fingerprints and other blemishes on the housing can be cleaned with soap and water or a nonabrasive cleaning solution. The heating plate should be wiped with a clean, damp cloth, avoiding rough or abrasive materials. The inside of the water reservoir should not be dried with a cloth, as lint may remain.
Decalcification is an important maintenance step to remove calcium deposits that accumulate over time on the metal parts of the coffeemaker, especially in areas with hard water. The frequency of decalcification depends on water hardness and usage. Before decalcifying, the charcoal water filter must be removed from the reservoir.
The coffeemaker features a "Clean" button with an indicator light. If the "Clean" LED begins to flash when the coffeemaker is turned on, it indicates that calcium buildup is affecting performance and coffee flavor. To decalcify, the water reservoir should be filled to capacity with a mixture of one-third white vinegar and two-thirds water. Pressing the "Clean" button will cause the LED indicator to glow steadily, and then pressing the "Brew/Off" button will start the cleaning cycle. One cycle is usually sufficient. After the cycle, the coffeemaker will shut off. If the "Clean" LED continues to flash, the procedure should be repeated with a fresh vinegar and water solution. Once the "Clean" LED no longer flashes, the coffeemaker should be turned off, and then one cycle of fresh, cold water should be run through the unit before brewing coffee again. Pressing the "Clean" button cancels all other settings; if pressed accidentally, pressing it again will restore previous settings. Pressing "Brew/Off" will also exit "Clean" mode and turn the coffeemaker off.
The charcoal water filter should be changed approximately every 60 days or after 60 uses, and more frequently if the user has hard water. Replacement filters are readily available.
| Color | black |
|---|---|
| Coffee Type | grounds |
| Coffee Strength Control | yes |
| Built-In Grinder | no |
| Removable Water Tank | no |
| Single / Multi Serve | multi serve |
| Water Filter | yes |
| Programmable | yes |
| Carafe | yes |
| Carafe Capacity | 12 cups |
| Warming Plate | no |
| Removable Drip Tray | no |
| Frother | no |
| Filter | permanent |
| Control Type | analog, button |
| Voltage | 120 volts |