5. Operating Your Grill (cont.)
12
13
5.5 Lighting Instructions
1. Read all instructions before lighting.
2. Open lid during lighting.
3. Make sure the regulator’s knob is in “OFF” position.
4. Push the gas control knob and turn counterclockwise to “HIGH” position. Then push and hold the ignition button
until the burner is lit.
5. If ignition does not occur in 5 seconds, turn the gas control knob off, wait 5 minutes, and repeat steps 2 - 5.* Before
cooking on this grill for the rst time, operate the grill for about 15 minutes with the lid closed and the gas turned on
“HIGH”. This will “heat clean” the internal parts and dissipate odor from the painted nish.
*Clean your grill after each use. See Section 6.3 for instructions
*If the burner does not light, turn the gas control knob off and wait 5 minutes to let the gas clear before you try again.
5.6 Match lighting
IMPORTANT!
A match lighting hole is located on the left side of the rebox.
Match lighting instructions:
1. Read all instructions before lighting.
2. Open lid during lighting.
3. Make sure the knob on the regulator is in “OFF” position.
4. Strike a long wooden match and position the burning match through the match lighting hole in the left side of the
rebox. Place the ame near the bottom edge of the burner.
5. Push down and turn the burner control knob counterclockwise to the high setting.
6. The burner should light. The ame will carry around the burner. Allow grill to pre-heat with the grill lid closed for 2-3
minutes before cooking.
mCAUTION:
Do not touch any hot grill parts. The outside of the grill bottom especially becomes very hot during use. Use protective
gloves to handle any parts that might become hot during use.
5.7 Using the Grill
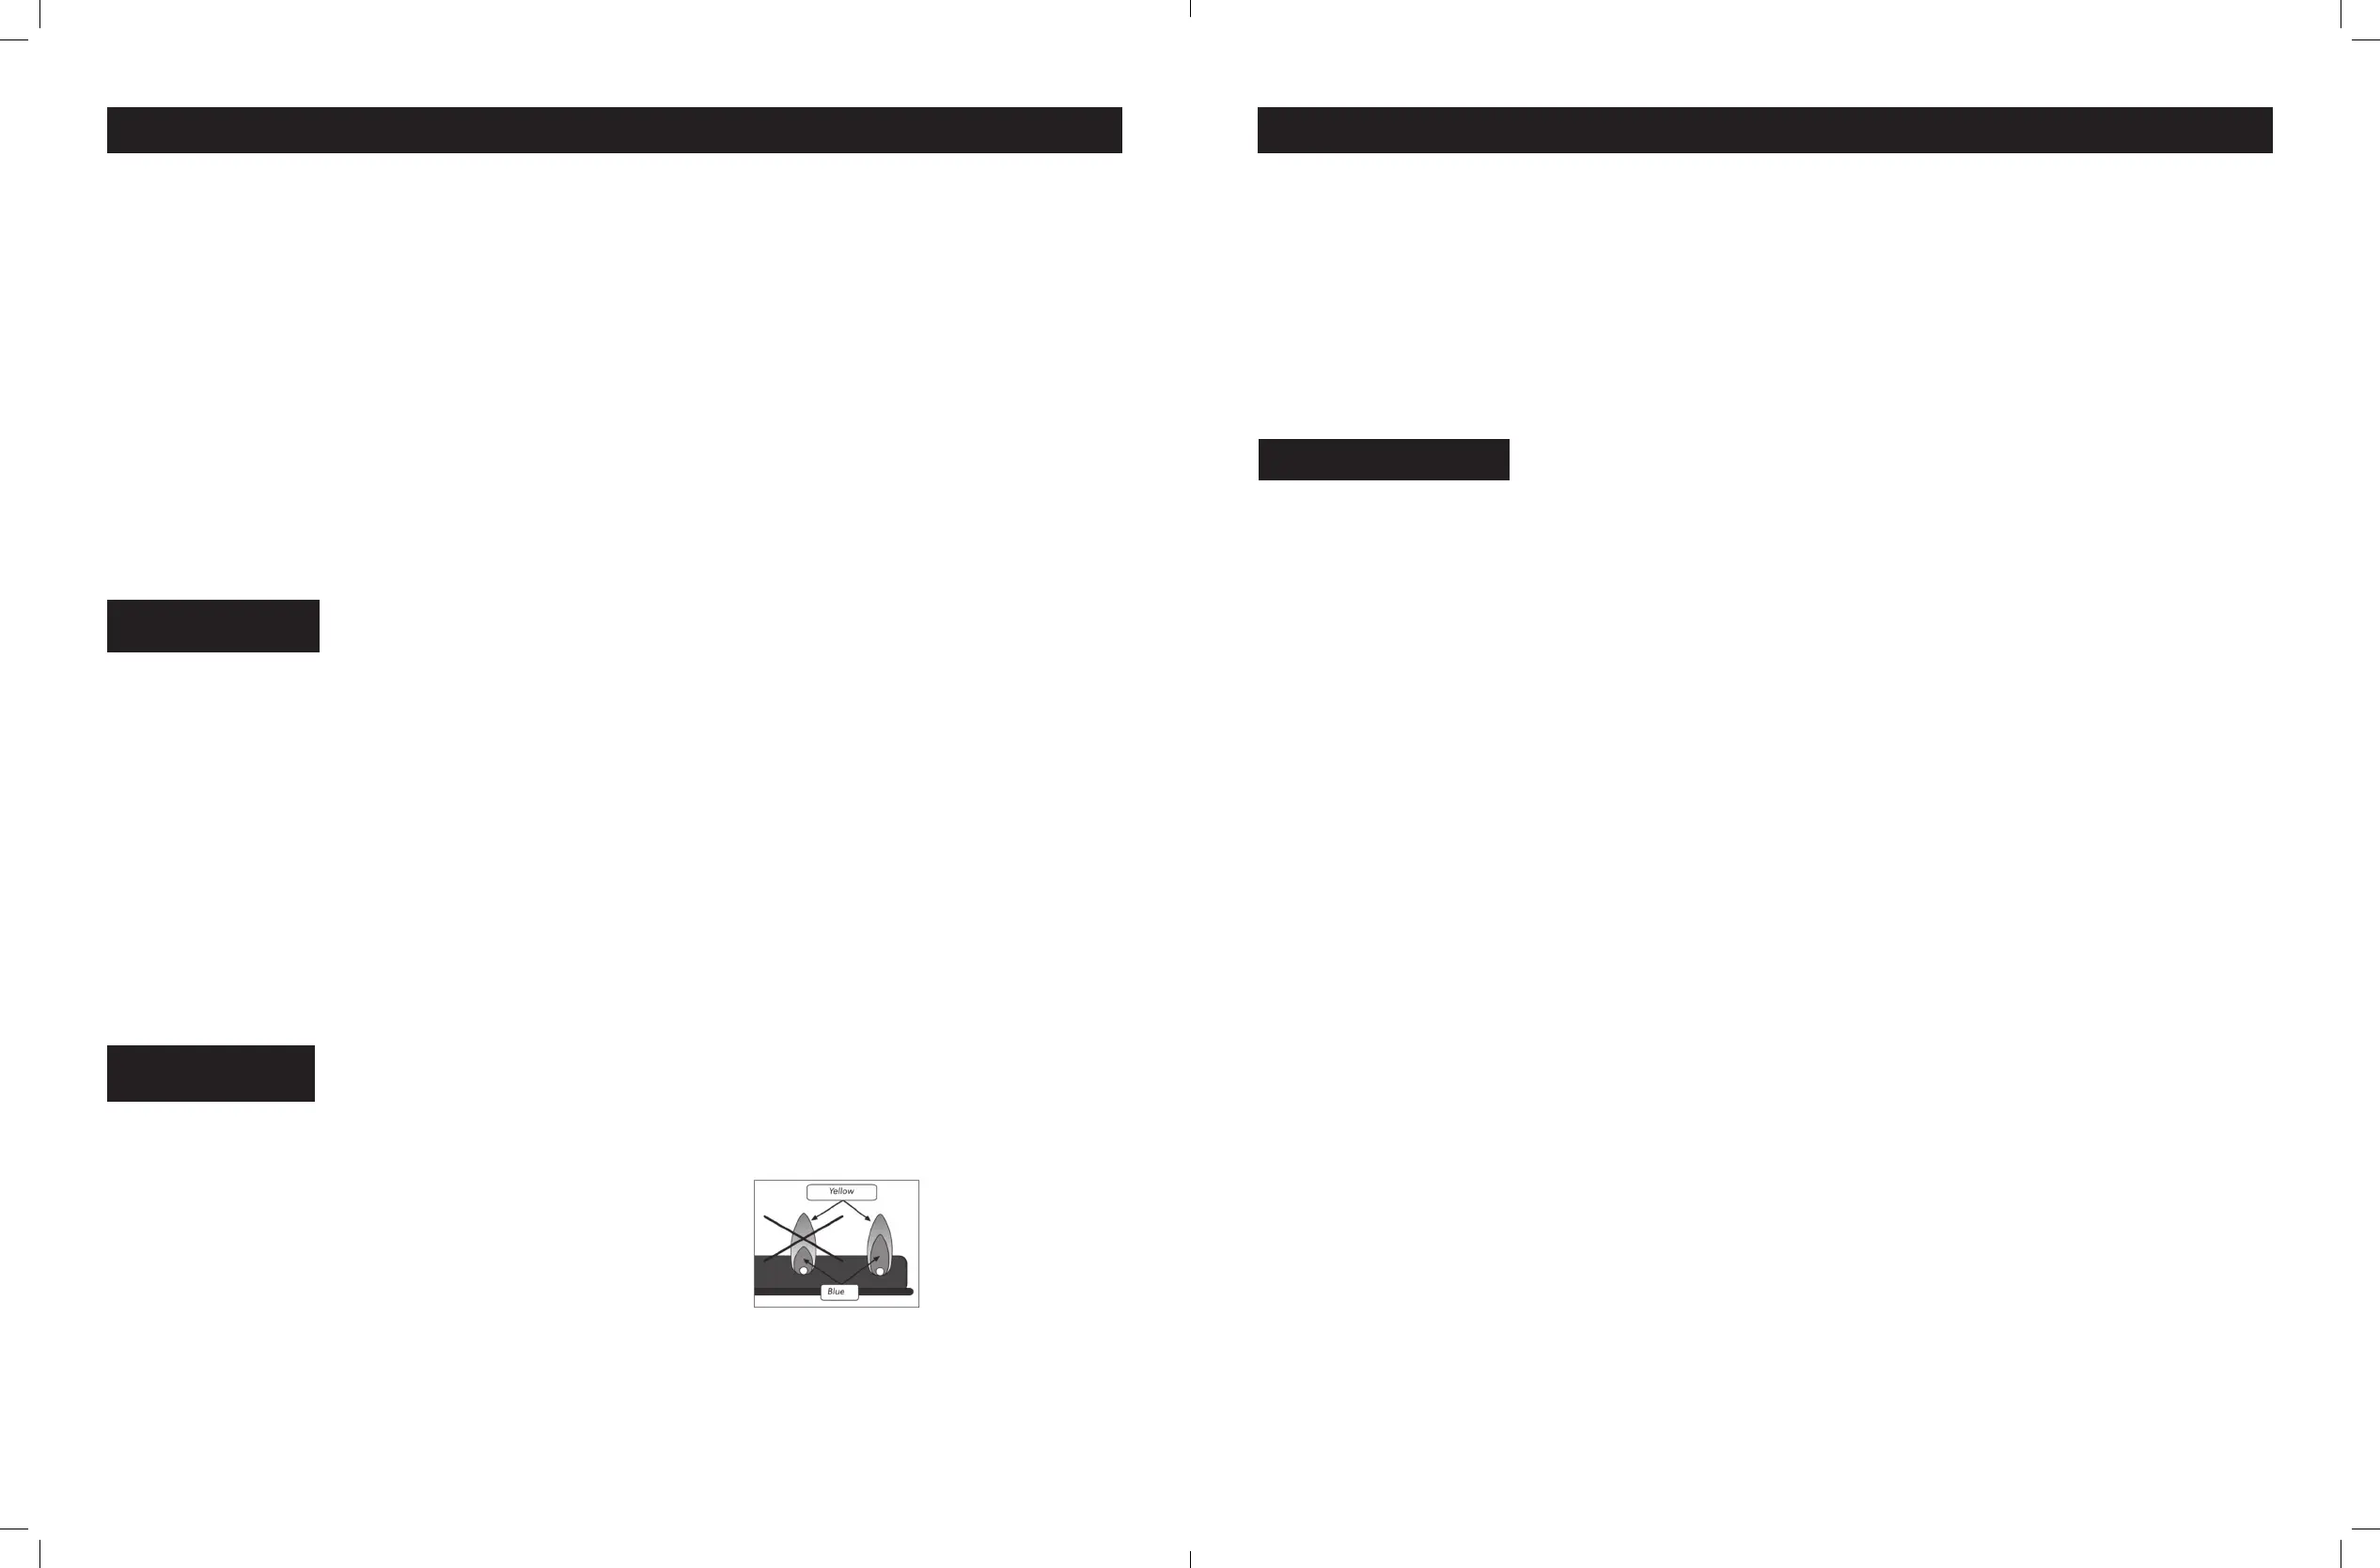
Inspect the burner ame by looking through the match lighting holes.
A good ame should be blue with some yellow tips coming from the
burner holes. Yellow tips on ames up to 1/4“ in height are acceptable as
long as no carbon or soot deposits appear.
During operation, stand to the side of grill when opening the grill lid.
Do not expose any part of your body directly above the cooking area.
The burner opening must be positioned properly over the valve orices.
6. Care And Maintenance
6.1 Care
Regular care of your grill will help keep it operating properly. All maintenance should be done only when the
grill is cool and with the fuel supply turned off. Occasionally inspect and tighten hardware that may become loose.
6.2 Cleaning The Venturi Tube
A spider’s nest or wasp’s mud inside the Venturi Tube can block gas ow and can even cause a re at the gas
control valve. Such a re can cause operator injury and serious damage to your grill.
To prevent insect related problems, inspect the Venturi Tube screen cover regularly and remove any dirt.
WARNING!
Do not disassemble or alter the fuel supply system. Improper assembly can result in a hazardous condition.
Seek qualied professional assistance if repairs are required.
6.3 Cleaning And Maintenance
• WARNING: Do not clean any grill surface while grill is operating.
Let grill cool to a safe temperature prior to cleaning.
• Disconnectthefuelsupplyandremovethefuelsupplycylinderpriortocleaning.
• Cleaningshouldbedonewheredetergentwon’tharmworksurfaceorlawn.
Exterior Cleaning
• Cleangrillexteriorsurfaceswithwarmsoapywater.
• Washdriptrayinwarmsoapywater–donotrunthroughdishwasher.
Interior Cleaning
• Cookinggratecanbecleanedwithagrillbrush.Forbestresults,cookinggrateshouldbewarm
(warm,nothot–neverbrushwithgrilloperating,orwheninteriorisveryhot).Ifdesired,cool
cooking grate can be removed from grill and cleaned with warm soapy water.
• Cookinggrateisalsodishwashersafe.Youcanremovewhencoolandplaceinthedishwashertoclean.
• Shouldyouwishtoremoveaccumulateddebrisfromthebottomoftherebox,proceedasfollows:
– Letgrillcoolcompletely
– Removecookinggrateandsetaside
– Carefullyscrapeandremovedebrisfrombottomofreboxusingcarenottotouchburnerelement,
igniter, or igniter wire.
WARNING: DO NOT APPLY ANY CLEANERS OR LIQUIDS TO BURNER ELEMENT
OR ATTEMPT TO CLEAN IN ANY WAY.
– DO NOT USE WATER OR LIQUIDS TO CLEAN GRILL INTERIOR