40 Series Granulators Page 37
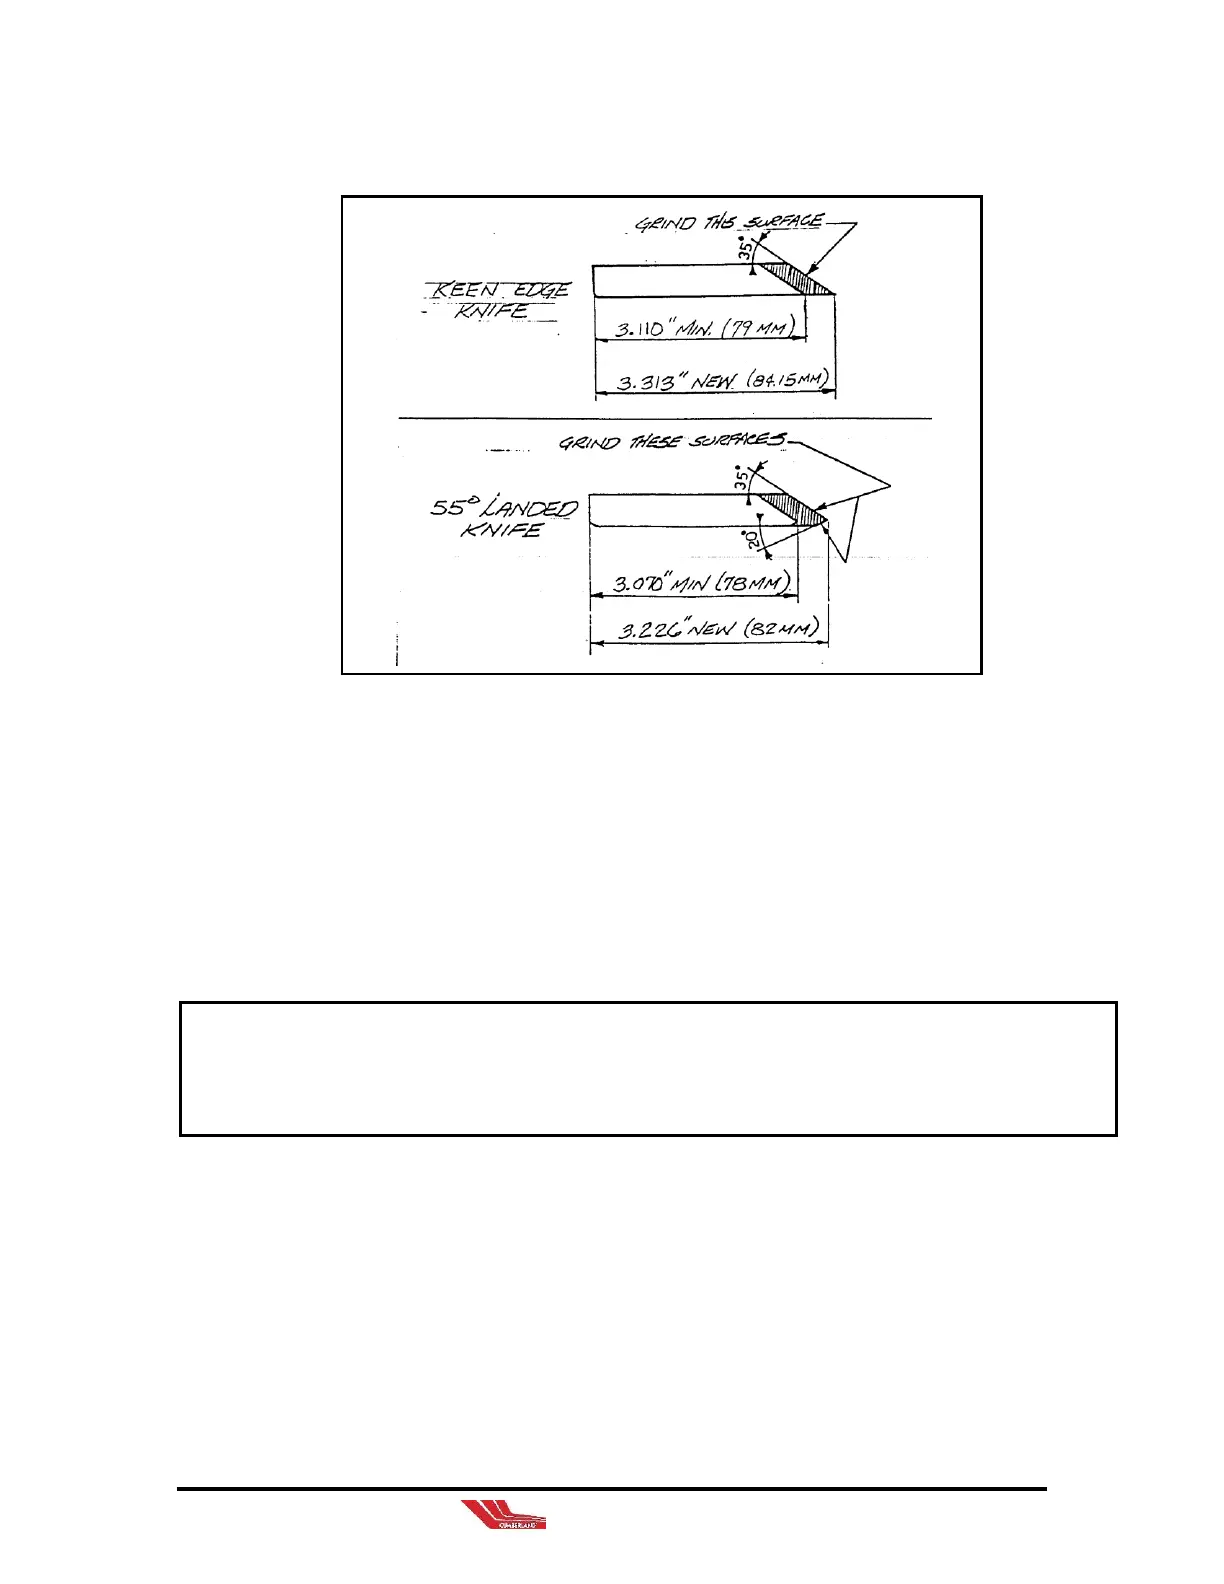
Figure 3
Rotor Knife Sharpening
9-6 Rotor Knife Installation
1. Lock the rotor with the rotor restraint pin provided to
prevent it from turning.
2. Re-install the rotor knives onto the rotor. Do not torque
the hex head rotor knife bolts fully at this point -- snug
them down only.
New or re-sharpened knives should be handled with extreme care. It is
suggested that the sharp cutting edge be covered with tape to prevent damage
to the knives or injury to personnel during installation.
3. Check that the heel of the rotor knife is tight up against
the knife seat. Utilizing a 0.05mm feeler gauge, try to
insert it between the heel of the knife and the knife seat
at both ends and across the rotor knife. If the feeler
gauge will not go down between the heel of the knife
and the knife seat, the knife is installed correctly.
4. Torque down the rotor bolts. Start from the center of
the knife and torque down the bolts equally, working