EasyManua.ls Logo

Curt Manufacturing 13277 - User Manual

Curt Manufacturing 13277
6 pages
Print Icon
To Next Page IconTo Next Page
Loading...
MAKE: STYLE:
MIN.
60
WARNING: NEVER EXCEED YOUR VEHICLE MANUFACTURER'S RECOMMENDED TOWING CAPACITY
For more information log onto www.curtmfg.com & for helpful towing tips log onto www.hitchinfo.com
WEIGHT CARRYING:
INSTALLATION TIPS:
INSTALLATION REQUIRES:
VEHICLE PHOTO:
HITCH ILLUSTRATION:
REPRESENTATIVE PHOTO
MAKE SURE YOUR HITCH MATCHES
LEVEL OF DIFFICULTY:
EASY MODERATE CHALLENGING
1. BEFORE YOU BEGIN INSTALLATION, READ ALL
INSTRUCTIONS THOROUGHLY.
2. TO EASE INSTALLATION, 2 PEOPLE MAY BE
REQUIRED.
3. USING PROPER TOOLS WILL GREATLY IMPROVE
THE QUALITY OF THE INSTALL AND REDUCE THE
TIME REQUIRED.
4. NEED HELP OR HAVE SOME QUESTIONS?
CALL TECHNICAL SUPPORT AT 800.798.0813
Safety glasses should be
worn at all times while
installing this product
.
YEARS:
2017
AUDI
MODEL:
Q7
SUV
7,000
700
TRAILER WEIGHT:
TONGUE WEIGHT:
13277 INSTALLATION INSTRUCTIONS
LBS.
LBS.
WARNING:
WE RECOMMEND THE USE OF 18050 STABILIZING STRAPS FOR ALL NON-TRAILER
(WHEEL-LESS) LOADS. PLEASE SEE THE CURT CATALOG OR VISIT US ONLINE AT
WWW.CURTMFG.COM FOR FURTHER INFORMATION.
MIN.
MIN.
120
IF YOU ARE HESITANT TO UNDERTAKE
THIS TASK ON YOUR OWN, CONTACT AN AUTHORIZED
CURT INSTALLER FOR ADDITIONAL ASSISTANCE.
NOVICE INSTALL TIME:
PRO INSTALL TIME:
SCAN FOR
MORE INFO
PERIODICALLY CHECK THIS RECEIVER HITCH TO ENSURE ALL FASTENERS ARE TIGHT AND ALL STRUCTURAL COMPONENTS ARE SOUND
CURT Manufacturing LLC. warrants this product to be free of defects in material and/or workmanship at the time of retail purchase by the original purchaser. If the product is found to be defective,
CURT Manufacturing LLC. may repair or replace the product at their option, when the product is returned, prepaid, with proof of purchase. Alteration to, misuse of, or improper installation of this product
voids the warranty. CURT Manufacturing LLC.'s liability is limited to repair or replacement of products found to be defective, and specifically excludes liability for incidental or consequential loss or damage.
For more information log onto www.curtmfg.com, & for helpful towing tips log onto www.hitchinfo.com
This product complies with safety specifications and requirements for connecting devices and towing systems of the state of New York, V.E.S.C.Regulation V-5 and SAE J684.
10/28/2016
CHALLENGING
RATCHET
SOCKET
18MM
TORQUE
WRENCH
TAPE
MEASURE
MASKING
TAPE
SOCKET
EXTENSION
6"
SAFETY
GLASSES
PART REMOVAL
TEMPORARILY REMOVE
BUMPER FASCIA
NO DRILLING REQUIRED
BUMPER FASCIA
TRIMMING REQUIRED
WELDNUT CLEANING
MAY BE REQUIRED
TORXBIT
SOCKET
T25
ROTARY
TOOL
PLASTIC PANEL
REMOVAL TOOLS
Question and Answer IconNeed help?

Do you have a question about the Curt Manufacturing 13277 and is the answer not in the manual?

Summary

Installation Overview and Preparation

Installation Tips

Read instructions thoroughly, consider 2 people, use proper tools, and contact support if needed.

Tools and Equipment Required

Lists tools like ratchet, sockets, torque wrench, rotary tool, tape, measuring tools, and safety glasses.

Installation Time Estimates

Professional installation time is 60 minutes, novice (DIY) time is 120 minutes.

Installation Walkthrough Steps

Step 1: Remove Wheel Well Screws

Remove screws along each wheel well and pull wheel liner back to expose an additional screw.

Step 2: Remove Fascia Screws

Remove screws from the bottom of the wheel well liner and underside of fascia.

Step 3: Remove Body Trim and Screws

Carefully remove body trim and exposed screws at the upper wheel well.

Step 4: Disconnect Electrical Connectors

Disconnect all electrical connectors from lights and sensors along the bumper fascia.

Step 5: Remove and Position Bumper Beam

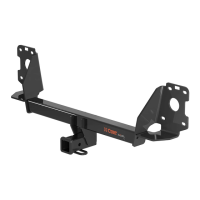
Remove bumper beam bolts, place hitch on end panel, and align bumper beam on top of hitch.

Step 6: Secure Hitch and Bumper Beam

Loosely secure hitch and bumper beam with bolts, then torque all bolts to 58 ft-lbs.

Step 7: Trim Fascia

Unclip kick sensor wire, measure, mark, and trim the fascia area to specified dimensions.

Step 8 & 9: Reinstall Fascia and Wire

Reinstall the bumper fascia and re-attach the kick sensor wire behind the receiver tube.

Towing Safety Information

Gross Trailer Weight; GTW

The Gross Trailer Weight is the weight of the trailer and cargo, measured on a vehicle scale.

Tongue Weight; TW

Downward force exerted on the hitch ball by the coupler, measured at towing height.

Weight Carrying; WC

The total weight of the trailer and cargo inside, not to exceed hitch capacity.

Weight Distribution; WD

Balances cargo weight for better steering, braking, and level trailer riding.

Sway Control

Reduces lateral trailer movements caused by wind, used with weight distribution hitches.

Ball Mount and Trailer Ball

Ensures proper connection and security of the ball mount and trailer ball.

Coupler and Safety Chains

Ensures coupler size matches hitch ball and safety chains are properly attached.

Electrical Wiring Identification

Provides a color-coded chart for trailer lighting and brake system wiring.

Curt Manufacturing 13277 Specifications

General IconGeneral
BrandCurt Manufacturing
Part Number13277
Product TypeTrailer Hitch
Weight Capacity (GTW)6, 000 lbs
Towing Capacity6, 000 lbs
Tongue Weight (TW)900 lbs
Hitch ClassClass III
Receiver Tube Size2 in
Drilling RequiredNo
MaterialSteel
InstallationBolt-On
Receiver Size2.5 inches
FinishBlack Powder Coat

Related product manuals