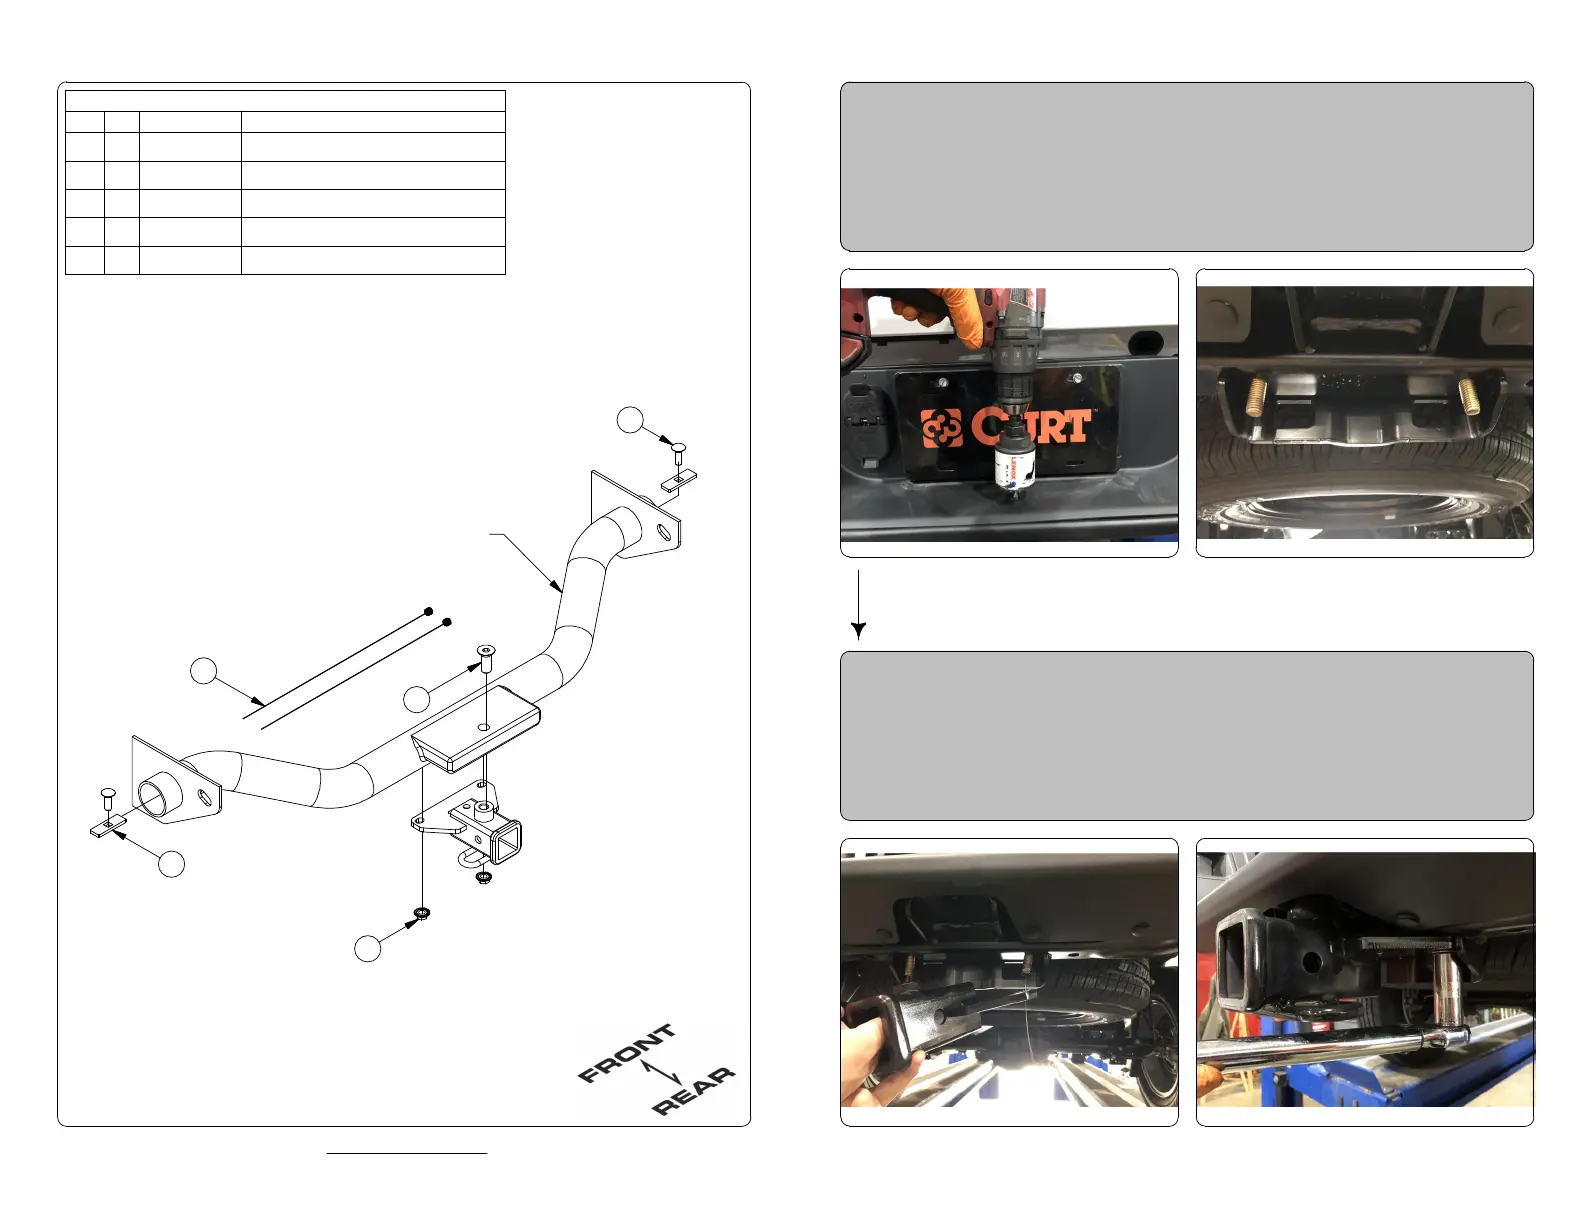
Parts List
DESCRIPTION
PART NUMBER
QTY
ITEM
BOLT, CAR,1/2-13 UNC,1-1/2,GRD8,YZ
10-1028721
NUT, SER-FLANGE,1/2-13 UNC,GRD8,YZ20-0006222
.250 x 1.00 x 3.00" SQUARE HOLE SPACERCM-SP623
FHSCS, 3/4-10 UNC, 2, GR810-1034614
1/2" FISHWIRE1_2 FISHWIRE2
5
INSTALLATION WALKTHROUGH:
For more information log onto www.curtmfg.com
1. Drill through rear bumper cover using a hole saw at
predefined dimple located in center of cover, then
insert 3/4" bolt.
2. Fishwire CM-SP6 spacer and 1/2" carriage bolt through end
of cross member on both sides.
3. Raise hitch into position and loosely secure with 3/4"
bolt followed by 1/2" flange nuts.
4 Torque 3/4" hardware to 320 lb-ft and 1/2" hardware
to 110 lb-ft.
1
2
3
REAR CROSS MEMBER
5
4



 To Next Page