13
ASSEMBLY (cont.)
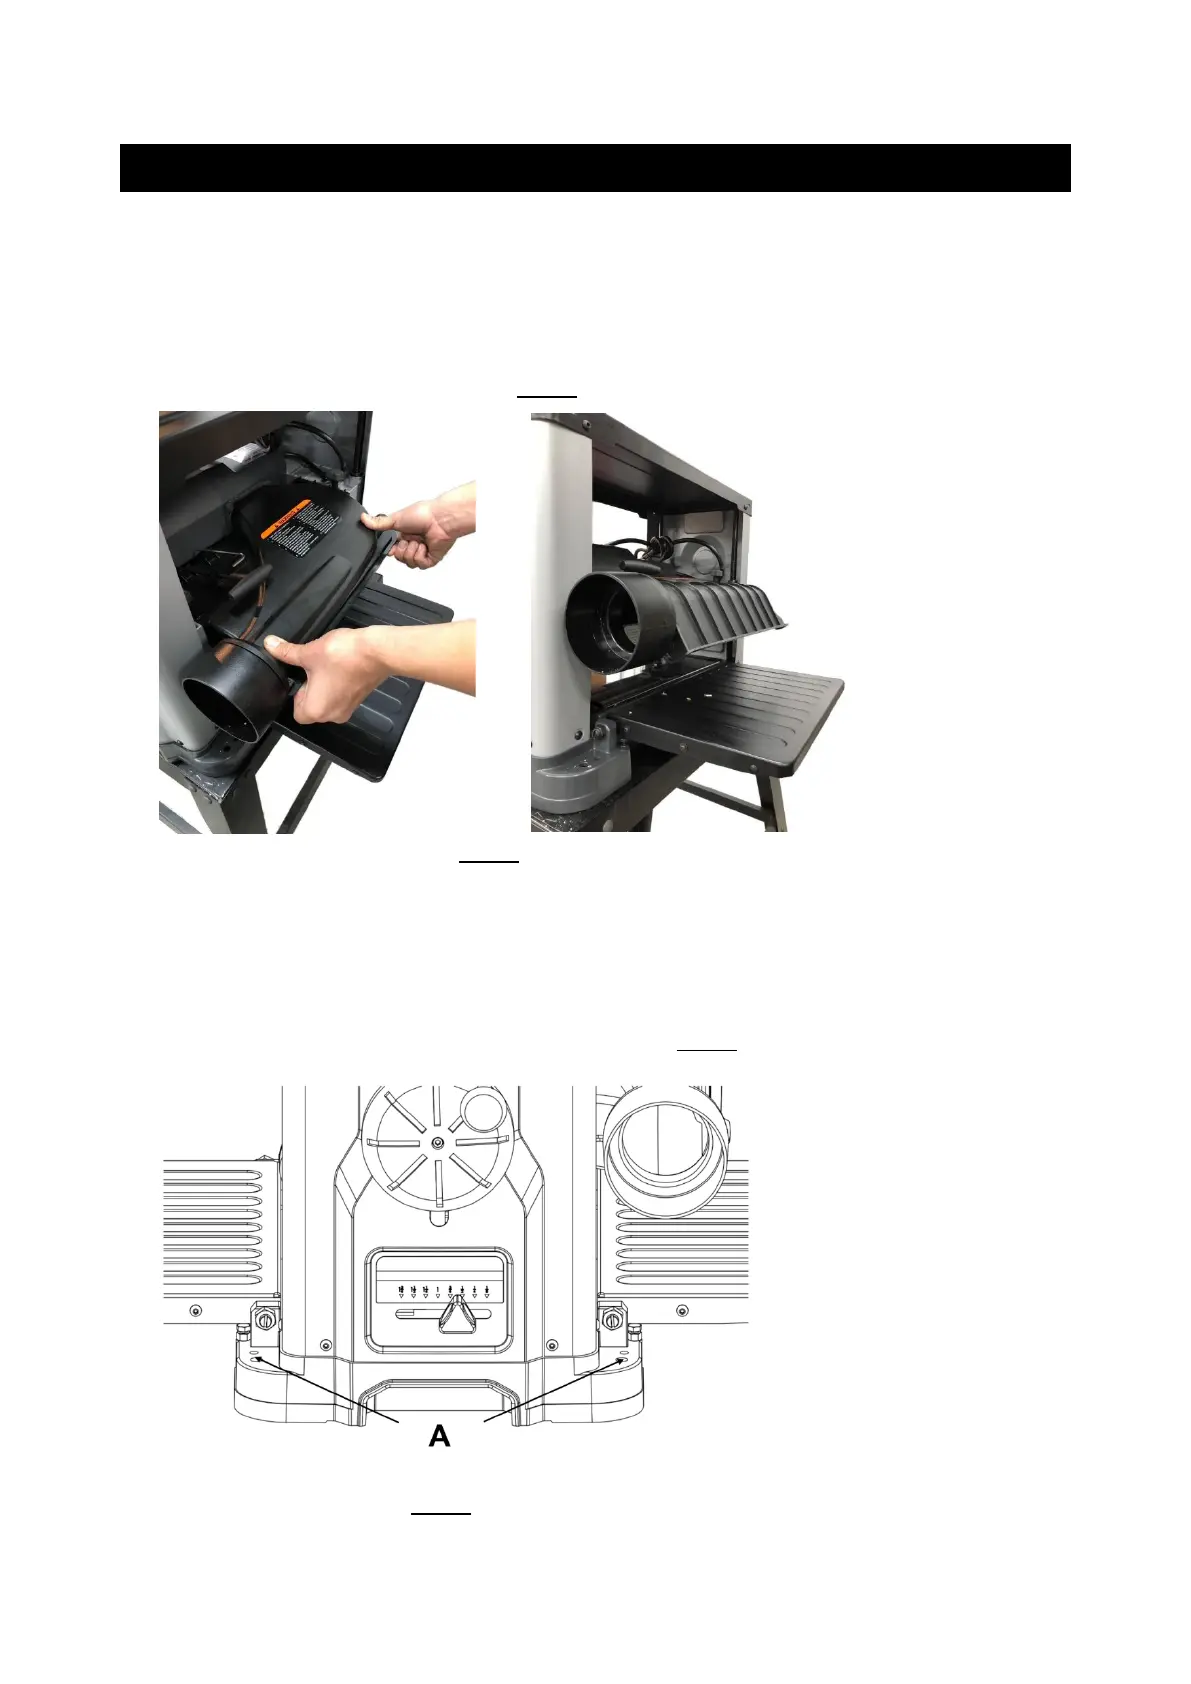
2. To minimize sawdust accumulation on your work piece, attach either a 2-1/2 in. or a 4
in. vacuum hose to the dust port.
3. The dust port must be snapped shut completely or chips may fly out of the front of the
planer.
4. The dust port can be opened to allow chips to flow out the back of the planer when a
vacuum system is not used. SEE FIG 3.
FIG 3
SECURING PLANER TO A TABLE OR WORKBENCH
During operation, if there is any tendency for the planer to tip over, slide or walk, the planer
MUST be secured to a supporting surface such as a workbench or table. Four holes are
provided (2 are shown at A below) to securely mount the planer. The surface you are
mounting the planer to should be perfectly flat. SEE FIG 4.
FIG 4