18
OPERATIONS
NOTE: This operations section was designed to give instructions on the basic operations
of this planer. However, it is in no way comprehensive of every planer operation. It is
strongly recommended that you read books, trade magazines, or get formal training to
maximize the potential of your planer while minimizing the risks.
NOTE: This planer is designed to process wood ONLY.
POWER SWITCH
The planer is turned on by flipping the switch into the up position and it is turned off by
flipping the switch in the down position. This planer is also equipped with a special lockout
toggle switch that prevents unauthorized use. To prevent unauthorized use of the planer,
simply pull out the yellow key (A) located on the face of the switch. SEE FIG 9.
FIG 9
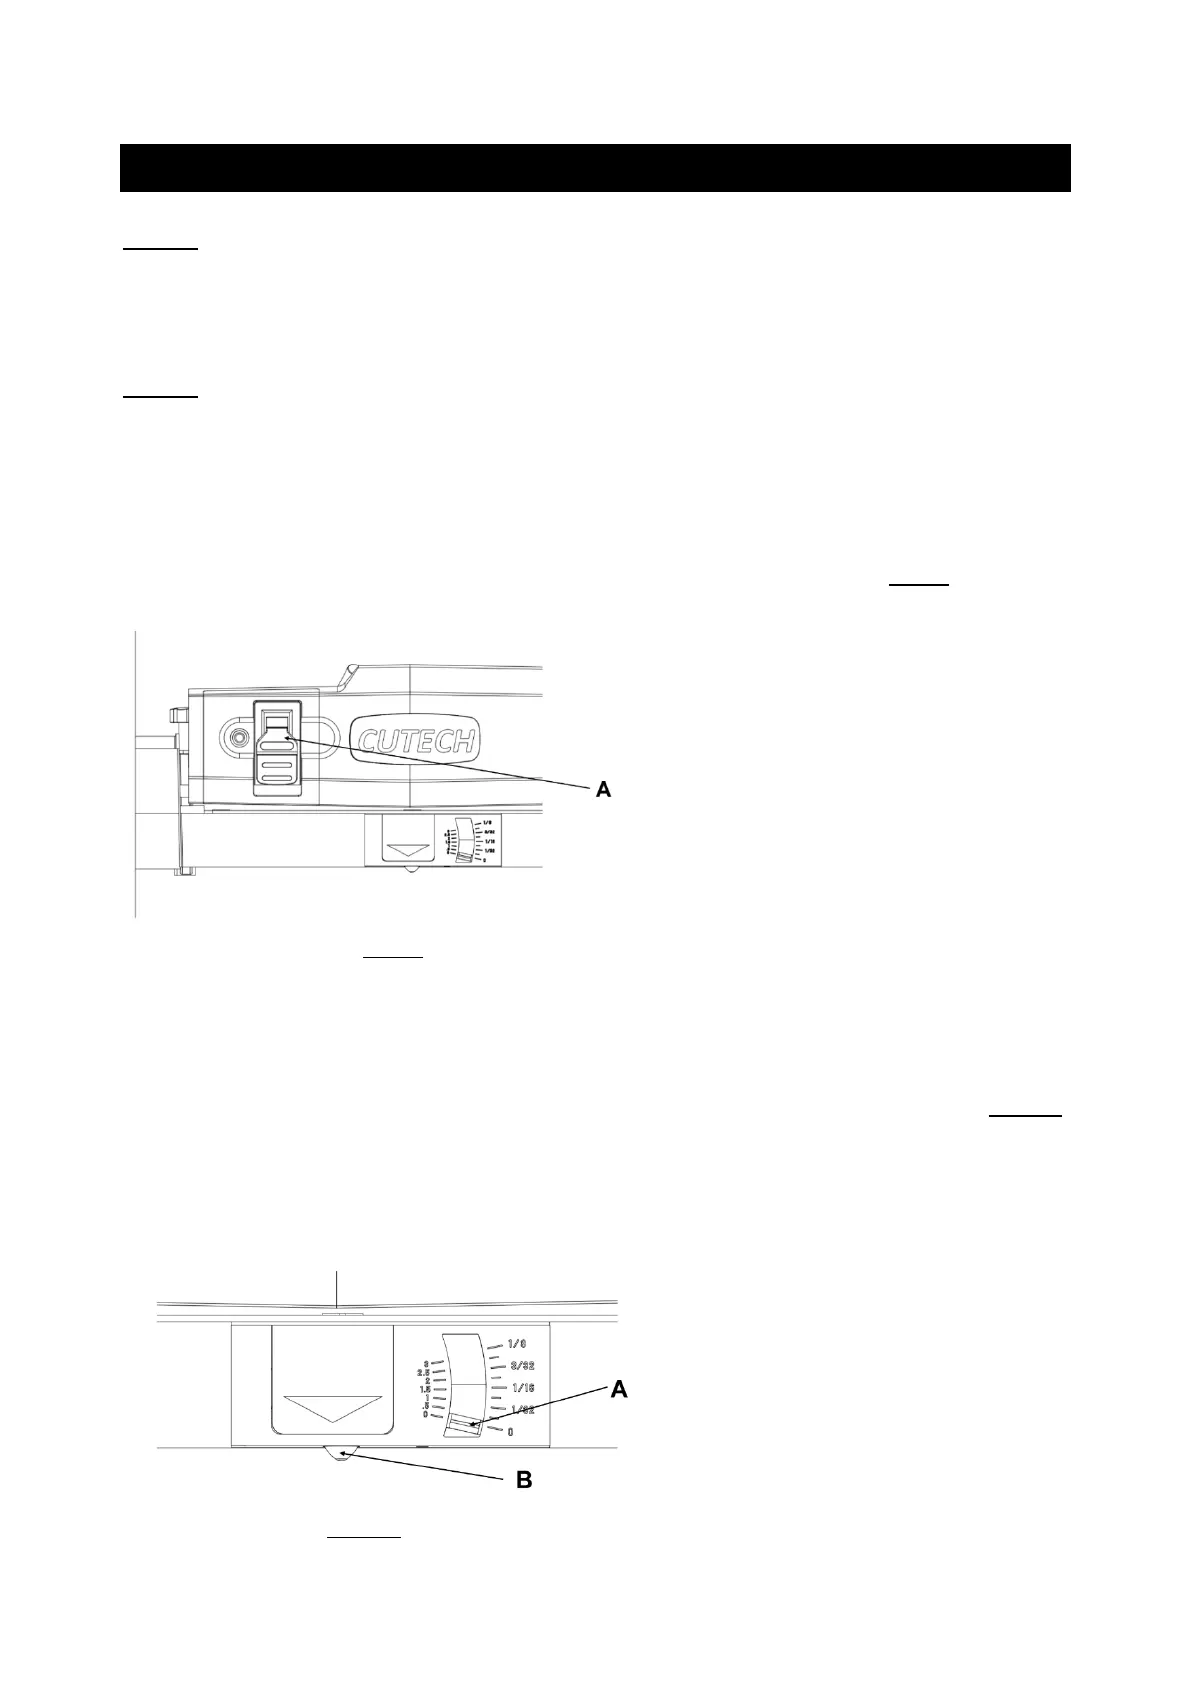
DEPTH-OF-CUT INDICATOR
The Depth-Of-Cut Indicator, located on the front of the machine, is a convenient way to
quickly determine how much material is being planed off in one pass.
1. With the machine OFF, insert your work piece just under the cut scale (A). SEE FIG 10.
2. Crank the raising / lowering handle until the button (B) comes in contact with the work
piece. As you rotate the raise / lower handle, the needle on the depth of cut scale will
move showing how much material will be removed in that pass.
FIG 10