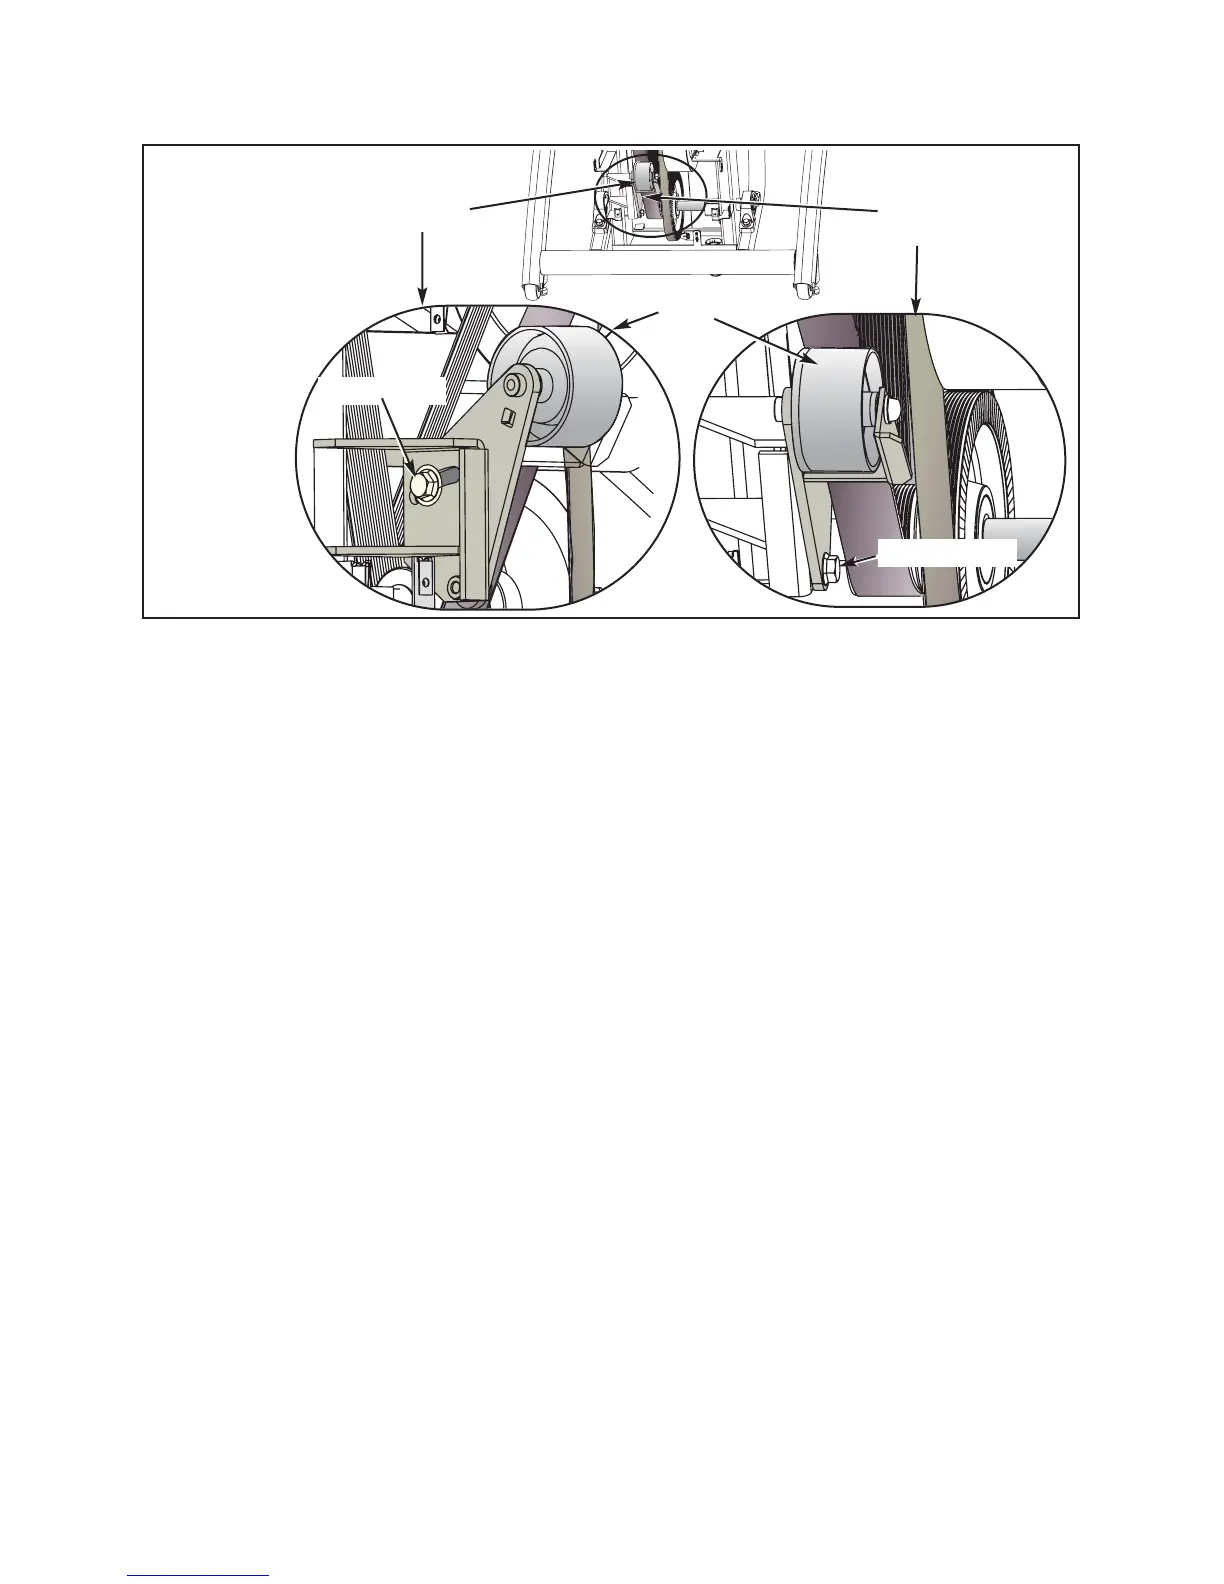
18. Torque the primary belt (if applicable).
A. Using a 3/8” square-hole torque wrench, pull up until the idler wheel rocks against the brake
and is torqued to 75 ft-lbs. NOTE: Continue holding the torque wrench at 75 ft-lbs during the
next step.
B. While holding the torque wrench at 75 ft-lbs, use a 1/2” socket wrench to tighten the top screw
on the idler pulley. See Figure 14.
C. Using a 1/2” socket wrench, tighten the bottom screw on the idler pulley. See Figure 14.
19. Attach the crank covers.
A. Place each crank cover in position.
B. Using a Phillips head screwdriver, attach the three screws securing each crank cover in place.
See Figure 6.
20. Attach the side covers.
A. Place each side cover in position in the rubber gasket.
B. Using a Phillips head screwdriver, tighten the six screws and six washers securing each side
cover. See Figure 5.
21. Secure the connecting rods.
A. Using a 3/16” Allen wrench, attach the screw securing each connecting rod to each crank.
See Figure 4.
22. Attach the access cover.
A. While being sure not to pinch any cables, hold the access cover in place. See Figure 2.
Cybex Arc Trainer 610A Service Manual
Service
Page 4-12
This Side of
Bracket
This Side of
Bracket
Top Screw
Bottom Screw
Figure 14
NOTE: Do not adjust
the idler pulley unless
it is obvious that your
belt is not tensioned
properly.
Idler
Pulley