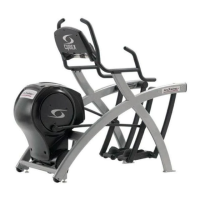
Cybex Arc Trainer 610A Service Manual
Service
Page 4-7
Drive Belts
NOTE: This procedure will cover the primary and secondary drive belts.
Tools Required
• Phillips head screwdriver
• 3/16” Allen wrench
• 2 Cloths
• 3/8” Nutdriver or socket wrench
• 7/16” Socket wrench
• 1/2” Socket wrench (only if belt tension needs to be reset)
• 1/2” Open end wrench (only if belt tension needs to be reset)
• 3/8” Square-hole torque wrench (only if belt tension needs to be reset)
! WARNING: Disconnect the power cord before beginning this procedure. Keep wet items away
from inside parts of the unit. Electrical shock could occur even if the unit is
unplugged.
1. Elevate the unit and disconnect the power source.
A. Plug the power cord into the power outlet.
B. Enter Test Mode.
C. Elevate the unit to a minimum of level 7 incline.
D. While the unit is elevated, turn the main power switch to the off (O) position and unplug the
power cord from the power outlet.
2. Remove the access cover.
A. Using a Phillips head screwdriver, remove the four screws securing the access cover. See
Figure 2.
B. Remove the access cover.
! WARNING: Flywheel may be hot. Wait until it cools before
servicing.
3. Detach the connecting rods.
A. Using a 3/16” Allen wrench, remove the Cap, SHCS
and spacer securing the linkage rod. See Figure 4.
NOTE: Detach only the ends where the rods connect
to the crank.
B. Lay the linkage rod down on the frame.
NOTE: Place a cloth in between the
linkage rod and the frame to prevent
scratches.
Figure 4
SHCS
Cloth on
the Frame
Connecting
Rod
Washer
Cap