3
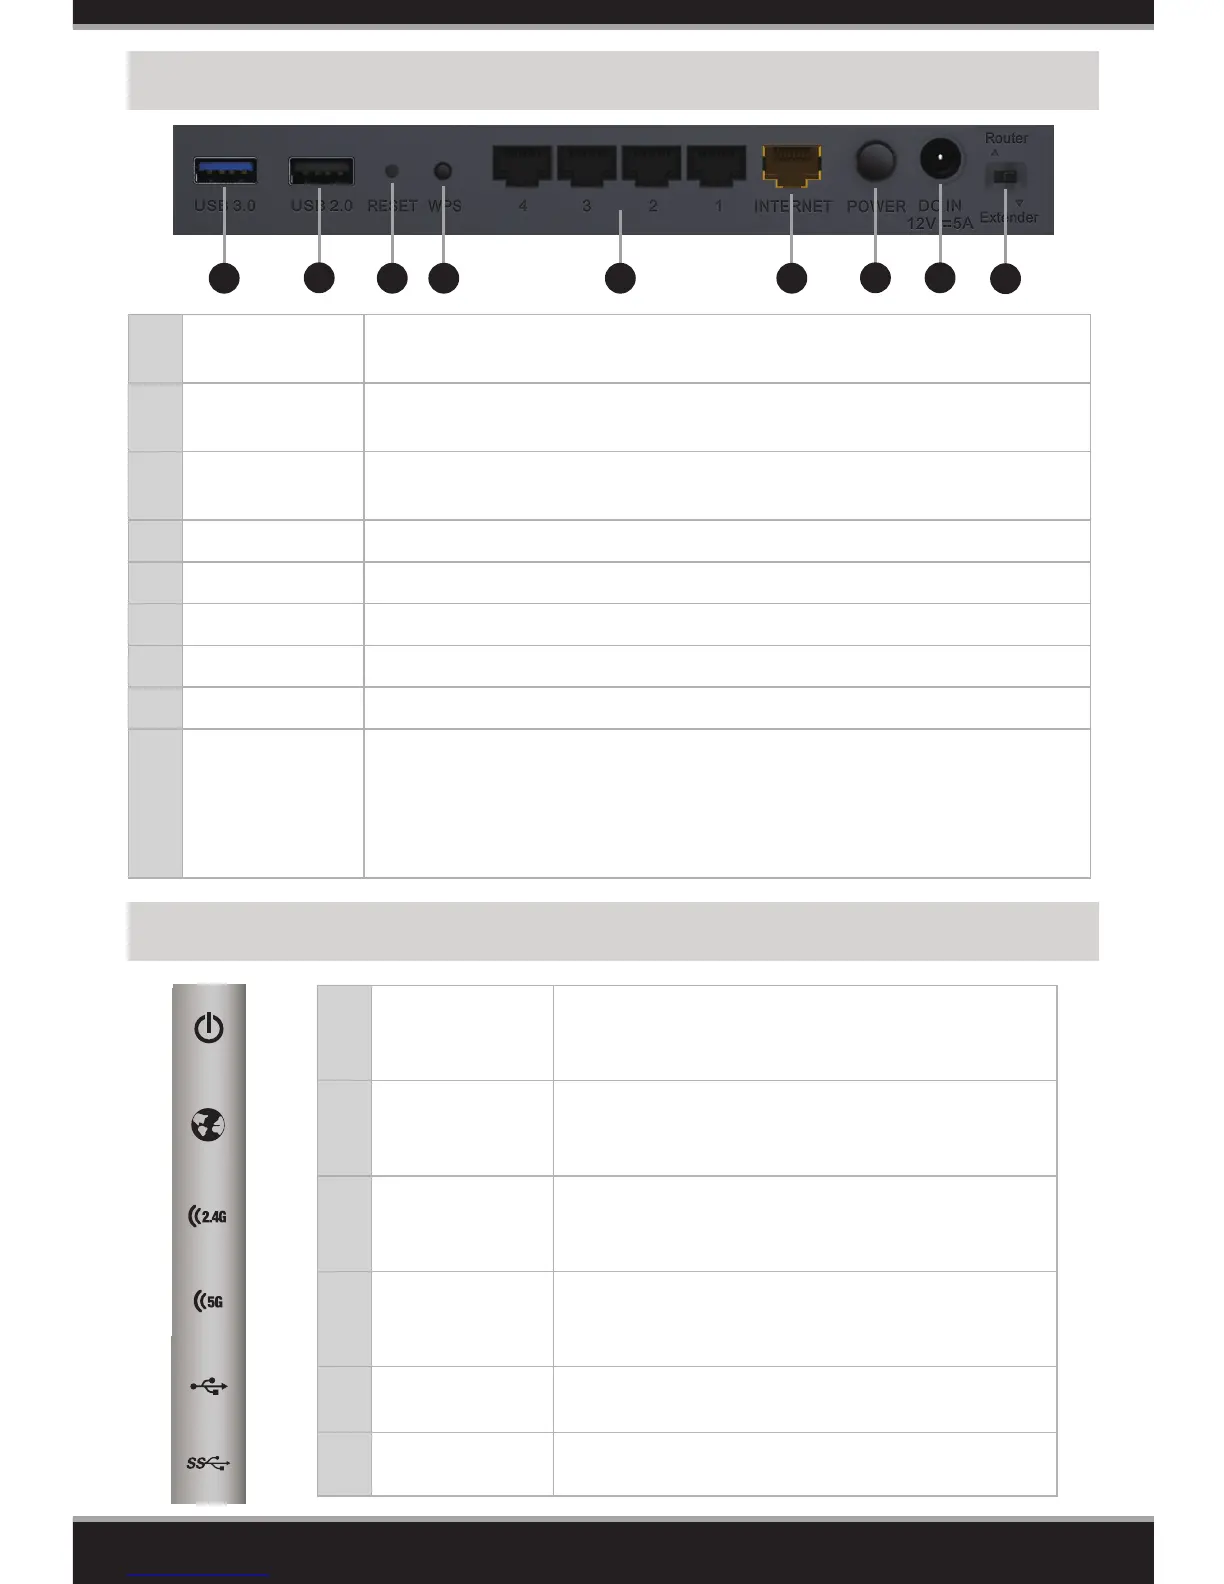
Hardware Overview
1 USB 3.0 Port
Connect a USB 3.0 ash drive or external hard drive to share content
throughout your network.
2 USB 2.0 Port
Connect a USB 2.0 ash drive or external hard drive to share content
throughout your network.
3 Reset Button
Press and hold the reset button with a paper clip for six seconds to reset the
router to the factory default settings.
4 WPS Button Press to start the WPS process. Both wireless LEDs will start to blink.
5 LAN Ports (1-4) Connect Ethernet devices such as computers, switches, and game consoles.
6 Internet Port Connect your broadband modem to this port using an Ethernet cable.
7 Power Button Press to power the router on and o.
8 Power Port Connect the supplied power adapter.
9 Mode Switch
Select Router (left) or Extender mode (right). To change modes, move
the switch to the desired position and after ve seconds the router
will reboot into the desired mode. Router is the default mode. For
information on how to use the router in Extender mode, refer to the
user manual located at http://support.dlink.com.
1
2
3 4 5 6
7 8
1 Power LED
A solid white light indicates a proper connection
to the power supply. The light will be solid orange
during boot-up.
2 Internet LED
A solid white light indicates a connection to the
Internet port. If the LED is orange, the connection is
good but the router cannot connect to the Internet.
3
2.4GHz Wireless
LED
A solid light indicates the 2.4GHz wireless function is
working properly. During the WPS process, this light
will blink.
4
5GHz Wireless
LED
A solid light indicates the 5GHz wireless function is
working properly. During the WPS process, this light
will blink.
5 USB 2.0 A solid light indicates a USB 2.0 device is connected.
6 USB 3.0 A solid light indicates a USB 3.0 device is connected.
LED Behavior
9