Checking the IP Address of the computer being used to
configure the DI-714 Wireless Router
-3-
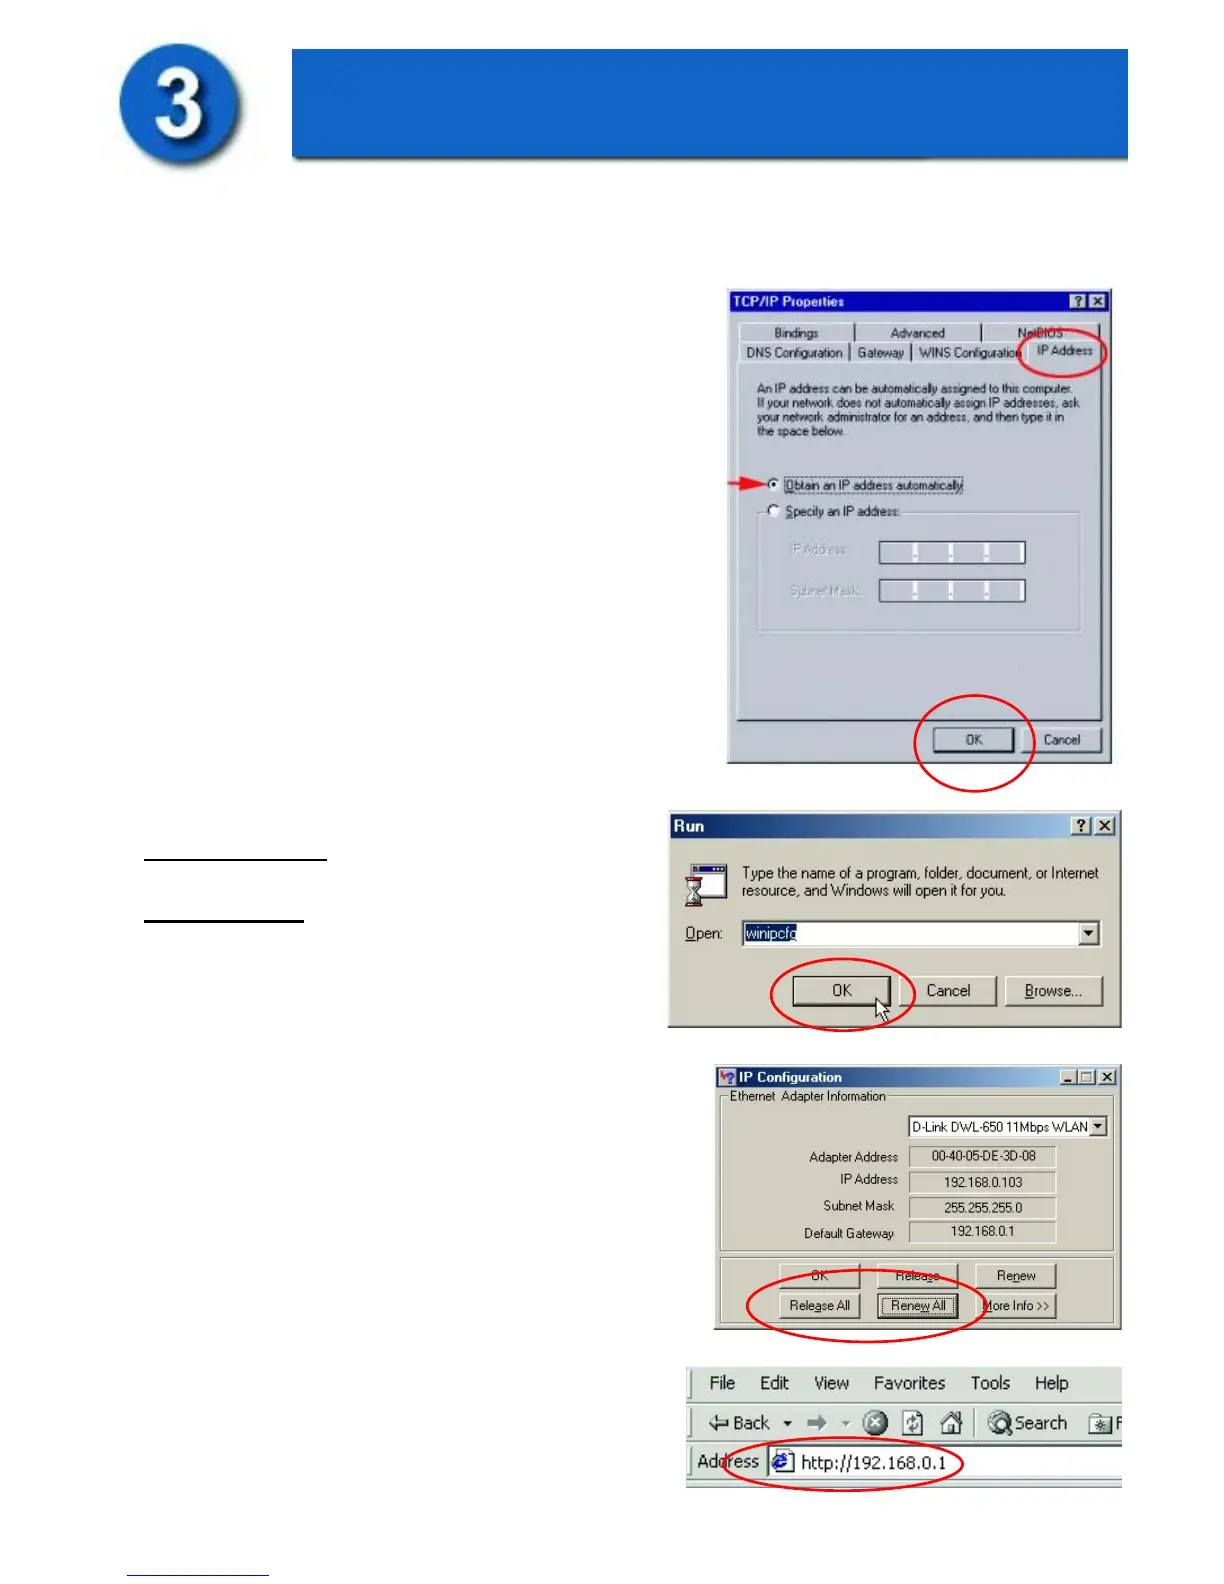
Next, go to Start>Run
For Win98/ME: Type in “winipcfg” and
click “OK.”
For Win2000:
Type “cmd,” then
“ipconfig” and hit “Enter.” Your IP
Address will be displayed. The IP address of
the computer must be between 192.168.0.2
and 192.168.0.254 in order to configure the
router. If it is not, do the following:
Click on the “Release All” and then on the
“Renew All” button to obtain an IP address
from the Broadband router between
192.168.0.100 and 192.168.0.199.
Note: If you are manually assigning a static
IP, please refer to Appendix A.
Open the web browser, and type
192.168.0.1 into the URL address box.
Note: Please disable any proxy server
setting for the web browser.
Installing the DI-714
using the Setup Wizard
Make sure that TCP/IP protocol has been installed in
your computer. Next, set the TCP/IP protocol to
“Obtain an IP Address automatically” by doing the
following:
• Go to Start>Settings
• Select “Control Panel”
• Double-click the “Network” icon
• Select the TCP/IP line that includes the name of
your network adapter card, under the
“Configuration” tab in the “Network” window
• Click on “Properties” in this window
• The window at the right will appear
• Select the “IP Address” tab as shown
• Choose “Obtain an IP address automatically”
• Click “OK”
 Loading...