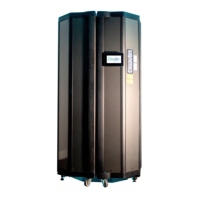
23.2 Unpacking and Assembly
1. Your M Series will arrive in two separate boxes. The larger of the two boxes will contain
the base of the M Series along with all of your accessories and literature. The smaller of
the two boxes will contain the hood for your M Series.
2. With two people, lift the base from its box and place it wherever you intend to use the
device.
Note: Be sure to remove all of the accessories, such as the manual, power cord and
eyewear before discarding the box.
3. Remove the hood from the smaller box and place it on the base with the arched openings
facing forward.
Note: There is a flange on the bottom of the hood that fits over the upper edge of the
fixture. The hood is designed to fit tightly, so it may take some pressure to seat it
properly.
4. Now you will need to electrically connect the M Series hood to the Base of the unit. To
complete this step all you will need to do is locate the electrical cord, extending from the
back of the hood, and plug it into the designated receptacle on the back of the base.
5. The final step of the assembly process is to install the M Series power cord. The power
cord is installed by inserting the male “D” shaped plug into the corresponding female
receptacle located on the back of the device.
6. Once you have installed the power cord, plug the unit into the appropriate wall outlet.
23.3 Special Notes
• The hood lamps have an “ON/OFF” switch so that they can be turned off if desired.
When the switch is in the ON position, the hood lamps will light when the base lamps
turn on.
Note: On combination UVA and UVB units, the hood will always be equipped with
UVA lamps. Regardless of what position the hood lamp switch is in, the UVA lamps in
the hood will not operate when a UVB treatment is in progress.
 Loading...