(3) If the measured axial and radial plays are beyond the limit of wear, replace or repair the
turbocharger.
3) Guide for disassembling/cleaning and checking the turbocharger
First, disassemble the turbocharger from the engine and clean/check it with the oil inlet and
outlet plugged with tape and so on.
4) Precautions for reassembling the turbocharger onto the engine
For reassembly of the turbocharger or handling it after disassembly operation, be sure to
observe the following precautions: Especially, exercise extreme care to prevent foreign mat-
ters from entering the inside of the turbocharger.
(1) Lubricating system
a. Before reassembling the turbocharger onto the engine, inject new oil in the oil inlet port
and lubricate the journal and thrust bearings by rotating them with hand.
b. Clean not only the pipes installed between the engine and oil inlet port but also the oil
outlet pipe and check them for damage or foreign matters.
c. Assemble each joint on oil pipes securely to prevent oil leaks.
(2) Intake system
a. Check the inside of the intake system for foreign matters.
b. Assemble each joint on the intake duct and air cleaner securely to prevent air leaks.
(3) Exhaust system
a. Check the inside of the exhaust system for foreign matters.
b. Be sure to use heat resisting steel bolts and nuts. Do not interchange them with ordinary
steel bolts and nuts when performing reassembly operation. Apply anti-seizure coating
to the bolts and nuts.
c. Assemble each joint on the exhaust pipes securely to prevent gas leaks
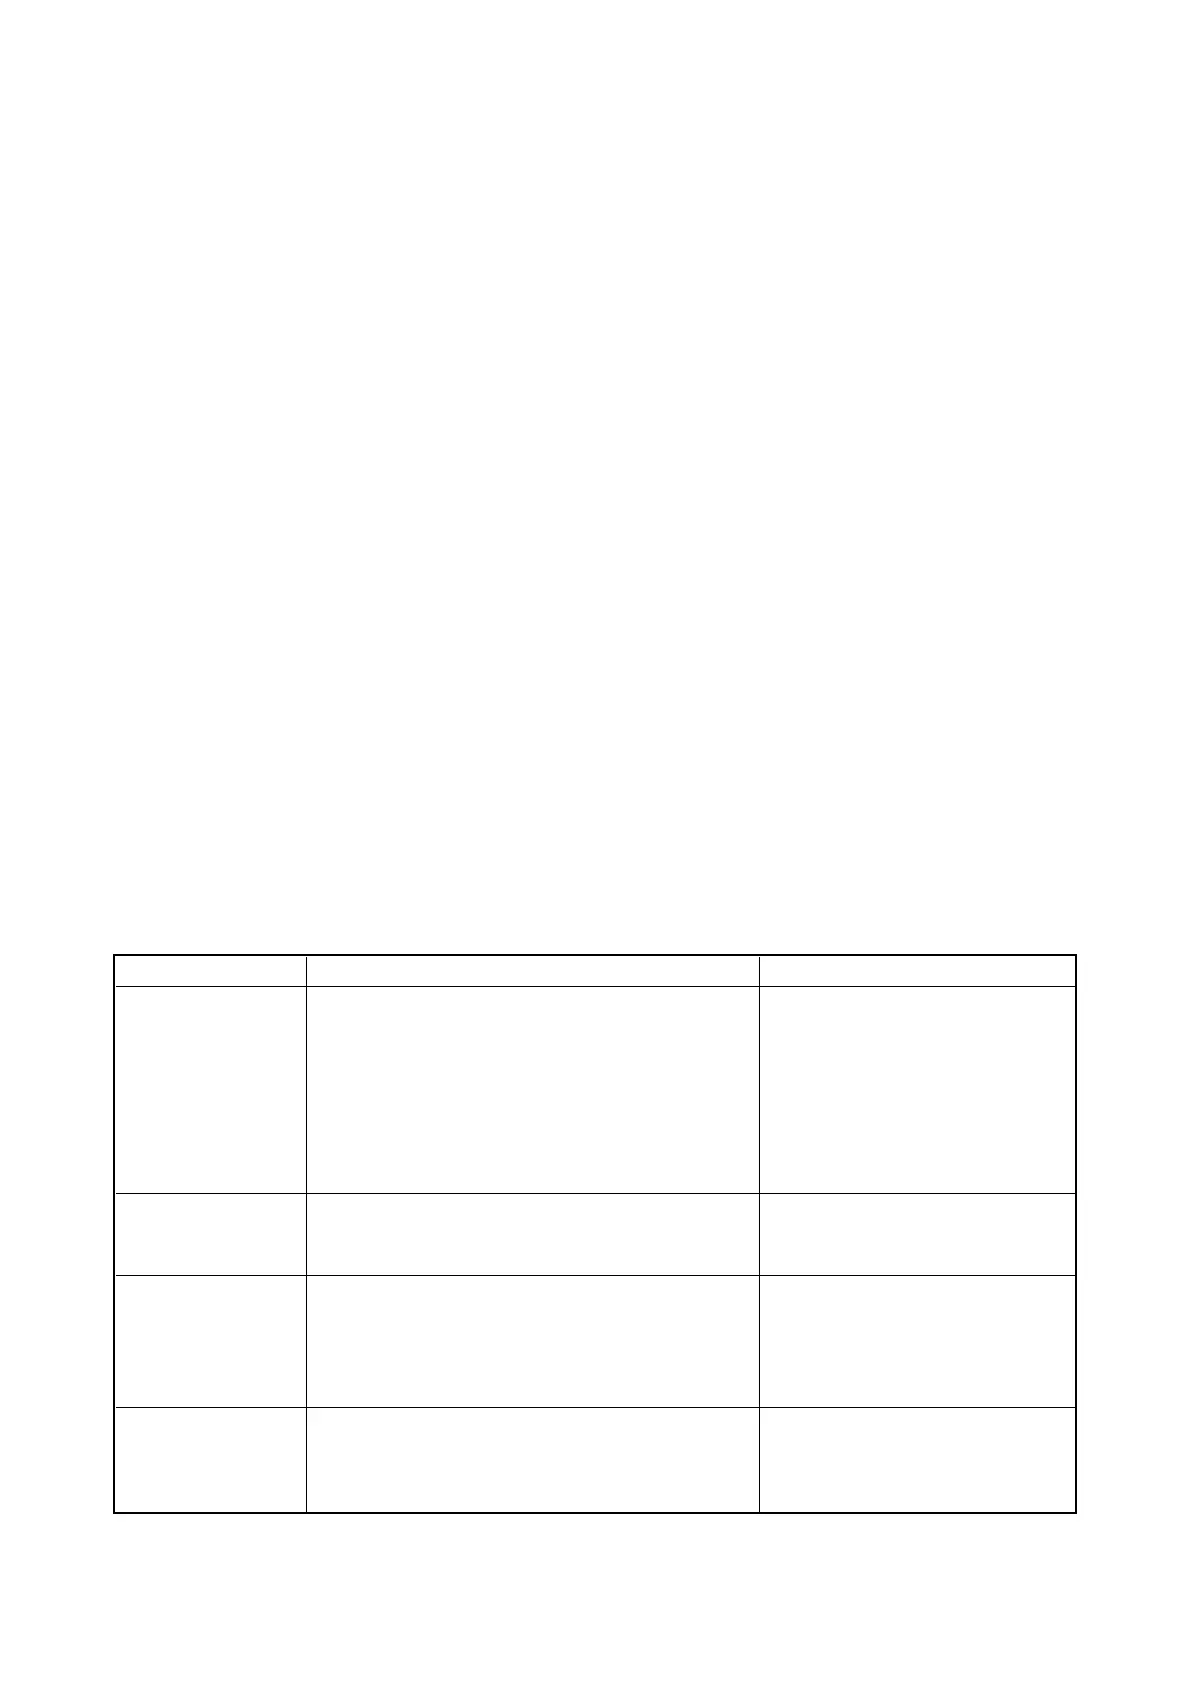
4.4.7. Diagnostics and troubleshooting
- 141 -
Complaints Possible causes Corrections
1. Excessive black 1) Air cleaner element clogged Replace or clean
smoke 2) Restrictions in air duct Check and correct
3) Leakage at intake manifold Check and correct
4) Turbocharger seized up and not rotating Disassemble/repair or replace
5) Turbine blades and compressor blades Disassemble/repair or replace
coming in contact with each other or
damaged
6) Exhaust piping deformed or clogged Check and correct
2. Excessive white 1) Oil leak into turbine and compressor Disassemble/repair or replace
smoke 2) Worn or damaged seal ring due to Disassemble/repair or replace
excessive wear of bearing
3. Low engine 1) Gas leak at each part of exhaust system Check and correct
output 2) Air cleaner element restricted Replace or clean
3) Turbocharger fouled or damaged Disassemble/repair or replace
4) Leakage at discharge port on Check and correct
compressor side
4. Unusual sound 1) Rotor assembly coming in contact Disassemble/repair or replace
or vibration 2) Unbalanced rotation of rotor Disassemble/repair or replace
3) Seized up Disassemble/repair or replace
4) Each joint loosened Check and correct
 Loading...