| 25 |
The washer is recommended to be installed by a professional service engineer.
Installation Guide
- Determine the installation site after discussing
the site structure with the customer.
※ Breast-high location is convenient for installation.
※ Installation and use are convenient with access to water
supply, drainage, and electric outlets.
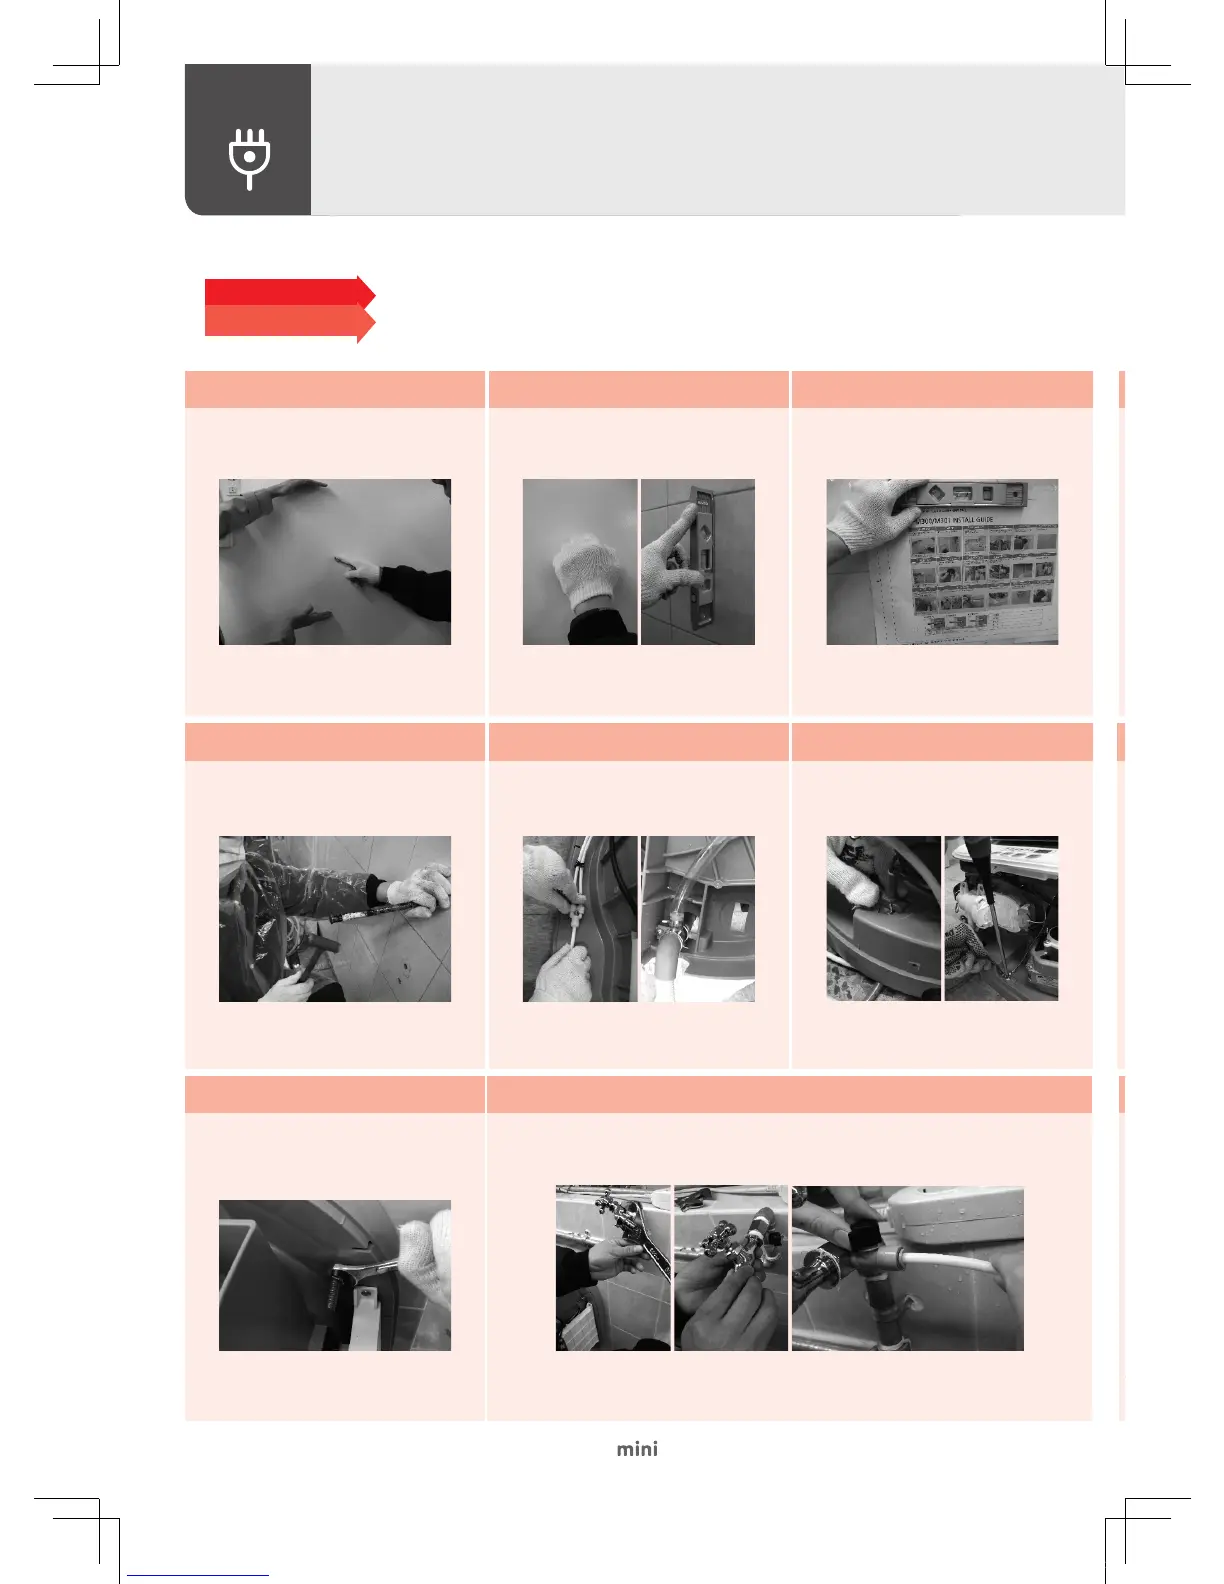
1. Determine the location for installation
- Knock on the wall with your hand to check the
existence of retaining wall inside.
※ Install the washer on an even wall.
2. Inspect wall
- Use a level meter for attachment.
- Attach a guide and mark the hole spot.
※ Attach the manual in consideration of actual product
size.
3. Attach installation instruction manual
- Notch below the marking hole.
- Drill a hole perpendicular to the wall surface.
※ Do not drill a hole on the edge of wall tile.
※ Do not drill a hole right below the faucet.
4-1. Drill a hole through tile
- Set the hammer drill perpendicular to the wall
surface and then drill a hole into the retaining
wall.
※ Follow the instructions on the diameter and depth
specifications for the hole.
※ Remove dirt from inside the hole.
4-2. Drill a hole into the retaining wall
- Insert set anchors into holes.
- Set anchors are included in the product
package.
※ Insert set anchors to the end of holes.
※ The set anchor bolt must be 75mm long or longer above
the wall.
5. Insert set anchors (4 holes)
- Fix set anchors with an anchor hammer.
※ Redo the fixation if the anchor cap protrudes above the
wall surface after fixation.
6. Fix set anchors
- Inject chemical anchor into the fixed set anchors.
- Insert cushion pads on the fixed anchors.
- Attach pads to the wall.
10. Inject chemical anchor and insert cushion pads
- Insert the inlet hose until the elbow makes a snapping sound.
- Connect the clamp inside the synchronous motor after fixing the
drain house to the synchronous motor.
※ Connect hoses properly to prevent leaks.
※ Insert the inlet/drain hoses into the back holes after
connection.
7. Connect inlet and drain hoses
- Connect the power cord as requested by the
customer (upward, downward).
- Attach a connector and fix the grounding wire.
※
Fix the upward power cord tight with clamp cords.
※
Fix the grounding wire with grounding screws.
※
Do not ground multiple grounding wires in a single place.
8. Connect the power cord
- Place hoses in the hole.
※ Prevent the hoses from becoming jammed between the
wall and washer.
9. Organize hoses
- Install the washer on the surface of wall so as
not to create a large gap.
11. Install the washing machine
- Connect the fixing nut (1EA) after inserting the
flat washer (1EA) and spring washer (1EA) and
then connecting a regular nut (1EA).
- Fasten the nut with Ø14 spanner.
※ Excessive fastening of nut may destroy the product or
wall tile.
※ Fixing nut must be fastened tight.
12. Fix the washing machine
Lock the water supply valve Disassemble the water supply valve
Install the branching adapter Branch off the inlet hose
※ Wrap the connection of branching adapter and water supply valve with Teflon tape.
※ Examine whether a water leak occurs after instillation.
13-1. Install the inlet hose - Regular Tap
Lock the water supply valve Disassemble the water supply valve
Install the branching adapter (Install adapters respectively on cold and hot water taps)
Branch off the inlet hose
13-2 Install the inlet hose - Kitchen sink, shower
- Run a test operation to identify any
malfunctions or leaks.
14. Test Operation
Install the washer without plugging in the power cord.
Hot water
For
hot
water
For
cold
water
Cold
water
Before installation
Perform a test run to identify any water leaks or abnormal noise.
After installation