38
NO DISASSEMBLING PROCEDURE NO DISASSEMBLING PROCEDURE
14
36
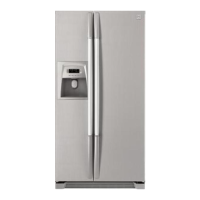
- Separate 2 housings of 10P / 7P
from Front PCB.
(Do not hold only wires to pull out.)
- Unscrew (3 points) to remove Sol Valve.
- Unscrew (2 points) to remove Box
Dispenser Shut.
- Unscrew (1 point) to remove Cover Ice Flap.
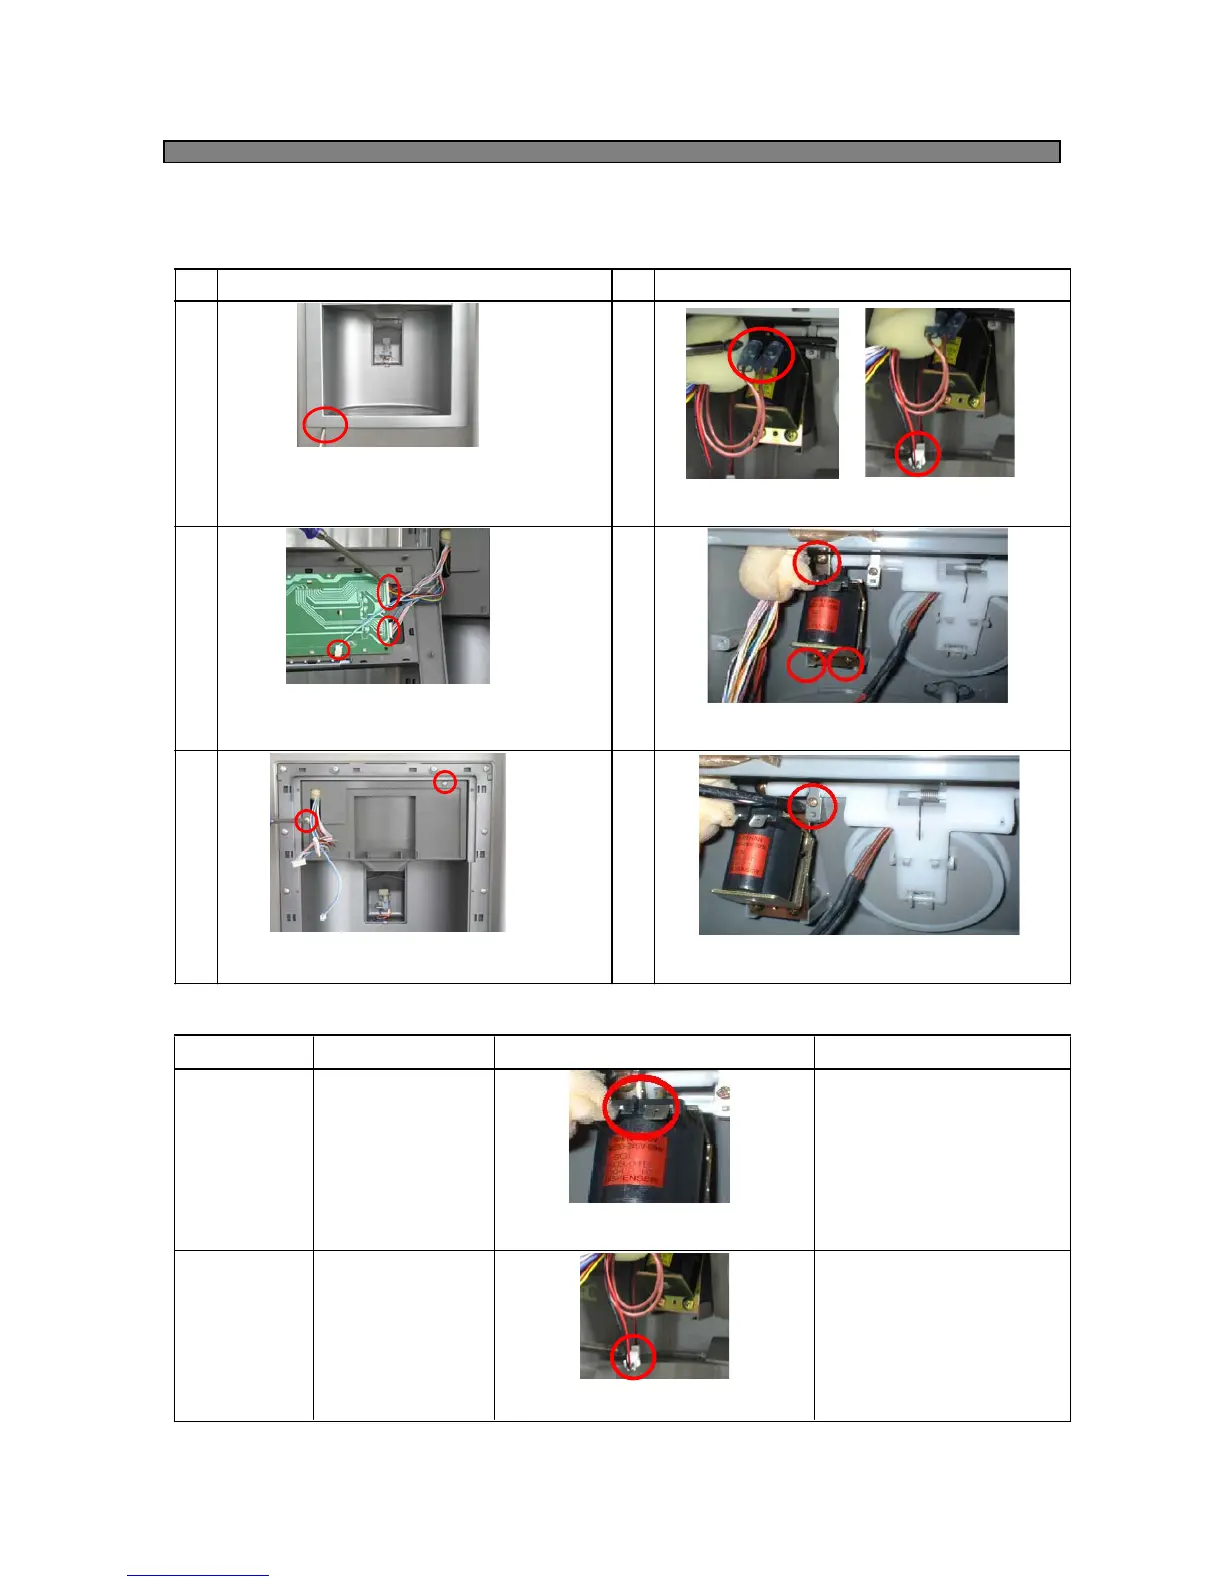
2) How to Check Micro Switch
8-4. Dispenser Solenoid Valve
1) Disassembling Procedure
SPEC. CRITERION
- Good : 215 ohm(+-10%)
(193 ~ 236 ohm)
- DEFECTIVE : 0
Change Sol Valve.
PARTS HOW TO CHECK
- GOOD : 96Ω(±8%)
(88 ~ 104Ω)
- DEFECTIVE ;
Change Flap Heater AS.
- SPEC. NAME
:SOL2003-01B
- VOLTAGE
:220/240V,50Hz
- VOLTAGE
:DC 12V,1.5W
- Check resistance value of
both terminals with a tester.
Dispenser
Sol Valve
Flap Heater
Assembly
- Check resistance value of
both terminals with a tester.
25
- Insert (-) screw driver into bottom left groove
of Cover Dispenser Box. Pull forward with a
snap.(Be careful not to damage cover and
door surface.)
- Separate 2 terminals from Sol Valve and
2P Housings from Cover Ice Flap.