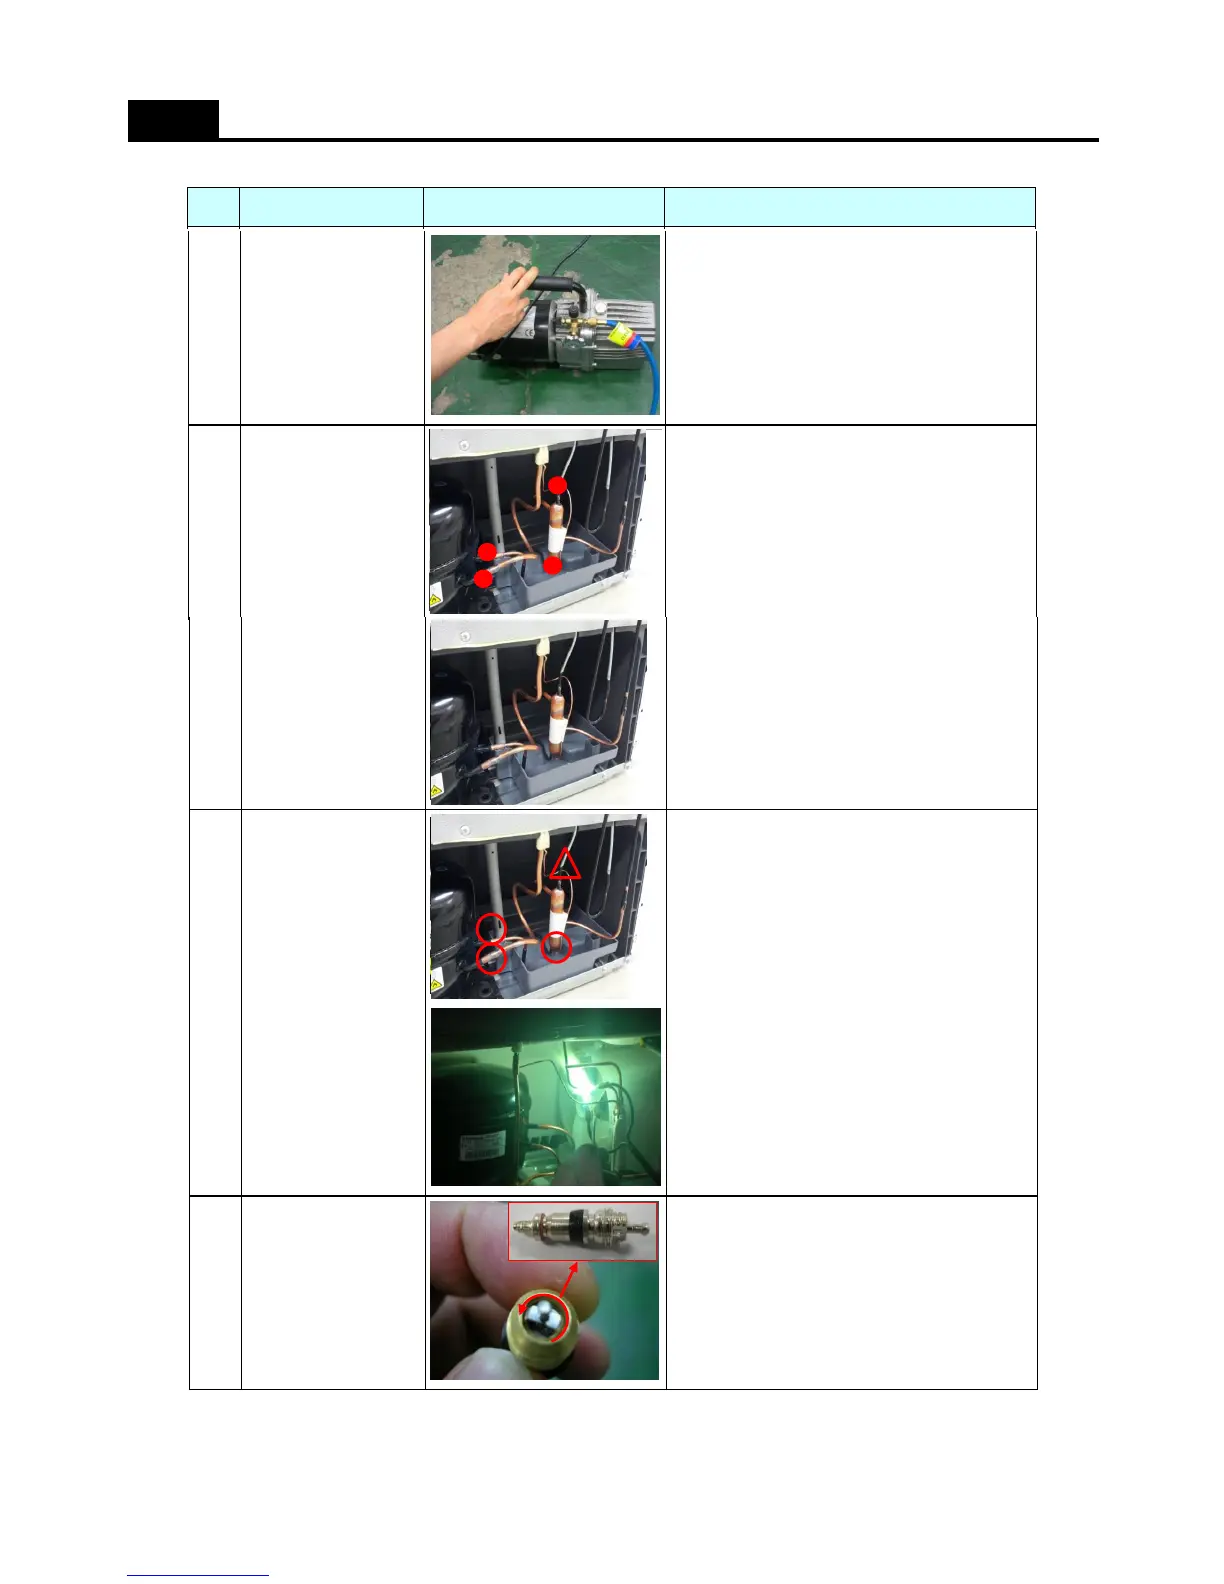
5. How To Charge R-600a Refrigerant
NO.
SVC process Image Details
1. Connect the discharging hose to
the pinch-plier
2. The outlet of discharging hose should
be placed to the outdoor(window)
1. Fix the pinch-plier to the compressor
charging pipe.
2. Pinch-plier should not be moving freely.
※ If that is moving freely, it would cause
fire/explosion as leakage gas in the room.
1. Discharge the R-600a ref. to outdoor.
[Befor connecting the vacuum pump]
※ It should have enough time more than
1. And then, connect the vacuum pump
to the outlet of discharging hose
1. Disassembe the each pipe (Del-pipe,
Suc-pipe, Capi-pipe, Dryer & Hot-pipe)
※Vacum pump should be placed at
the outdoor where is able to clear air easily.
※ It should have enough time
more than 10 minutes to discharge.
※ Caution ; A part is easily damaged
by flame so that disassemly should
be done carefully.
Remov ing the
remaining ref.
Remov ing the
pinch-plier & pipe
Discharging
the R-600a ref.
Connecting
the
pinch-plier
&
discharging
hose
Fix ing
the pinch-plier
&
charging pipe
NO.
SVC process Image Details
1. Change the comp. & dryer.
※ You should check the comp. spec.
and assemble correctly.
1. Weld the each pipe.
※ O Copper-Copper welding - 5% rod
△ Copper-Steel welding - 35% rod
1. Decap the couplig pipe cap and
disassemble the vlave ass'y.
※ If you don't disassemble, the coupling
rubber would be melted.
1. Weld after inserting the coupling pipe
to the compressor.
※ Use the wet cloth for preventing the
other part of machinery-room from damage.
Disassembly
of charging valv e
(Coupling pipe)