This document is a Quick Start Guide for a Bullet Network Camera, providing essential information for its installation, configuration, and maintenance.
Function Description
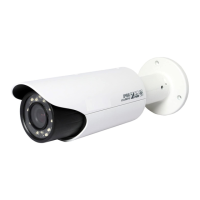
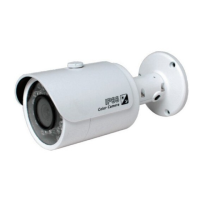
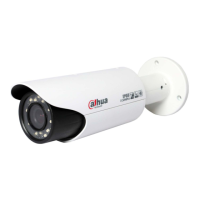
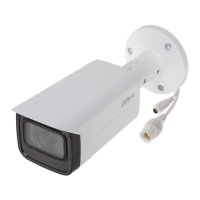
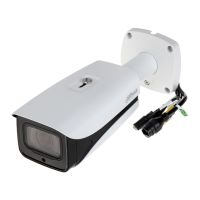
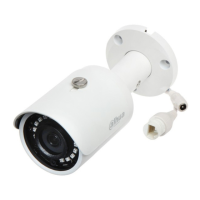
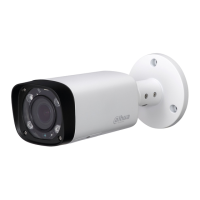
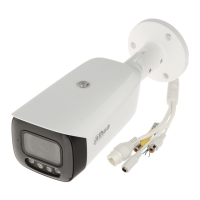
The Bullet Network Camera is designed for surveillance and monitoring, capturing video and potentially audio signals. It supports network connectivity, allowing for remote access and management via a web interface. The camera can be integrated into a larger security system through its alarm input/output ports, enabling it to trigger or respond to external alarm devices. Certain models offer Power over Ethernet (PoE) for simplified power and data transmission over a single cable. It is suitable for both indoor and outdoor use, with optional waterproof connectors for outdoor installations.
Important Technical Specifications
- Power Input: 12V DC power input. Specific models may support PoE (Power over Ethernet).
- Network Connectivity: Ethernet port for network connection.
- Alarm I/O: Includes alarm signal input and output ports. The number of I/O ports may vary by device.
- Alarm Input: Collects logic "1" when the input signal is connected to +3V to +5V or idling, and logic "0" when grounded.
- Alarm Output: Open-drain output, working in two modes:
- Mode A (Level Application): Outputs high and low levels, requiring external pull-up resistance (10K Ohm typical). Maximum external pull-up level is 12V, maximum port current is 300mA. Default output signal is high-level, switching to low-level upon alarm (output low-level voltage < 0.8V if operating current < 300mA).
- Mode B (Switch Application): Used to drive external circuits. Maximum voltage is 12V, maximum current is 300mA. For voltages higher than 12V, an additional electric relay is required.
- Audio I/O (Select Models):
- Audio Input: Connects to sound pickups to receive audio signals.
- Audio Output: Connects to speakers to output audio signals.
- SD Card Slot (Select Models): For local storage, requiring power disconnection before installation or removal.
- Dimensions: Approximately 288.4 mm (11.35 in) length, 94.4 mm (3.72 in) width, and 84.7 mm (3.33 in) height. Mounting base diameter is 90.4 mm (3.56 in) with a 70.0 mm (2.76 in) inner circle and 3-Ø4.7 mm (Ø0.19 in) mounting holes.
- Operating Environment: Designed to operate within specified humidity and temperature ranges. Avoid strong light exposure, damp/dusty/extremely hot/cold environments, strong electromagnetic radiation, and unstable lighting.
- Safety Standards: Conforms to Safety Extra Low Voltage (SELV) standard and Limited Power Source (LPS) requirement according to IEC60950-1.
Usage Features
- Device Initialization: Required for first-time use and after a device reset. This process involves setting a strong password and configuring network settings.
- IP Address Modification: Allows for batch modification of IP addresses for multiple devices, provided they share the same login password. Supports both Static and DHCP modes for IP address assignment.
- Web Interface Access: Accessible via an IE browser by entering the device's IP address. A plugin download and installation may be required for the first-time login.
- Alarm Configuration: Alarm input and output settings can be configured through the web interface, allowing users to define how the camera responds to or triggers alarms.
- Lens Angle Adjustment: The camera's lens angle can be physically adjusted after installation to achieve the desired field of view.
- Waterproof Connector (Optional): For outdoor installations, a waterproof connector can be installed to protect cable joints from short circuits and water damage.
- Password Security: Emphasizes the use of strong passwords (8-32 characters, combination of letters, numbers, and symbols) and regular password modification. ONVIF passwords may need manual updates for older firmware versions.
Maintenance Features
- Firmware Upgrades: Regular firmware upgrades are recommended to ensure optimal performance and security.
- Cleaning:
- Device Body: Clean with a soft dry cloth. For stubborn stains, use a cloth moistened with mild detergent. Avoid volatile solvents (alcohol, benzene, diluent) and strong, abrasive detergents.
- Dome Cover (Optical Component): Do not touch or wipe directly with hands. For dust, grease, or fingerprints, wipe gently with moistened oil-free cotton with diethyl or a soft cloth. An air blower can also be used for dust removal.
- Image Sensor (CMOS): Do not touch directly. Remove dust and dirt with an air blower or gently wipe with a soft cloth moistened with alcohol.
- Desiccant Replacement (Select Models): If condensed fog appears on the lens after unpacking or if the desiccant turns green, contact after-sale service for replacement.
- Lightning Protection: Recommended to use the device with a lightning arrester to improve protection.
- Grounding: Recommended to ground the device for enhanced reliability.
- Professional Installation and Maintenance: Emphasizes that installation and maintenance should be performed by professional engineers using standard components and accessories.
- Troubleshooting: If the manual (in PDF format) cannot be opened, upgrade the reader software or try other mainstream reader software. For any problems during use, contact the supplier or customer service.