8 Technical data
Installation manual
24
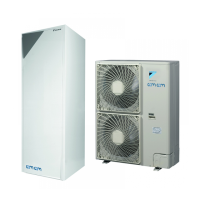
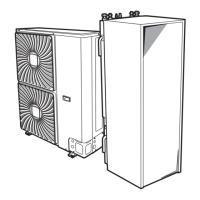
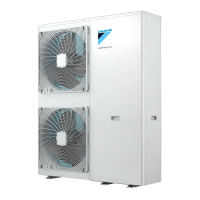
EHVH04+08S23DAV
Daikin Altherma – Low temperature split
4P499571-1D – 2018.11
8.2 Wiring diagram: Indoor unit
See the internal wiring diagram supplied with the unit (on the inside of the indoor unit switch box cover). The abbreviations used are listed
below.
Notes to go through before starting the unit
English Translation
Notes to go through before
starting the unit
Notes to go through before
starting the unit
X1M Main terminal
X2M Field wiring terminal for AC
X3M Backup heater terminal
X5M Field wiring terminal for DC
X8M Anti-legionella heater power
supply terminal
Earth wiring
Field supply
Several wiring possibilities
Option
Not mounted in switch box
Wiring depending on model
PCB
Note 1: Connection point of the
power supply for the anti-
legionella heater should be
foreseen outside the unit.
Note 1: Connection point of the
power supply for the anti-
legionella heater should be
foreseen outside the unit.
Optional backup heater power
supply
Optional backup heater power
supply
1N~, 230 V, 6 kW 1N~, 230V, 6kW
3N~, 400 V, 6 kW 3N~, 400V, 6kW
User installed options User installed options
LAN adapter LAN adapter
Backup heater Backup heater
Remote user interface User interface used as room
thermostat
Ext. indoor thermistor External indoor thermistor
Ext outdoor thermistor External outdoor thermistor
Digital I/O PCB Digital I/O PCB
Demand PCB Demand PCB
Main LWT Main leaving water temperature
On/OFF thermostat (wired) On/OFF thermostat (wired)
On/OFF thermostat (wireless) On/OFF thermostat (wireless)
Ext. thermistor External thermistor
Heat pump convector Heat pump convector
Add LWT Additional leaving water
temperature
On/OFF thermostat (wired) On/OFF thermostat (wired)
On/OFF thermostat (wireless) On/OFF thermostat (wireless)
Ext. thermistor External thermistor
Heat pump convector Heat pump convector
Position in switch box
English Translation
Position in switch box Position in switch box
Legend
A1P Main PCB
A2P * On/OFF thermostat (PC=power circuit)
A3P * Heat pump convector
A4P * Digital I/O PCB
A8P * Demand PCB
A9P Status indicator
A10P MMI (=user interface connected to the
indoor unit) – Power supply unit PCB
A11P MMI (=user interface connected to the
indoor unit) – Main PCB
A12P MMI display PCB
A13P * LAN adapter
A14P * User interface used as room thermostat –
PCB
A15P * Receiver PCB (wireless On/OFF thermostat)
B1L Flow sensor
B1PR Refrigerant pressure sensor
B1PW Water pressure sensor
CN* (A4P) * Connector
DS1(A8P) * DIP switch
F2B # Overcurrent fuse anti-legionella heater
F2T Thermal fuse anti-legionella heater
F1U, F2U (A4P) * Fuse 5A 250V for digital I/O PCB
FU1 (A1P) Fuse T 5A 250V for PCB
FU2 (A10P) Fuse T 1.6A 250V for PCB
K3M Contactor anti-legionella heater
K*R (A4P) Relay on PCB
M1P Main supply pump
M2P # Domestic hot water pump
M2S # 2-way valve for cooling mode
M3S 3-way valve for floorheating/domestic hot
water
P1M MMI display
PC (A15P) * Power circuit
PHC1 (A4P) * Optocoupler input circuit
Q2L Thermal protector anti-legionella heater
Q4L # Safety thermostat
Q*DI # Earth leakage circuit breaker
R1H (A2P) * Humidity sensor
R1T (A1P ) Outlet water heat exchanger thermistor
R1T (A2P) * Ambient sensor On/OFF thermostat
R1T (A14P) * Ambient sensor user interface
R2T (A2P) * External sensor (floor or ambient)
R3T Refrigerant liquid side thermistor
R4T Inlet water thermistor
R5T, R8T Domestic hot water thermistor
R6T * External indoor or outdoor ambient
thermistor
S1S # Preferential kWh rate power supply contact
S2S # Electrical meter pulse input 1
S3S # Electrical meter pulse input 2
S6S~S9S * Digital power limitation inputs
SS1 (A4P) * Selector switch
SW1~2 (A12P) Turn buttons
 Loading...