3 | Components
Service manual
146
EBLA09~16DA + EDLA09~16DA
Daikin Altherma 3 M
ESIE20-06A – 2021.03
3.8 Compressor thermal protector
3.8.1 Checking procedures
To perform a mechanical check of the compressor thermal protector
Prerequisite: Stop the unit operation via the user interface.
Prerequisite: Turn OFF the respective circuit breaker.
Prerequisite: Remove the required plate work, see "3.17Plate work"[4230].
Prerequisite: Remove the compressor insulation.
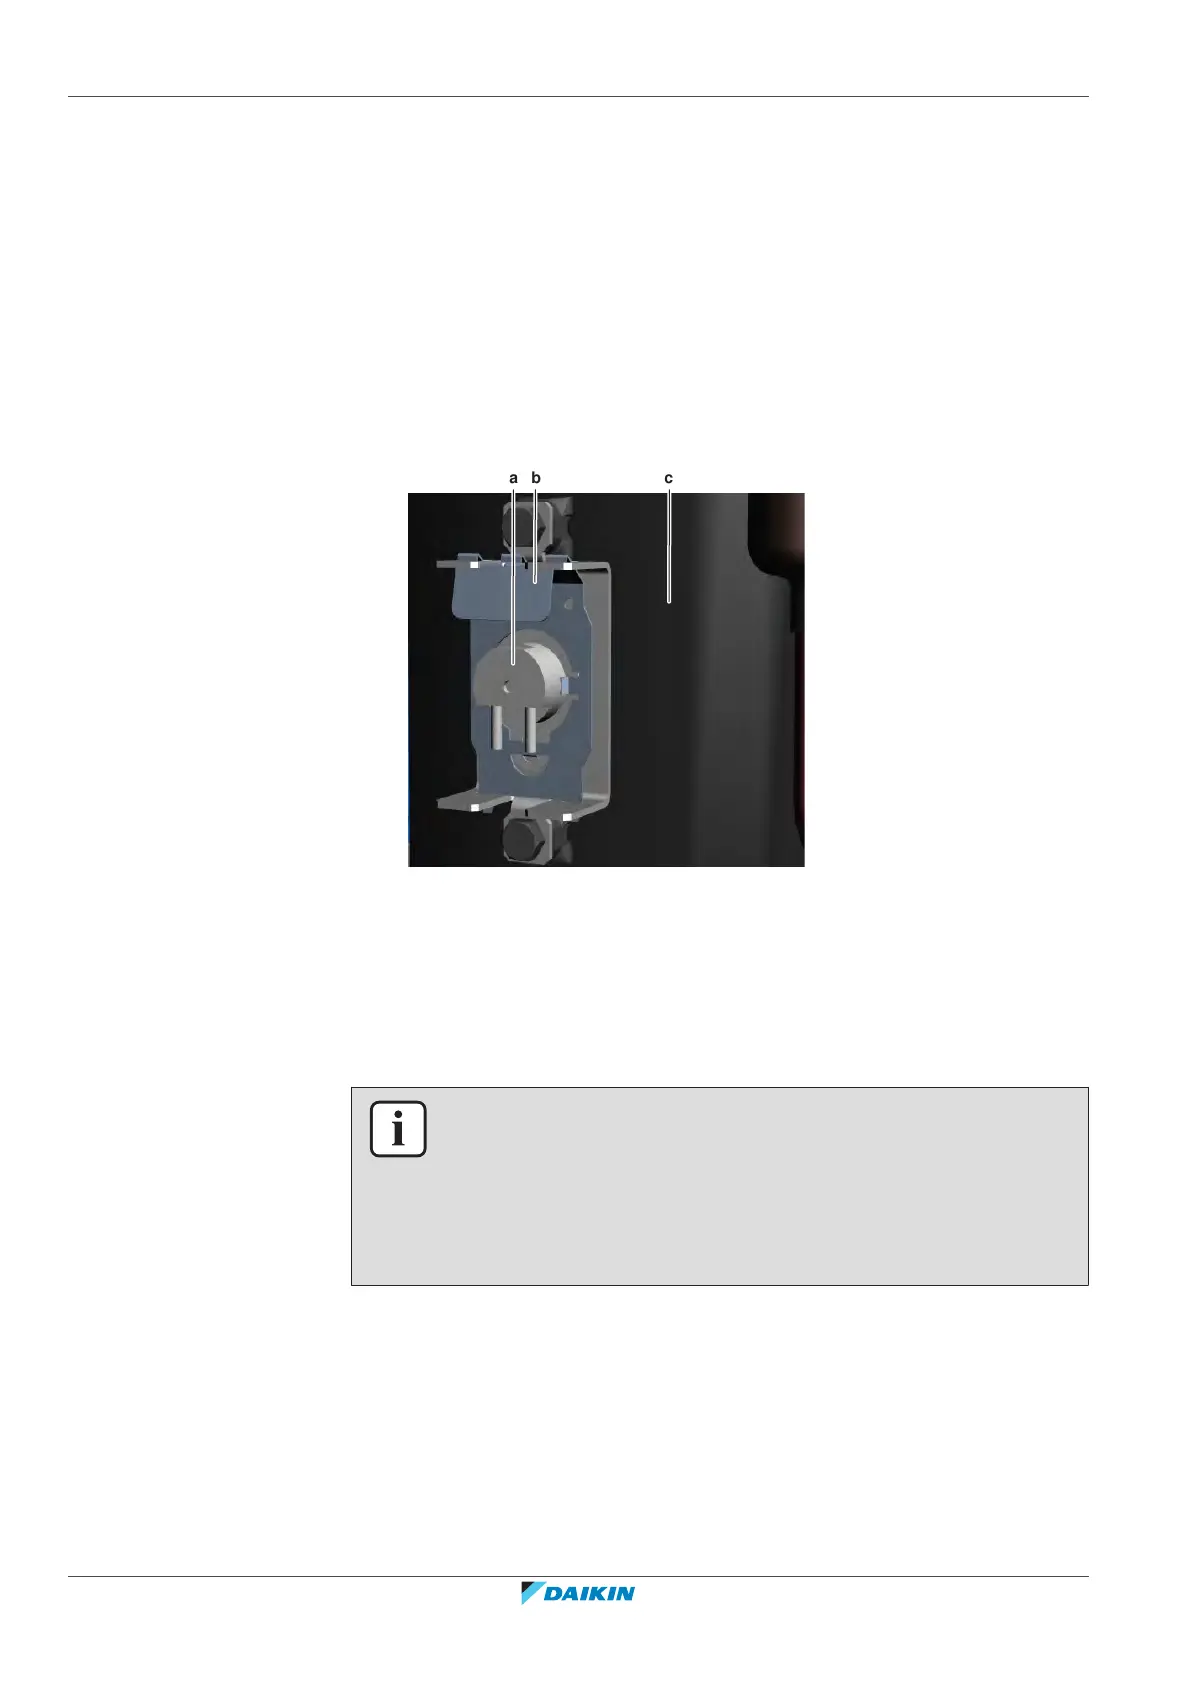
1 Remove the compressor thermal protection with bracket from the
compressor.
a Compressor thermal protector
b Bracket
c Compressor
2 If in doubt, measure the temperature of the compressor thermal protection.
Result: The temperature MUST be below 104°C.
3 Using a hot air gun, carefully heat the compressor thermal protection to
slightly above 132°C (compressor thermal protection trips at 126~132°C).
INFORMATION
Make sure that the wiring between the compressor thermal protector connector and
the connector on the PCB is properly connected and NOT damaged (check
continuity), see "6.2Wiring diagram"[4314].
For single phase units ONLY: Make sure that the high pressure switch (which is wired
in series with the compressor thermal protector) functions correctly, see
"3.11.1Checking procedures"[4157].
4 Disconnect the compressor thermal protector from the intermediate
connector and measure the resistance between pins 1‑2.
Result: The contact MUST be open (measured resistance = OL).
5 Let the compressor thermal protection cool down below 104°C (reset
temperature is 104~116°C).
6 Again measure the resistance between the pins 1‑2 of the connector of the
compressor thermal protector.
Result: The contact MUST be closed (measured resistance = 0Ω).