3 | Components
Service manual
150
EBLA09~16DA + EDLA09~16DA
Daikin Altherma 3 M
ESIE20-06A – 2021.03
Does the expansion valve open? Action
No Replace the expansion valve body, see
"3.9.2Repair procedures"[4152].
To perform an electrical check of the expansion valve
1 First perform a mechanical check of the expansion valve, see "3.9.1Checking
procedures"[4149].
2 Disconnect the electrical connector of the expansion valve coil from the
appropriate PCB and measure the resistance of all windings (between the pins
of each phase (wire) and the common wire) using a multi meter. All
measurements MUST be approximately the same.
Name Symbol Location (PCB) Connector Winding
resistance
Main
expansion
valve
Y1E Main X21A 46±3Ω
Injection
expansion
valve
Y3E Main X22A 46±3Ω
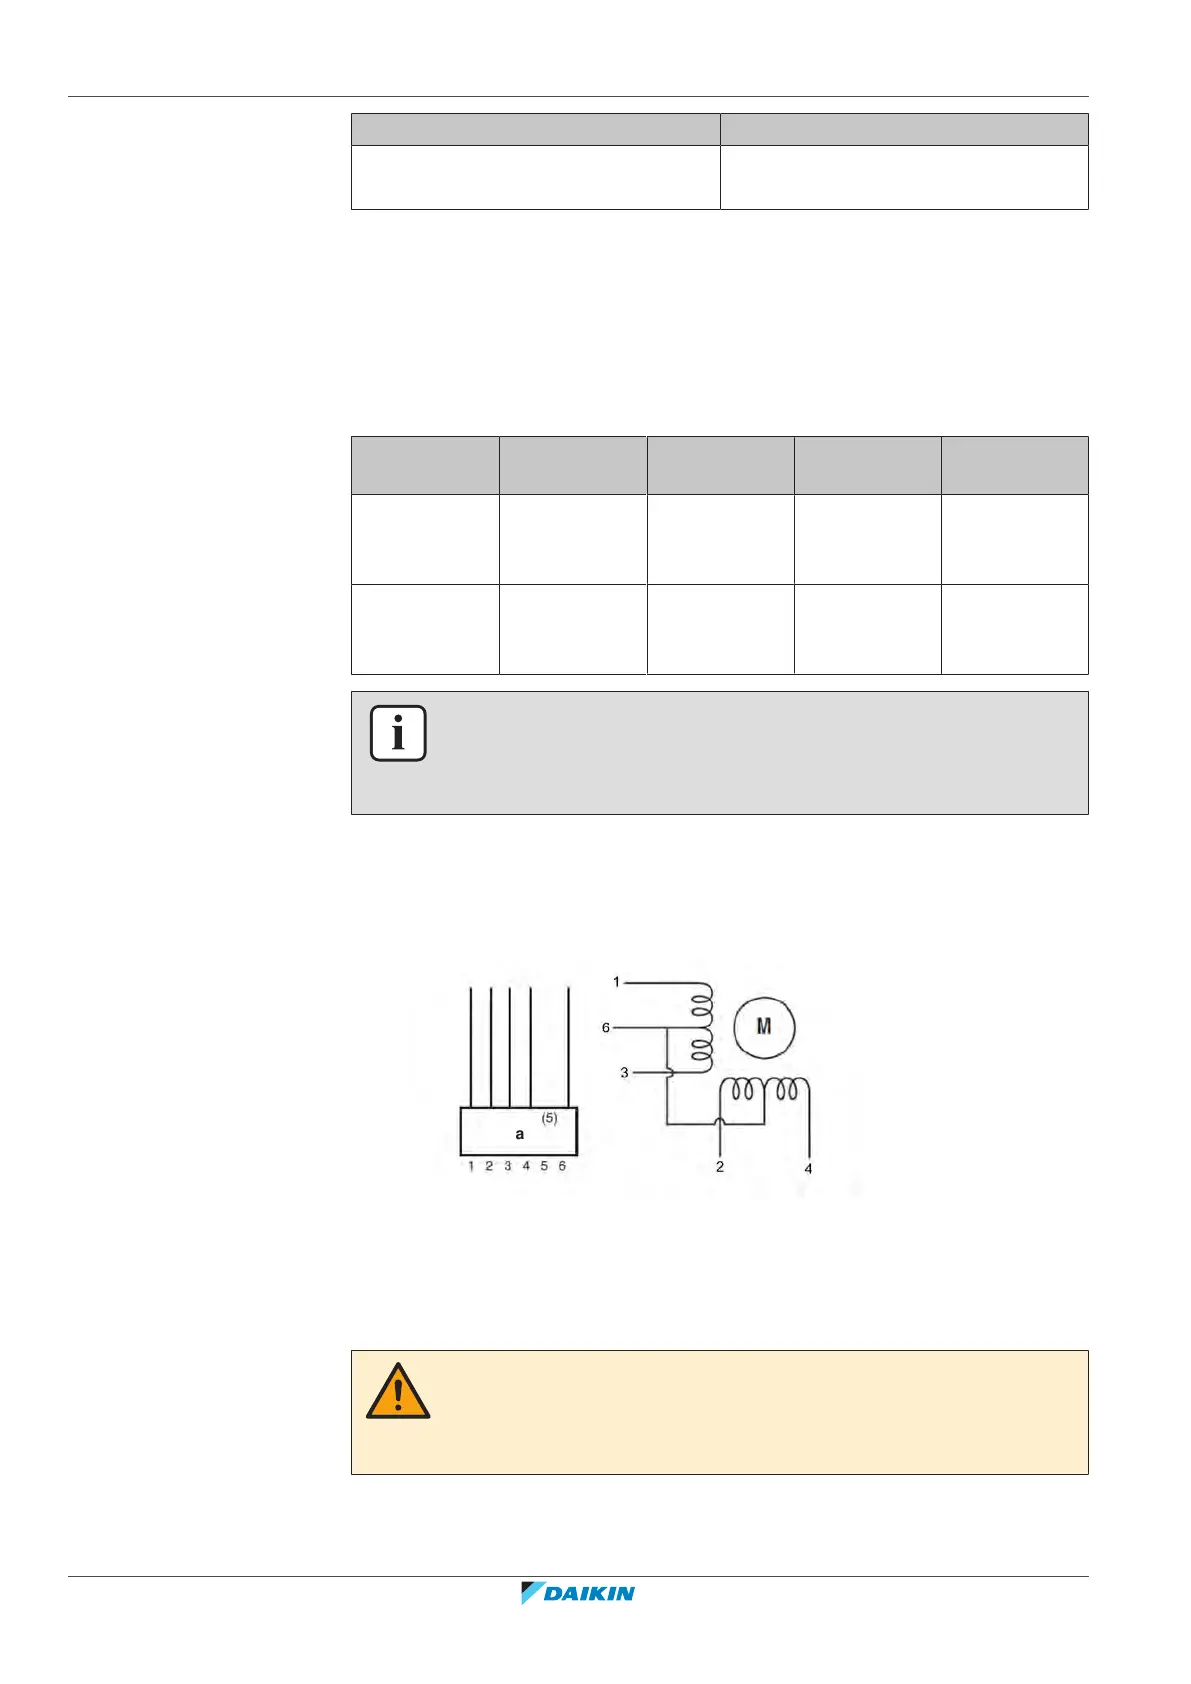
INFORMATION
Below is an example of the resistance measurements in which the common wire is
connected to pin 6 of the expansion valve coil connector. Connections may differ
according to the type of expansion valve.
▪ Connector pin 1‑6,
▪ Connector pin 2‑6,
▪ Connector pin 3‑6,
▪ Connector pin 4‑6.
a Connector
3 Check the insulation resistance of the coil by measuring the resistance
between the pins of each phase (1, 2, 3, 4) and GND on the unit.
Result: None of the measurements should be short‑circuit.
WARNING
When reconnecting a connector to the PCB, make sure to connect it on the correct
location and do NOT apply force, as this may damage the connector or connector
pins of the PCB.