7 | Installation
Installer reference guide
85
ERGA04~08DAV3(A) + EHVH/X04+08S18+23DA/DJ3V+6V+9W7
Daikin Altherma 3 R F
4P618947-1 – 2020.03
NOTICE
▪ Connect the vacuum pump to the service port of the gas stop valve.
▪ Make sure that the gas stop valve and liquid stop valve are firmly closed before
performing the leak test or vacuum drying.
7.6.3 To check for leaks
NOTICE
Do NOT exceed the unit's maximum working pressure (see "PS High" on the unit
name plate).
NOTICE
Make sure to use a recommended bubble test solution from your wholesaler. Do not
use soap water, which may cause cracking of flare nuts (soap water may contain salt,
which absorbs moisture that will freeze when the piping gets cold), and/or lead to
corrosion of flared joints (soap water may contain ammonia which causes a corrosive
effect between the brass flare nut and the copper flare).
1 Charge the system with nitrogen gas up to a gauge pressure of at least
200kPa (2bar). It is recommended to pressurize to 3000kPa (30bar) in order
to detect small leaks.
2 Check for leaks by applying the bubble test solution to all connections.
3 Discharge all nitrogen gas.
7.6.4 To perform vacuum drying
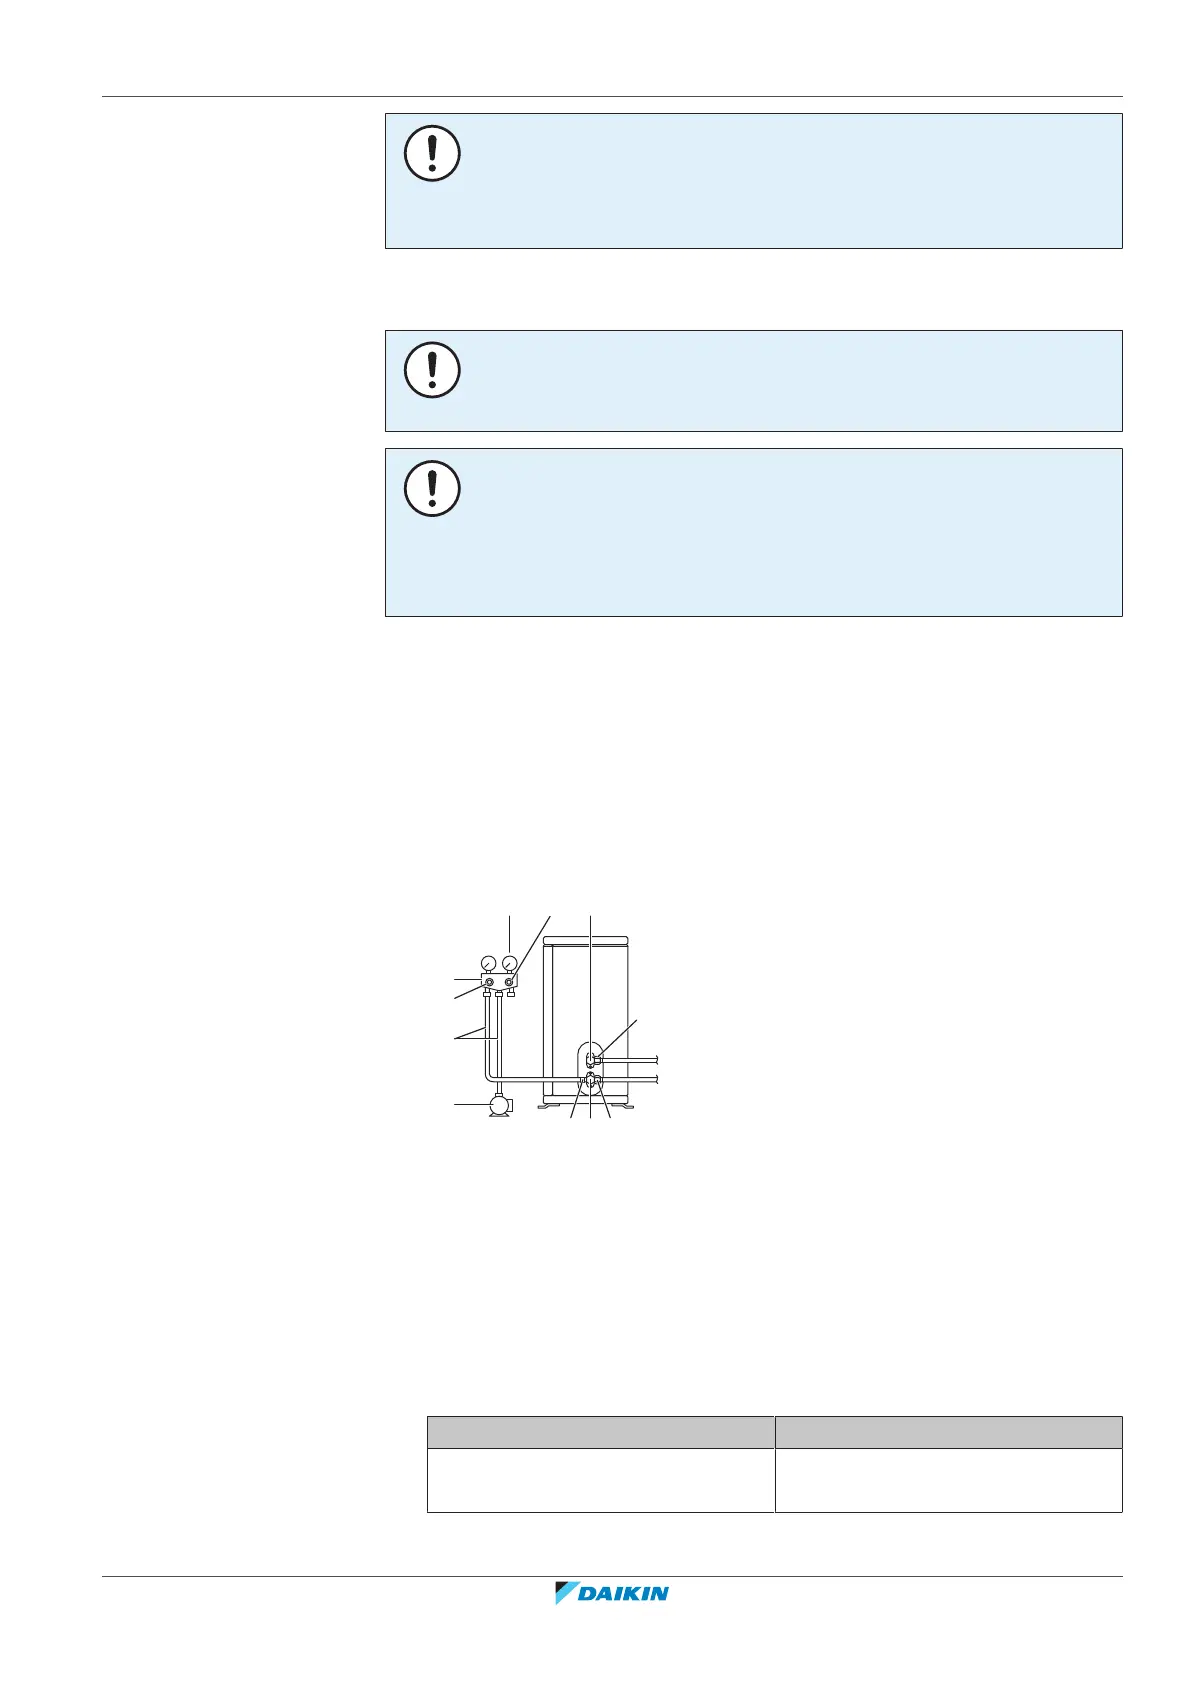
Connect the vacuum pump and manifold as follows:
a Pressure meter
b Gauge manifold
c Low pressure valve (Lo)
d High-pressure valve (Hi)
e Charging hoses
f Vacuum pump
g Service port
h Valve lids
i Gas stop valve
j Liquid stop valve
1 Vacuum the system until the pressure on the manifold indicates −0.1 MPa
(−1bar).
2 Leave as is for 4-5minutes and check the pressure:
If the pressure… Then…
Does not change There is no moisture in the system.
This procedure is finished.
 Loading...