9 | Electrical installation
Installer reference guide
136
ERGA04~08EA + EHVH04+08SU18+23EA
Daikin Altherma 3 R F
4P629090-1A – 2021.11
A
X5M.4
X5M.3
S4S
X5M.10
X5M.9
S10S
X5M.6
X5M.5
S11S
2
1
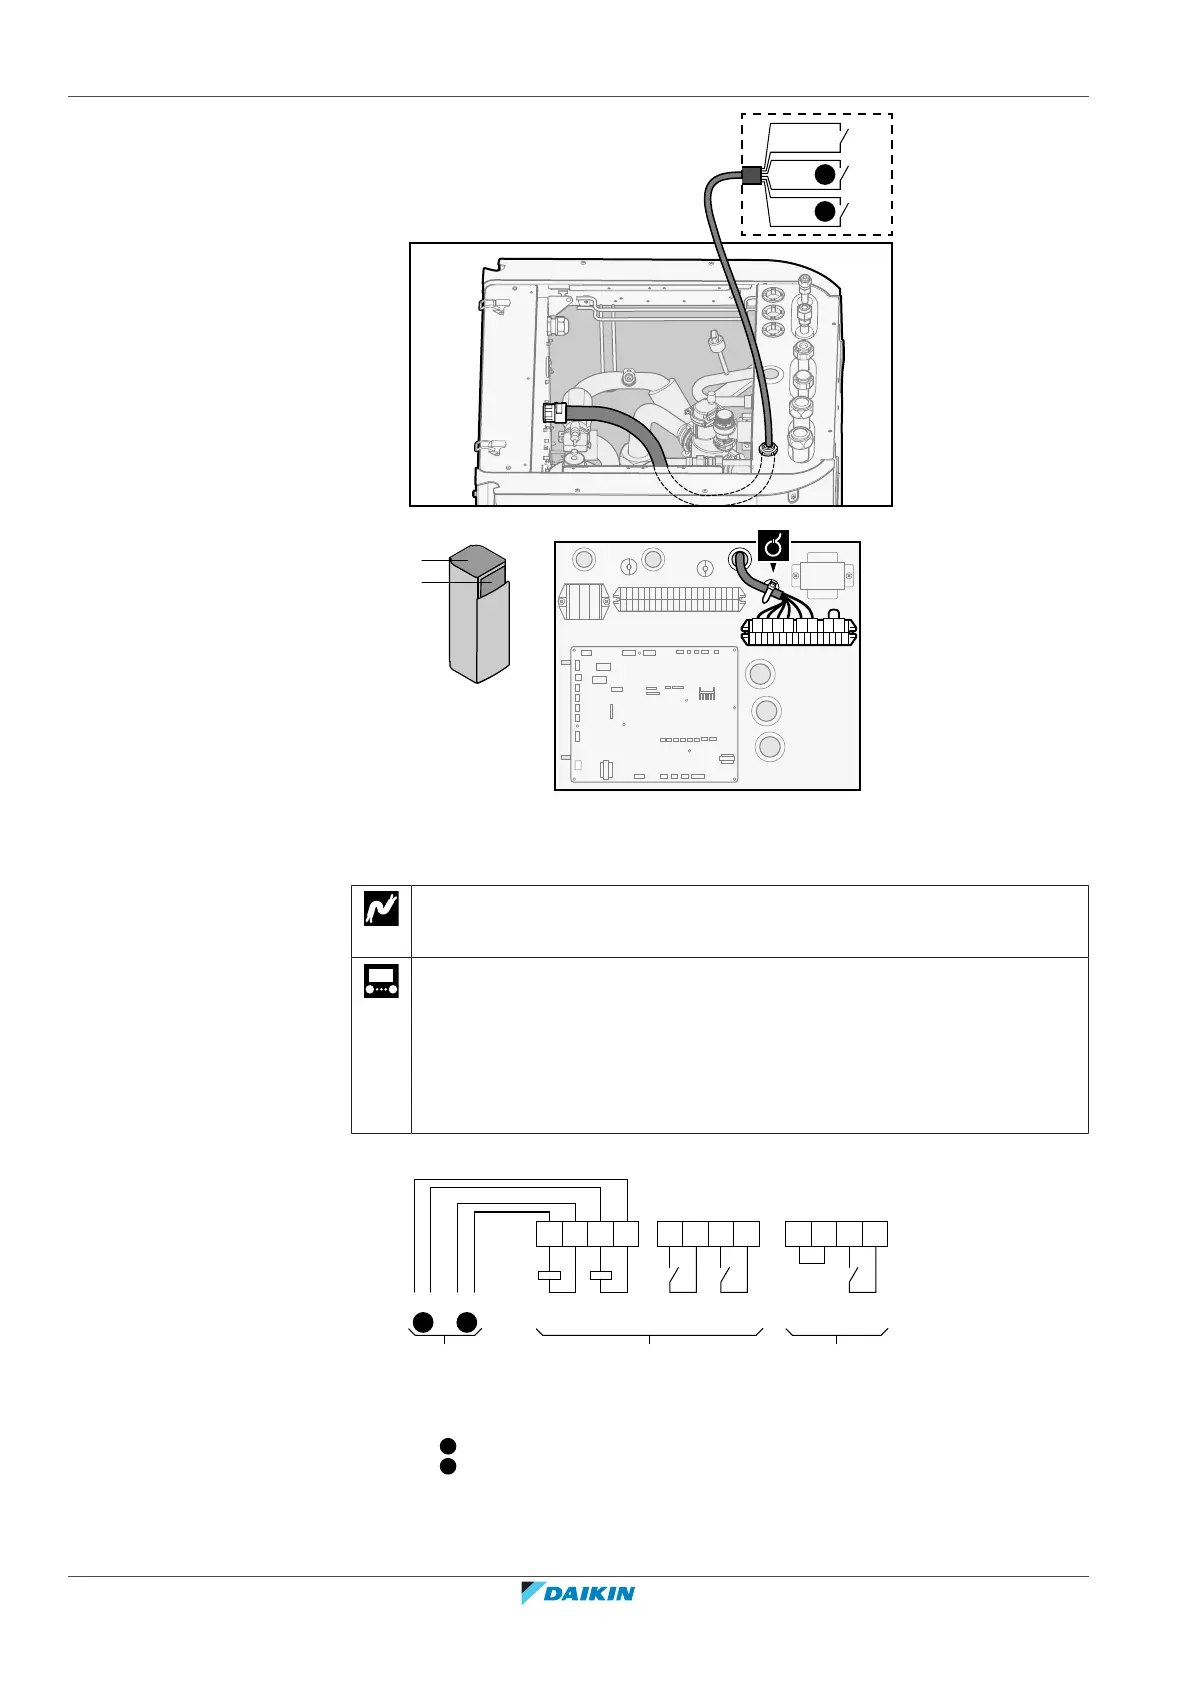
3 Fix the cables with cable ties to the cable tie mountings.
In case of high voltage Smart Grid contacts
Wires (Smart Grid pulse meter): 0.5mm²
Wires (high voltage Smart Grid contacts): 1mm²
[9.8.4]=3 (Benefit kWh power supply = Smart grid)
[9.8.5] Smart grid operation mode
[9.8.6] Allow electrical heaters
[9.8.7] Enable room buffering
[9.8.8] Limit setting kW
The wiring of the Smart Grid in case of high voltage contacts is as follows:
S4S
34
X5MX5M
1314
K2AK1A
56910
K1ALNL
STEP 1 Smart Grid relay kit installation
STEP 2 Low voltage connections
STEP 3 High voltage connections
High voltage Smart Grid contact 1
High voltage Smart Grid contact 2
a, b Coil sides of relays
c, d Contact sides of relays
e Jumper (factory-mounted). If you also connect a safety thermostat (Q4L), replace
the jumper with the safety thermostat wires.



 To Next Page