8 English
5. INDOOR UNIT INSTALLATION
It may be easier to attach accessory parts before installing the indoor unit. Therefore, please also
read the instruction manuals which are provided with the accessory parts.
As for the parts to be used for installation work, be sure to use the provided accessories and specified parts
designated by our company.
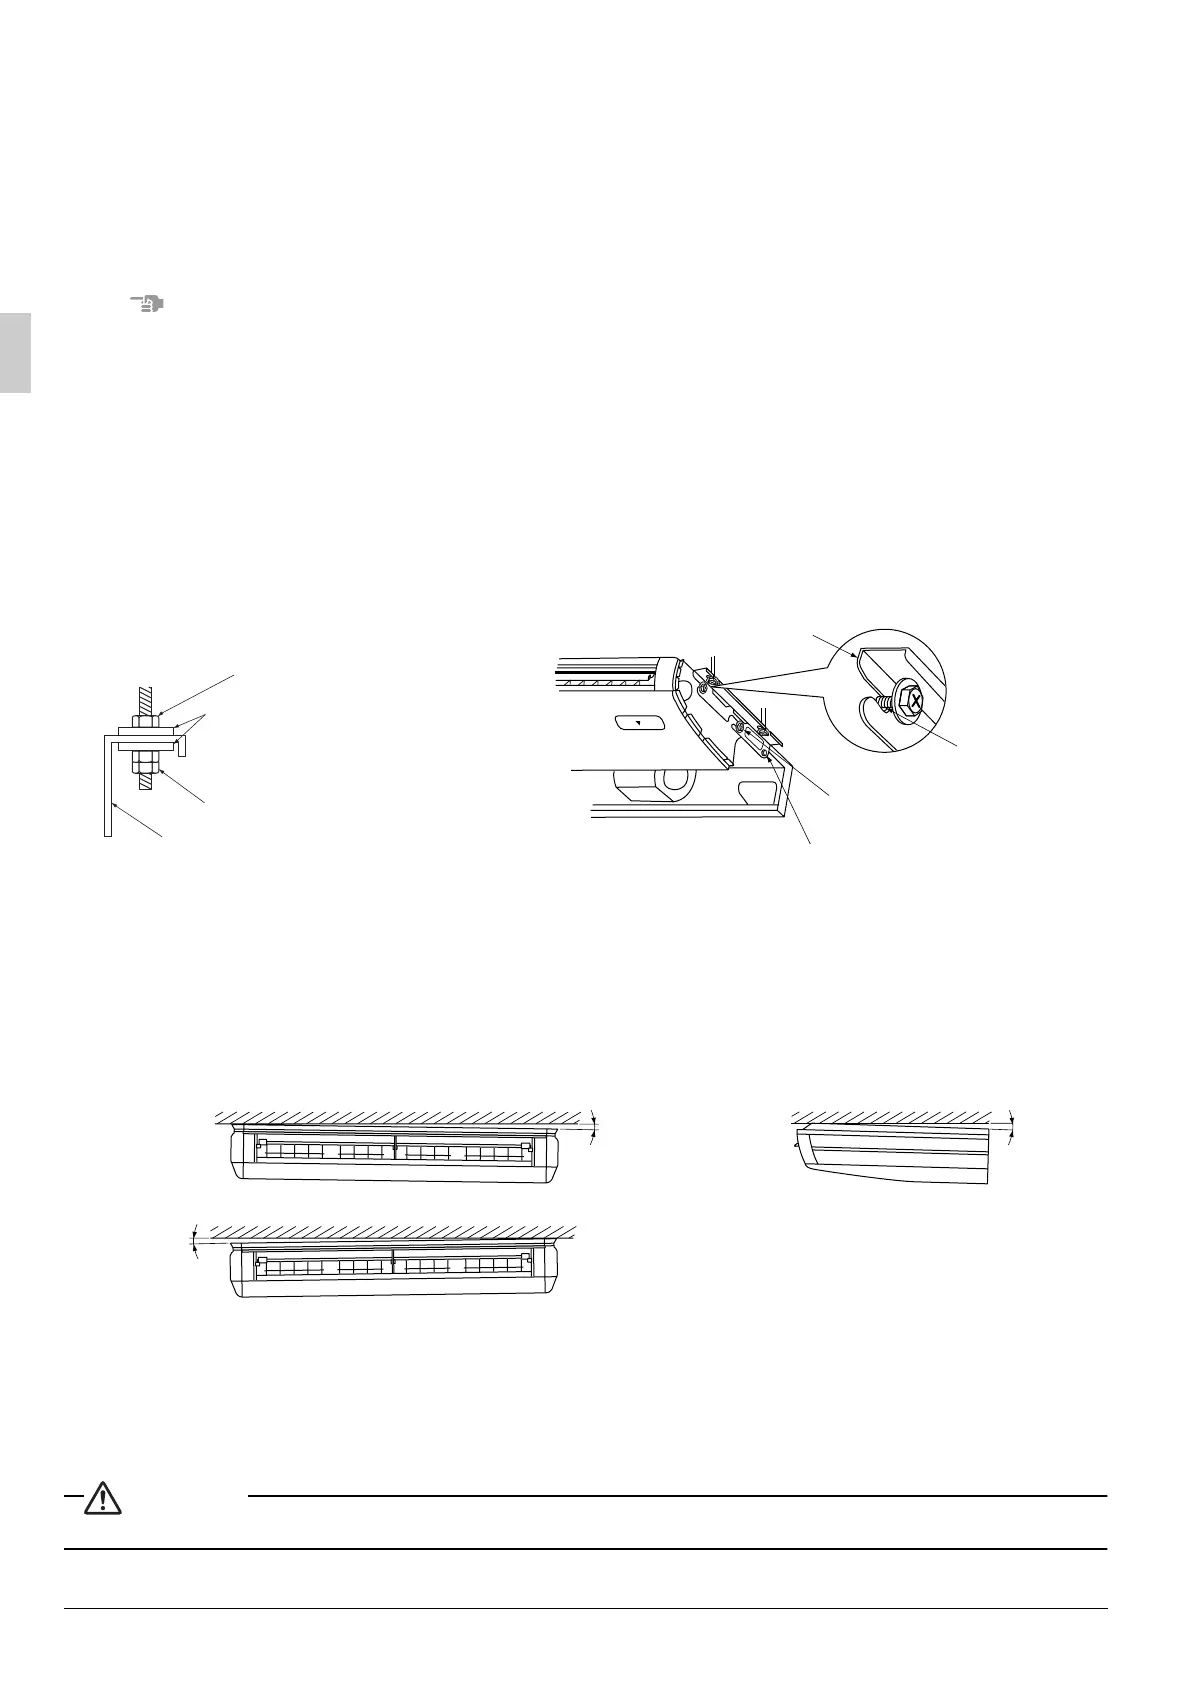
(1) Secure the hanger brackets to the suspension bolts. (Refer to Fig. 7)
NOTE
•
To ensure they are safely secured, use the included washers, and secure them with double nuts to make sure.
(2) Lift the indoor unit’s main body, insert the bolts (M8) for the hanger brackets into the attachment
part on the hanger brackets, while sliding the main body from the front. (Refer to Fig. 8)
(3) Fasten the bolts for the hanger brackets (M8) securely in 4 places, left and right. (Refer to Fig. 8)
(4) Replace the screws for the hanger brackets which had been removed (M5) securely in 2 places left
and right. This is necessary to prevent any forward and back slide in the main body of the indoor
unit. (Refer to Fig. 8)
(5) When hanging the indoor unit main body, be sure to use a level or a plastic tube with water in it to
make sure the drain piping is set either level or slightly tilted, in order to ensure proper drainage.
(Refer to Fig. 9)
A.When the drain piping is tilted to the right, or to the right and back.
Place it level, or tilt it slightly to the right or the back. (Within 1°.)
B.When the drain piping is tilted to the left, or to the left and back.
Place it level, or tilt it slightly to the left or the back. (Within 1°.)
CAUTION
Setting the unit at an angle opposite to the drain piping might cause a water leakage.
Nut (Field supplied)
Washer (3) (attached)
Double nuts (Field supplied)
Hanger bracket
Hanger bracket
Attachment
part
Hanger bracket
setting bolt (M8)
Hanger bracket
fixing screw (M5)
Fig. 7
Fig. 8
≤ 1˚
≤ 1˚
≤ 1˚
A
A.B
B
Fig. 9
01_EN_3PN06588-3E.fm Page 8 Tuesday, June 27, 2006 4:45 PM
 Loading...