8
Preparation Before Operation
■■
■■
■ Setting the air purifying filters
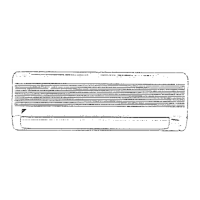
Indoor unit
NOTE
Pull out the air filters.
● Push upwards the
tab at the center of
each air filter, then
pull it down.
2
Open the front grille.
● Hold the grille by the tabs on the two sides
and lift it until it stops with a click.
(about 60°)
1
Set the air purifying filters.
● Attach an air purifying filter to each air filter.
(See page 13 “Care and cleaning”)
Set the air filters in their original
positions and close the front grille.
● Operation without air filters may result in
troubles as dust will accumulate inside the
indoor unit.
3
4
Please note
● The air conditioner always consumes 15 - 35
watts of electricity even while it is not operating.
● If you are not going to use the air conditioner for
a long period, for example in spring or autumn,
turn the breaker OFF.
● Use the air conditioner in the following conditions.
Mode
COOL
HEAT
DRY
Operating conditions
Outdoor temperature : 19 to 54 °C
Indoor temperature : 18 to 32 °C
Indoor humidity : 80% max.
Outdoor temperature : –10 to 21 °C
Indoor temperature : 28 °C max.
Outdoor temperature : 19 to 54 °C
Indoor temperature : 18 to 32 °C
Indoor humidity : 80% max.
If operation is continued out of this range
•
A safety device may work to stop the
operation.
(In multi system, it may work to stop
the operation of the outdoor unit only.)
• Condensation may occur on the
indoor unit and drip.
•
A safety device may work to stop the
operation.
•
A safety device may work to stop the
operation.
• Condensation may occur on the
indoor unit and drip.
Tips for saving energy
●
Be careful not to cool (heat) the room too much.
Keeping the temperature setting at a moderate
level helps save energy.
Recommended temperature setting
For cooling: 26°C – 28°C
For heating:20°C – 24°C
● Cover windows with a blind or a curtain.
Blocking sunlight and air from outdoors
increases the cooling (heating) effect.
● Clogged air filters cause inefficient
operation and waste energy. Clean them
once in about every two weeks.
● Holding down ( ) or ( ) button
rapidly increases or decreases the time display.
■■
■■
■ Setting the clock
Press .
Press
to set the clock to the
present time.
■■
■■
■ Turn the breaker ON
● Turning ON the breaker opens the flap, then
closes it again. (This is a normal procedure.)
1
is displayed.
2
blinks.
3
Press .
blinks.
(Now the clock is set.)