10
Preparation Before Operation
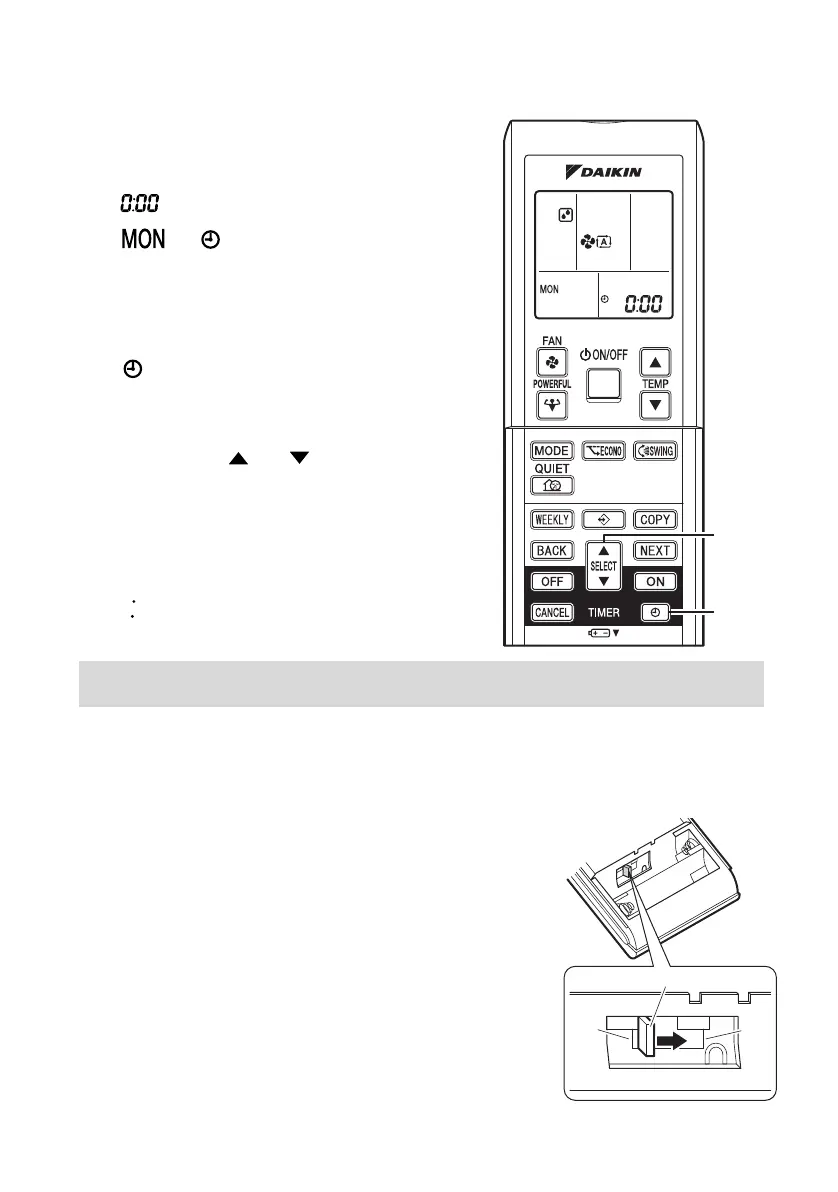
■ To set the clock
1. Press “CLOCK button”.
is displayed.
and blinks.
2. Press “SELECT button” to set
the current day of the week.
3. Press “CLOCK button”.
blinks.
4. Press “SELECT button” to set
the clock to the present time.
Holding down “ ” or “ ” button rapidly
increases or decreases the time display.
5. Press “CLOCK button”.
Always point the remote controller at the
indoor unit when pushing the buttons when
setting the indoor unit’s internal clock.
blinks.
NOTE
■ Turn the breaker ON
• Turning ON the breaker closes the flap. (This is a normal procedure.)
■ Checks on Remote Controller Settings
• This remote controller is common to the heat pump model
and cooling only model. Use the dipswitches on the remote
controller to set the heat pump model or cooling only model.
• Refer to the following explanation and make the setting as
shown in the illustration.
• For customers of Heat pump model: Set to H/P
• For customers of Cooling-only model: Set to C/O
• If the indoor unit’s internal clock is not set to the correct time, the WEEKLY TIMER will not
operate punctually.
1, 3, 5
2, 4
H/P C/O
Dipswitches
3PEN477071-1A.book Page 10 Thursday, March 30, 2017 1:28 PM