Installation Manual EDUS391777-F17
7 FXSQ-TAVJU
3P184443-13Z
7
English
V[RG
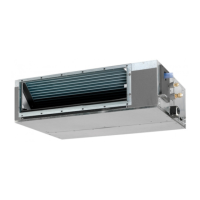
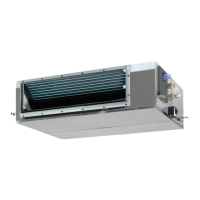
5WEVKQPƃCPIG
4GRNCEGOGPV
%JCODGTEQXGT
V[RG
Replacement
5WEVKQPƃCPIG
Chamber cover
Note)
1. Be sure to remove chamber cover one side by
one side.
(QTVJKUOQFGNOCKPVGPCPEGQHVJGEQPVTQNDQZ
through side is only available.
Maintenance through bottom is not available.
Fig. 5
5. INSTALLATION OF INDOOR UNIT
Depending on the optional accessories, it may be easier
to attach them before installing the indoor unit. Refer to
also the installation manual attached to the optional ac-
cessories.
(QTKPUVCNNCVKQPWUGVJGCVVCEJGFCPFURGEKƂGFCEEGUUQ-
ries.
(1) Install the indoor unit temporarily.
r (KZVJGJCPIGTVQVJGJCPIKPIDQNV
/CMGUWTGVQUGEWTGN[ƂZVJGJCPIGTYKVJVJGPWVCPF
the washer for hanger (11) from the upper and lower
side. (Refer to Fig. 6)
If the washer clamp (9) is used, the upper side washer
for hanger (11) may be protected from falling off.
(Refer to Fig. 7)
[ Fix the hanger ]
Field supply
Tighten
(double nut)
Washer for
hanger (11)
(accessory)
Fig. 6
=9CUJGTƂZKPI?
Washer
clamp (9)
(accessory)
+PUGTV
7RRGTPWV
Washer for
JCPIGT
(accessory)
Fig. 7
r Keep the air outlet covered with a protective sheet to pre-
vent weld spatter and other foreign materials from entering
the indoor unit and damaging the resin drain pan.
(If holes or cracks are generated in the resin drain pan,
water can leak.)
(2) Adjust so that the unit is properly positioned.
(3) Check the level of the unit. (Refer to Fig. 8)
(4) Remove the washer clamp (9) used for preventing the
washer for hanger (11) from dropping and tighten the up-
per side nut.
Hanger
Bottom of
product
Level
Vinyl tube
[Maintaining horizontality]
Feed water into the tube and
set the indoor unit to the water
levels on the left and right.
Fig. 8
CAUTION
r Install the indoor unit leveled.
If the indoor unit is inclined and the drain piping side gets
JKIJKVOC[ECWUGOCNHWPEVKQPQHƃQCVUYKVEJCPFTGUWNVKP
water leakage.
r Attach nuts on the upper and lower side of hanger.
If there is no upper nut and the lower nut is over-tightened,
the hanger and the top plate will deform and cause abnor-
mal sound.
r &QPQVKPUGTVOCVGTKCNUQVJGTVJCPVJCVURGEKƂGFKPVQ
the clearance between the hanger and the washer
for hanger (11).
Unless the washers are properly attached, the hanging
bolts may come off from the hanger.
WARNING
The indoor unit must be securely installed on a
place that can withstand the weight.
+HVJGUVTGPIVJKUKPUWHƂEKGPVVJGKPFQQTWPKVOC[HCNN
down and cause injuries.
 Loading...