MeChanICal InsTallaTIon
www.DaikinApplied.com 27 IM 893-10 • ROOFPAK SINGLEZONE UNITS
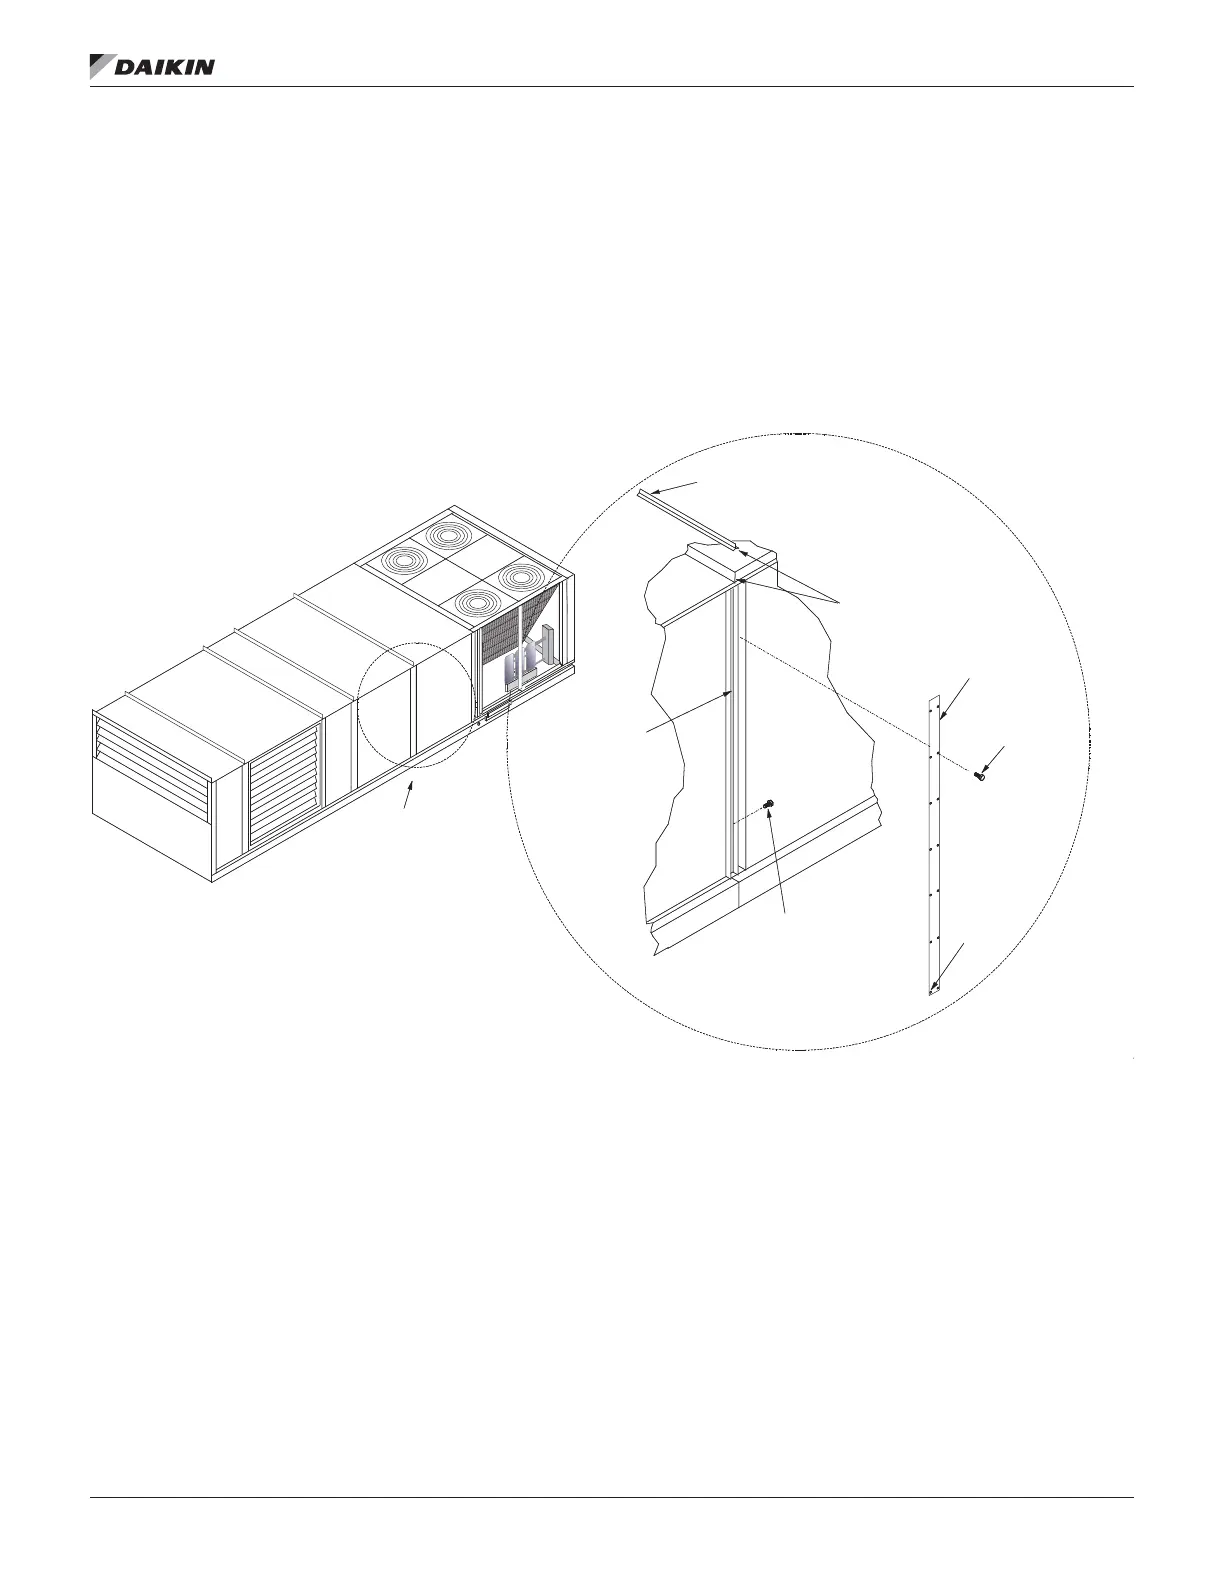
Phase II. Reassemble cabinet (Figure 31)
1. Reinstall top cap removed in Phase I, Step 1.
2. Caulk (watertight) ends of splice cap.
3. Caulk (watertight) vertical seam.
4. Install #10 screws (provided).
5. Install screws (0.25–20 × 0.75) removed in Phase I,
Step 2
6. Install splice cover (provided).
Figure 32: Reassemble Cabinet
Reinstall top cap
saved in step 1
Caulk ends
of splice cap
See detail
Splice cover,
provided
#10 screws,
provided
Nut clip-on,
provided
Caulk
vertical
seam
Install screws
(.25 to 20 × .75)
saved from step 1