7 Commissioning
Installer reference guide
19
(A)RXP20~35L2V1B + RXF20~35A2V1B
R32 split series
4P513661-2 – 2017.11
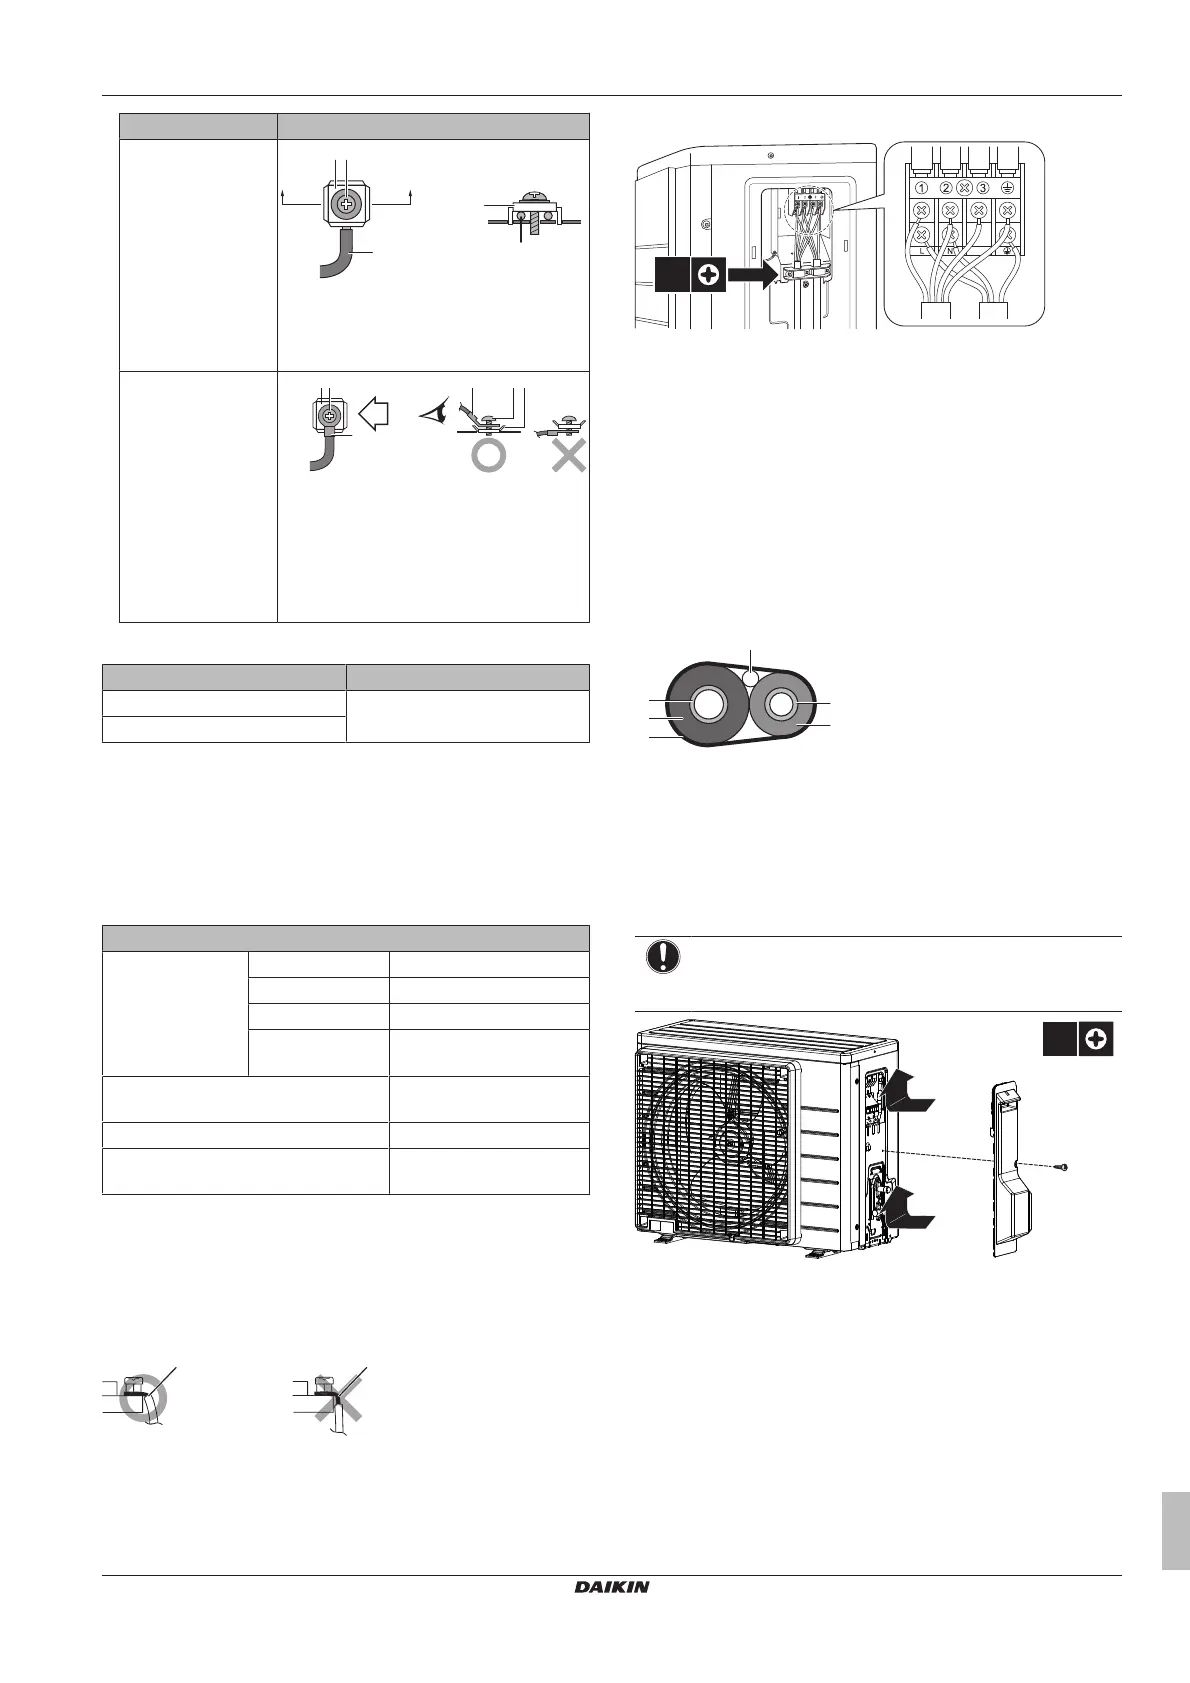
Wire type Installation method
Single-core wire
a Curled single-core wire
b Screw
c Flat washer
Stranded conductor
wire with round
crimp-style terminal
a Terminal
b Screw
c Flat washer
O Allowed
X NOT allowed
Tightening torques
Item Tightening torque (N•m)
M4 (X1M) 1.2~1.5
M4 (earth)
▪ If single-core wires are used, be sure to curl the end of the lead.
Improper work may cause heat or fire.
▪ The earth wire between the pull relief and the terminal must be
longer than the other wires.
6.7.4 Specifications of standard wiring
components
Component
Power supply cable Voltage 220~240V
Phase 1~
Frequency 50Hz
Wire sizes MUST comply with
applicable legislation
Interconnection cable
(indoor↔outdoor)
4-core cable ≥1.5 mm² and
applicable for 220~240 V
Recommended field fuse 16A
Earth leakage circuit breaker MUST comply with
applicable legislation
6.7.5 To connect the electrical wiring on the
outdoor unit
1 Remove the service cover. See "6.2.2 To open the outdoor
unit"on page11.
2 Strip insulation (20mm) from the wires.
a Strip wire end to this point
b Excessive strip length may cause electrical shock or
leakage.
3 Open the wire clamp.
4 Connect the interconnection cable and power supply as follows:
5 Tighten the terminal screws securely. We recommend using a
Phillips screwdriver.
6 Install the switch box cover.
7 Install the service cover.
6.8 Finishing the outdoor unit
installation
6.8.1 To finish the outdoor unit installation
1 Insulate and fix the refrigerant piping and interconnection cable
as follows:
a Gas pipe
b Gas pipe insulation
c Interconnection cable
d Liquid pipe
e Liquid pipe insulation
f Finishing tape
2 Install the service cover.
6.8.2 To close the outdoor unit
NOTICE
When closing the outdoor unit cover, make sure that the
tightening torque does NOT exceed 4.1N•m.
7 Commissioning
7.1 Overview: Commissioning
This chapter describes what you have to do and know to
commission the system after it is installed.
Typical workflow
Commissioning typically consists of the following stages:
1 Checking the "Checklist before commissioning".
2 Performing a test run for the system.