6 Installation
Installer reference guide
13
(A)RXP20~35L2V1B + RXF20~35A2V1B
R32 split series
4P513661-2 – 2017.11
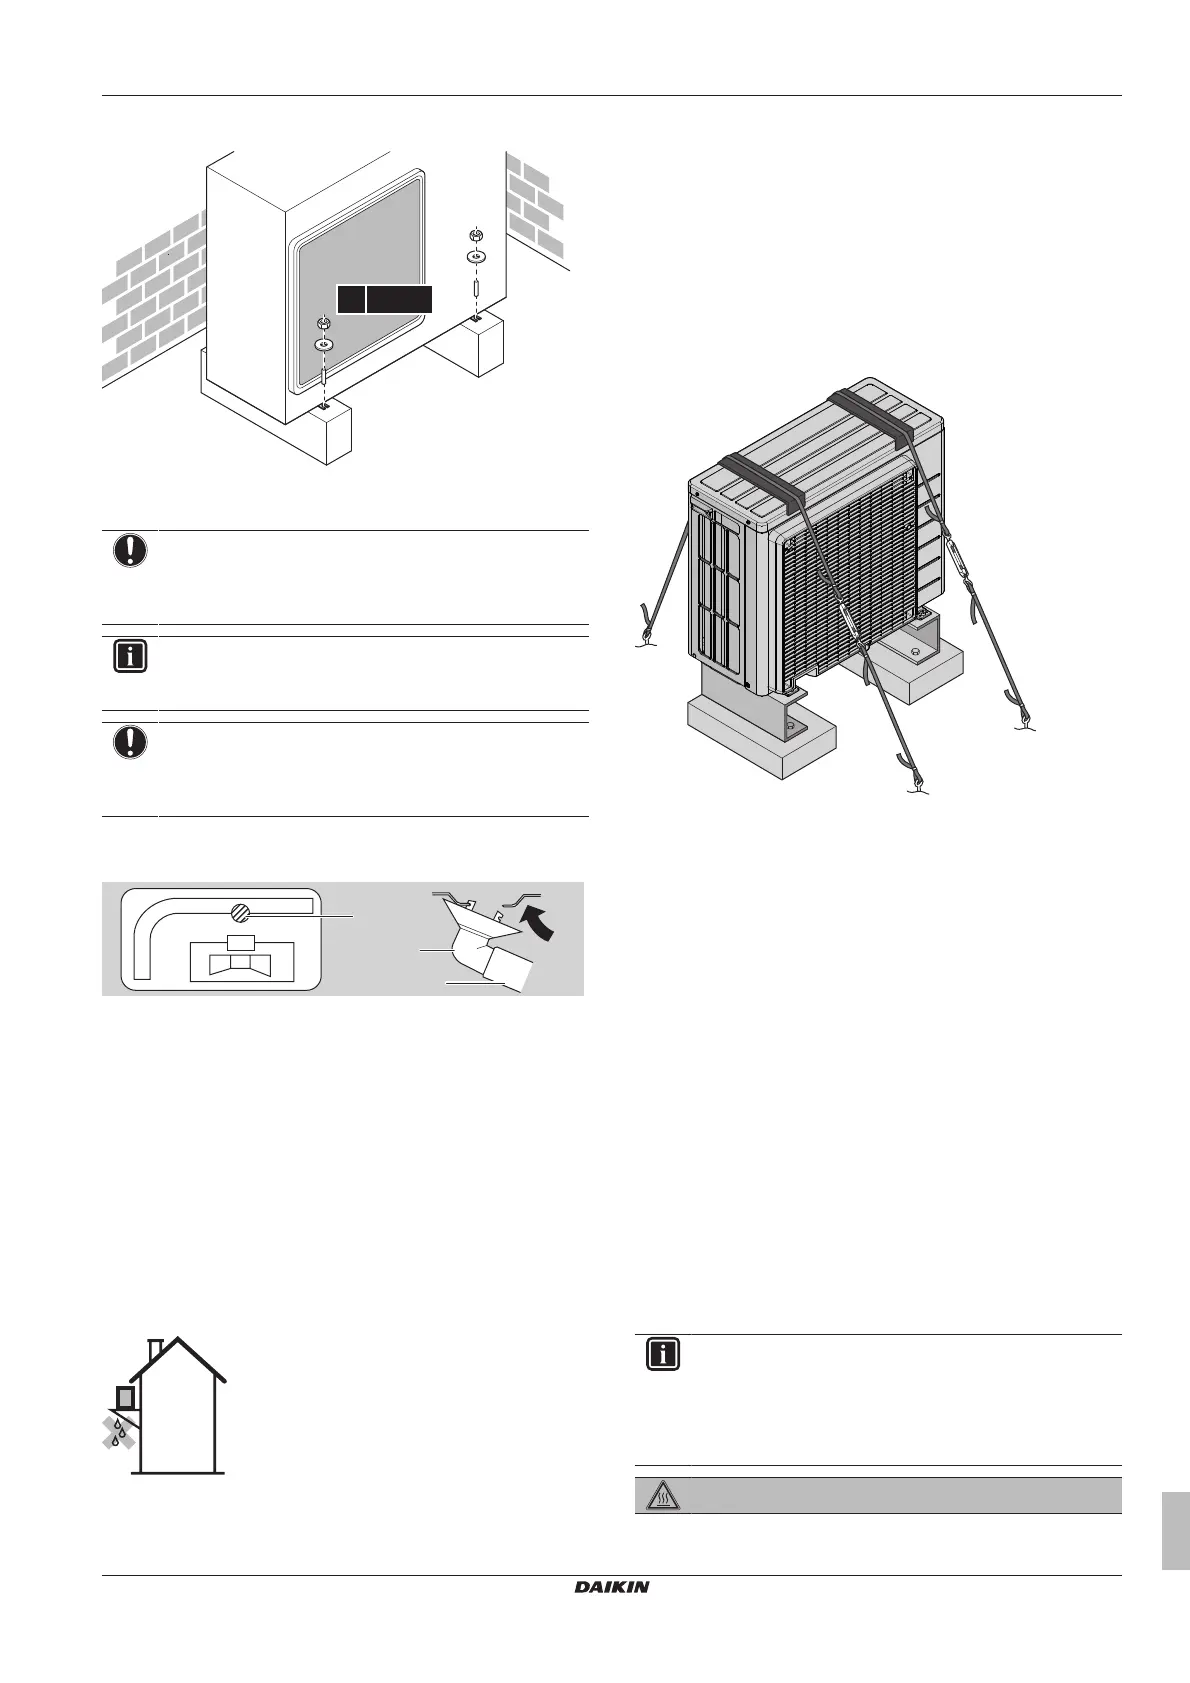
6.3.4 To install the outdoor unit
6.3.5 To provide drainage
NOTICE
If the unit is installed in a cold climate, take adequate
measures so that the evacuated condensate CANNOT
freeze.
INFORMATION
For information on the available options, contact your
dealer.
NOTICE
Provide at least 300 mm of free space below the unit.
Additionally, make sure the unit is positioned at least
100mm above the expected level of snow.
1 Use a drain plug for drainage.
2 Use a Ø16mm hose (field supply).
a Drain port
b Bottom frame
c Drain plug
d Hose (field supply)
▪ Make sure that condensation water can be evacuated properly.
▪ Install the unit on a base to make sure that there is proper
drainage in order to avoid ice accumulation.
▪ Prepare a water drainage channel around the foundation to drain
waste water away from the unit.
▪ Avoid drain water flowing over the footpath, so that it does NOT
become slippery in case of ambient freezing temperatures.
▪ If you install the unit on a frame, install a waterproof plate within
150 mm of the bottom side of the unit in order to prevent water
from getting into the unit and to avoid drain water dripping (see the
following figure).
6.3.6 To prevent the outdoor unit from falling
over
In case the unit is installed in places where strong wind can tilt the
unit, take following measure:
1 Prepare 2 cables as indicated in the following illustration (field
supply).
2 Place the 2 cables over the outdoor unit.
3 Insert a rubber sheet between the cables and the outdoor unit
to prevent the cable from scratching the paint (field supply).
4 Attach the cable’s ends. Tighten those ends.
6.4 Connecting the refrigerant piping
6.4.1 About connecting the refrigerant piping
Before connecting the refrigerant piping
Make sure the outdoor and indoor unit are mounted.
Typical workflow
Connecting the refrigerant piping involves:
▪ Connecting the refrigerant piping to the indoor unit
▪ Connecting the refrigerant piping to the outdoor unit
▪ Insulating the refrigerant piping
▪ Keeping in mind the guidelines for:
▪ Pipe bending
▪ Flaring pipe ends
▪ Using the stop valves
6.4.2 Precautions when connecting the
refrigerant piping
INFORMATION
Also read the precautions and requirements in the
following chapters:
▪ General safety precautions
▪ Preparation
DANGER: RISK OF BURNING