5
4. Accessories
4.1 Accessories supplied with this unit
See location 1 in the figure above for reference to where following
accessories are supplied with the unit.
1
1
RXQ14~20RXQ6~12
6-18 HP
Tie wrap
(1)
Tie wrap
(2)
Tie wrap
(3)
20 HP
(a)
Note
(a)
For RXQ20, Front connection pipe require the combination of
gas accessory pipe(1) and gas accessory pipe(2).
Front connection
Operation
manual
Installation
manual
Caution
label
(Addition
refrigerant
charge
record)
Bottom
connection
Bottom
connection
Front
connection
6-8HP,
20HP
10HP
12HP,
14-18HP
REFNET header
KHRP26M22H KHRP26M33H KHRP26M72H KHRP26M73H
REFNET joint KHRP26A22T KHRP26A33T KHRP26A72T KHRP26A73T
Outdoor unit multi connection piping kit
Number of outdoor units connected 2 units 3 units
Kit name
Pipe size reducer
Kit name KHRP26M73TP KHRP26M73HP
BHFP22P100 BHFP22P151
4.2 Option accessory
To install the outdoor units, the following optional parts are also
required. To select an optimum kit, refer to “ 9.3 Selection of
refrigerant branch kits.”
Refrigerant branching kit
Note
Make sure that any separate purchased accessories are designed for
use with R410A.
12x12x
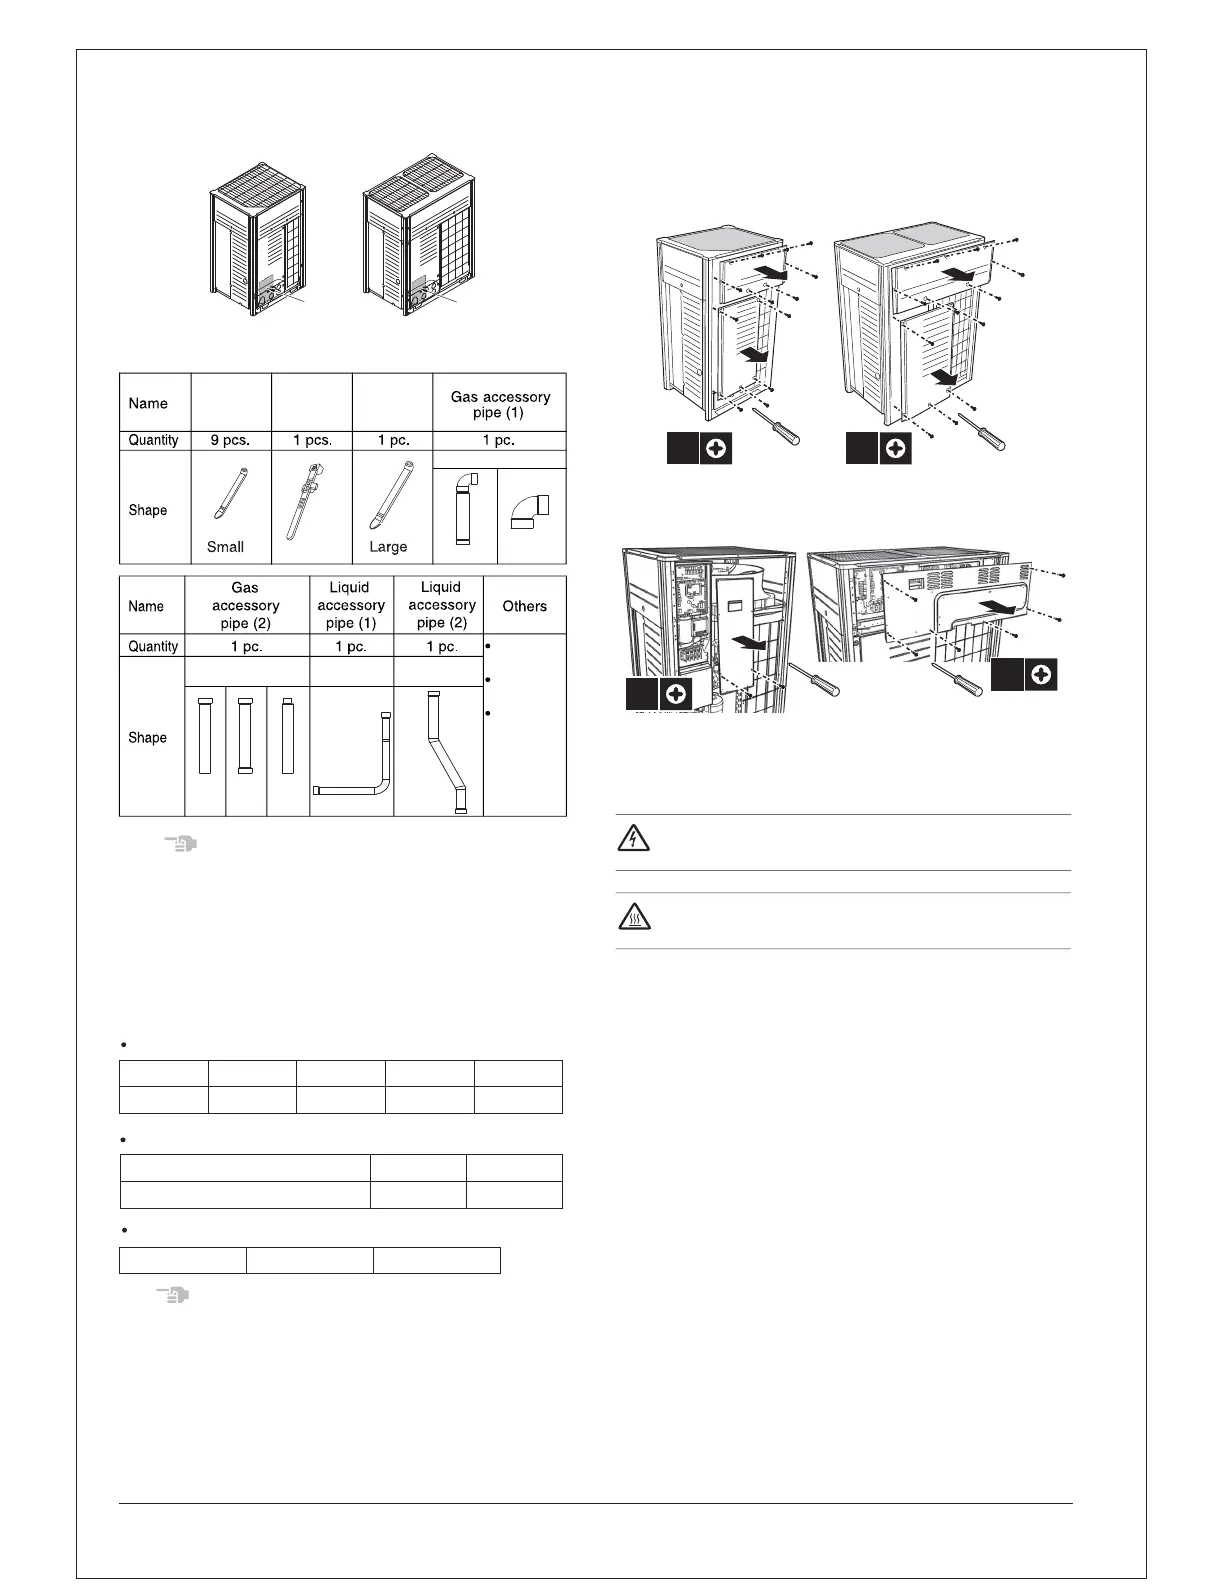
5. Overview of unit
5.1 Opening the unit
To gain access to the unit, front plates need to be opened as follows:
Once the front plates open, the electrical component box can be
accessed by removing the electrical component box cover as follows.
For service purposes, the push buttons on the main PCB need to be
accessed. To access these push buttons, the electrical component
box cover does not need to be opened. See "13.Making field settings" .
DANGER: Electrical shock
See "2.General safety precautions".
DANGER: Do not touch piping and internal parts.
See "2.General safety precautions".
RXQ14~20RXQ6~12
RXQ14~20RXQ6~12
2x
6x
Do not leave any accessories supplied with this unit, until
installation finished.
 Loading...