5 ■English
Outdoor Unit Installation
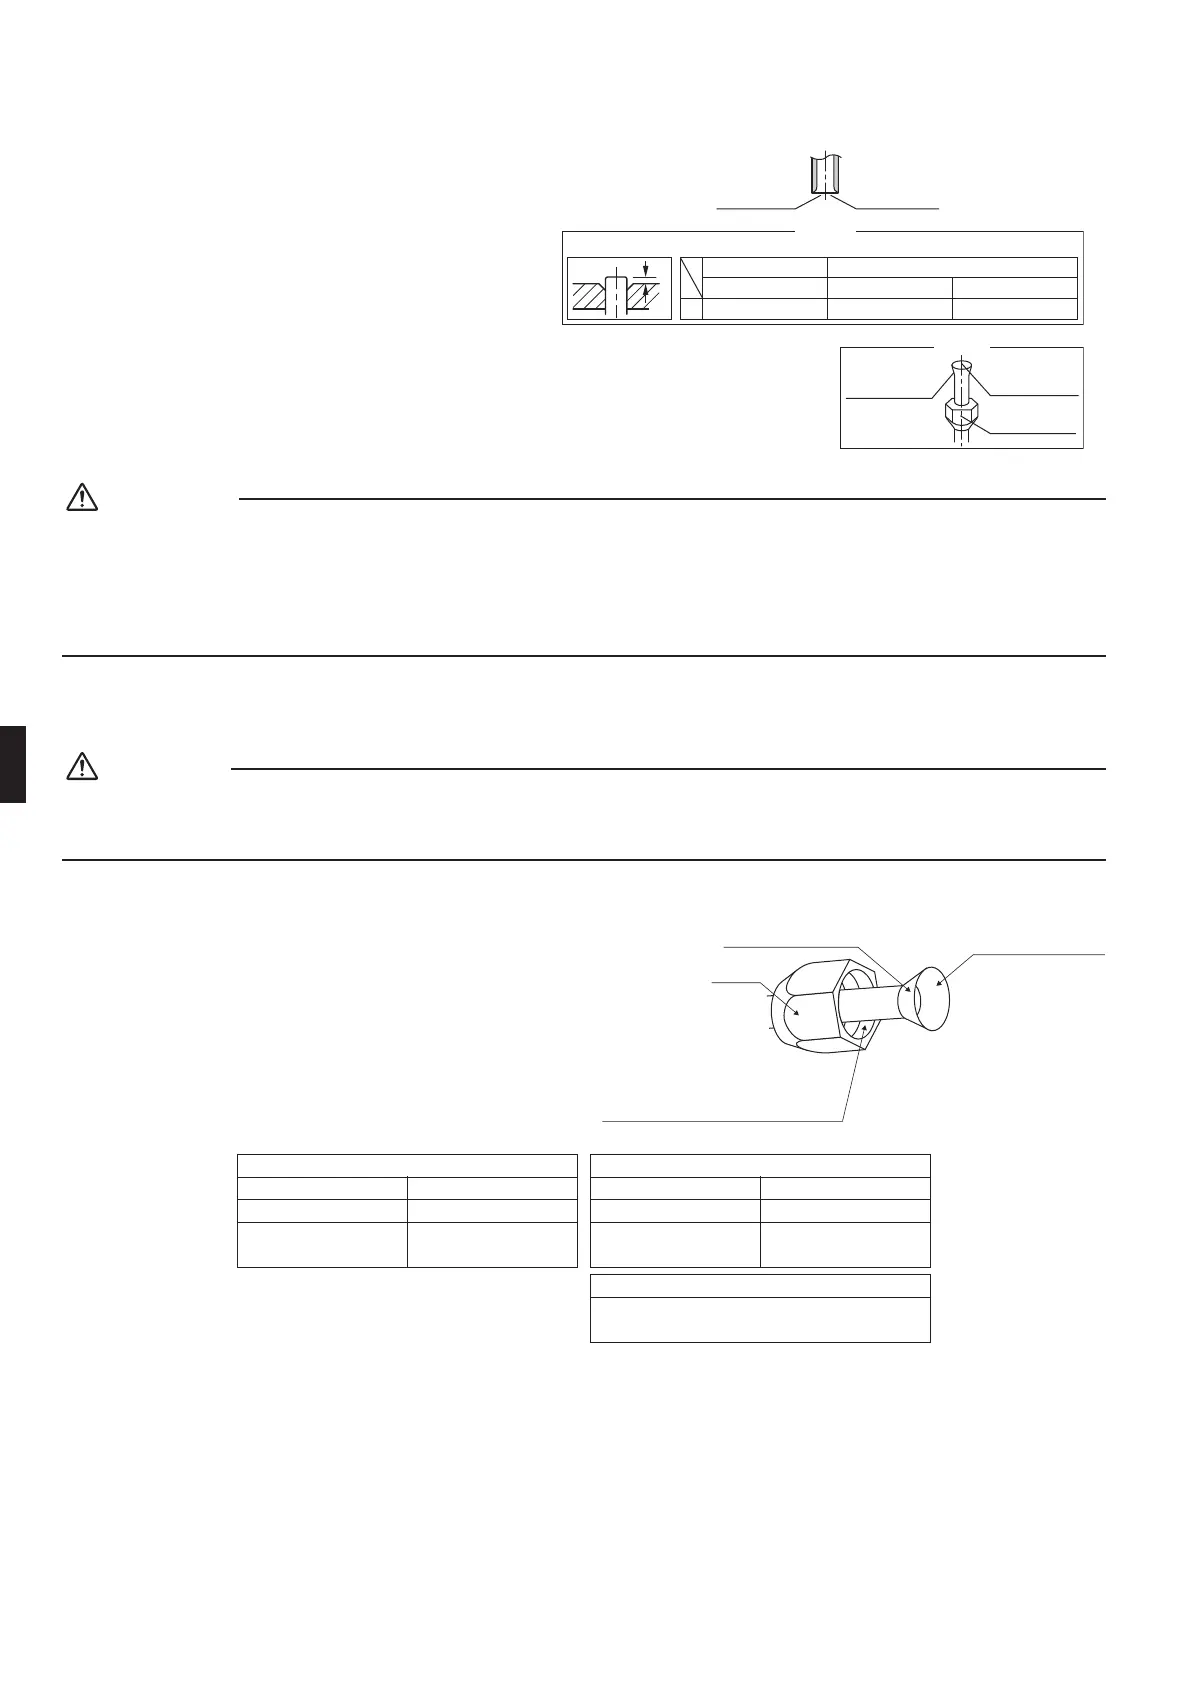
3. Flaring the pipe end
1)Cutthepipeendwithapipecutter.
2)Removeburrswiththecutsurfacefacing
downwardsothatthechipsdonotenterthepipe.
3)Putthearenutonthepipe.
4)Flarethepipe.
5)Checkthatthearingisproperlymade.
(Cut exactly at
right angles.)
Remove burrs.
Set exactly at the position shown below.
A
Flaring
Die
Check
Flare’s inner
surface must
be flaw-free.
The pipe end must
be evenly flared in
a perfect circle.
Make sure that the
flare nut is fitted.
A 0-0.5mm
Clutch-type
Flare tool for R410A
1.0-1.5mm
Clutch-type (Rigid-type)
1.5-2.0mm
Wing-nut type (Imperial-type)
Conventional flare tool
WARNING
•Donotusemineraloilonaredpart.
•Preventmineraloilfromgettingintothesystemasthiswouldreducethelifetimeoftheunits.
•Neverusepipingwhichhasbeenusedforpreviousinstallations.Onlyusepartswhicharedeliveredwiththeunit.
•DoneverinstalladriertothisR410Aunitinordertoguaranteeitslifetime.
•Thedryingmaterialmaydissolveanddamagethesystem.
•Incompletearingmaycauserefrigerantgasleakage.
4. Refrigerant piping work
CAUTION
•Usethearenutxedtothemainunit.(Topreventcrackingofthearenutbyageddeterioration.)
•Topreventgasleakage,applyrefrigerationoilonlytotheinnersurfaceoftheare.(UserefrigerationoilforR410A.)
•Usetorquewrencheswhentighteningthearenutstopreventdamagetothearenutsandgasleakage.
•Alignthecentresofbotharesandtightenthearenuts3
or4turnsbyhand.Thentightenthemfullywiththetorque
wrenches.
Do not apply refrigeration
oil to the outer surface.
Flare nut
Apply refrigeration oil to
the inner surface of the
flare.
Do not apply refrigeration oil to the flare nut
to avoid tightening with excessive torque.
[Apply oil]
Flare nut tightening torque
Gas side Liquid side
3/8 inch 1/4 inch
32.7-39.9N • m
(333-407kgf • cm)
14.2-17.2N • m
(144-175kgf • cm)
Valve cap tightening torque
Gas side Liquid side
3/8 inch 1/4 inch
21.6-27.4N • m
(220-280kgf • cm)
21.6-27.4N • m
(220-280kgf • cm)
Service port cap tightening torque
10.8-14.7N • m
(110-150kgf • cm)
01_EN_3P297037-2D.indd 5 11/1/2012 11:04:42 AM
 Loading...
