Si-71A For FVY71L~125L
Removal Procedure 179
5.5 Removal of Heat Exchanger
Procedure
Warning Be sure to turn off all power supplies before disassembling work.
Step Procedure Points
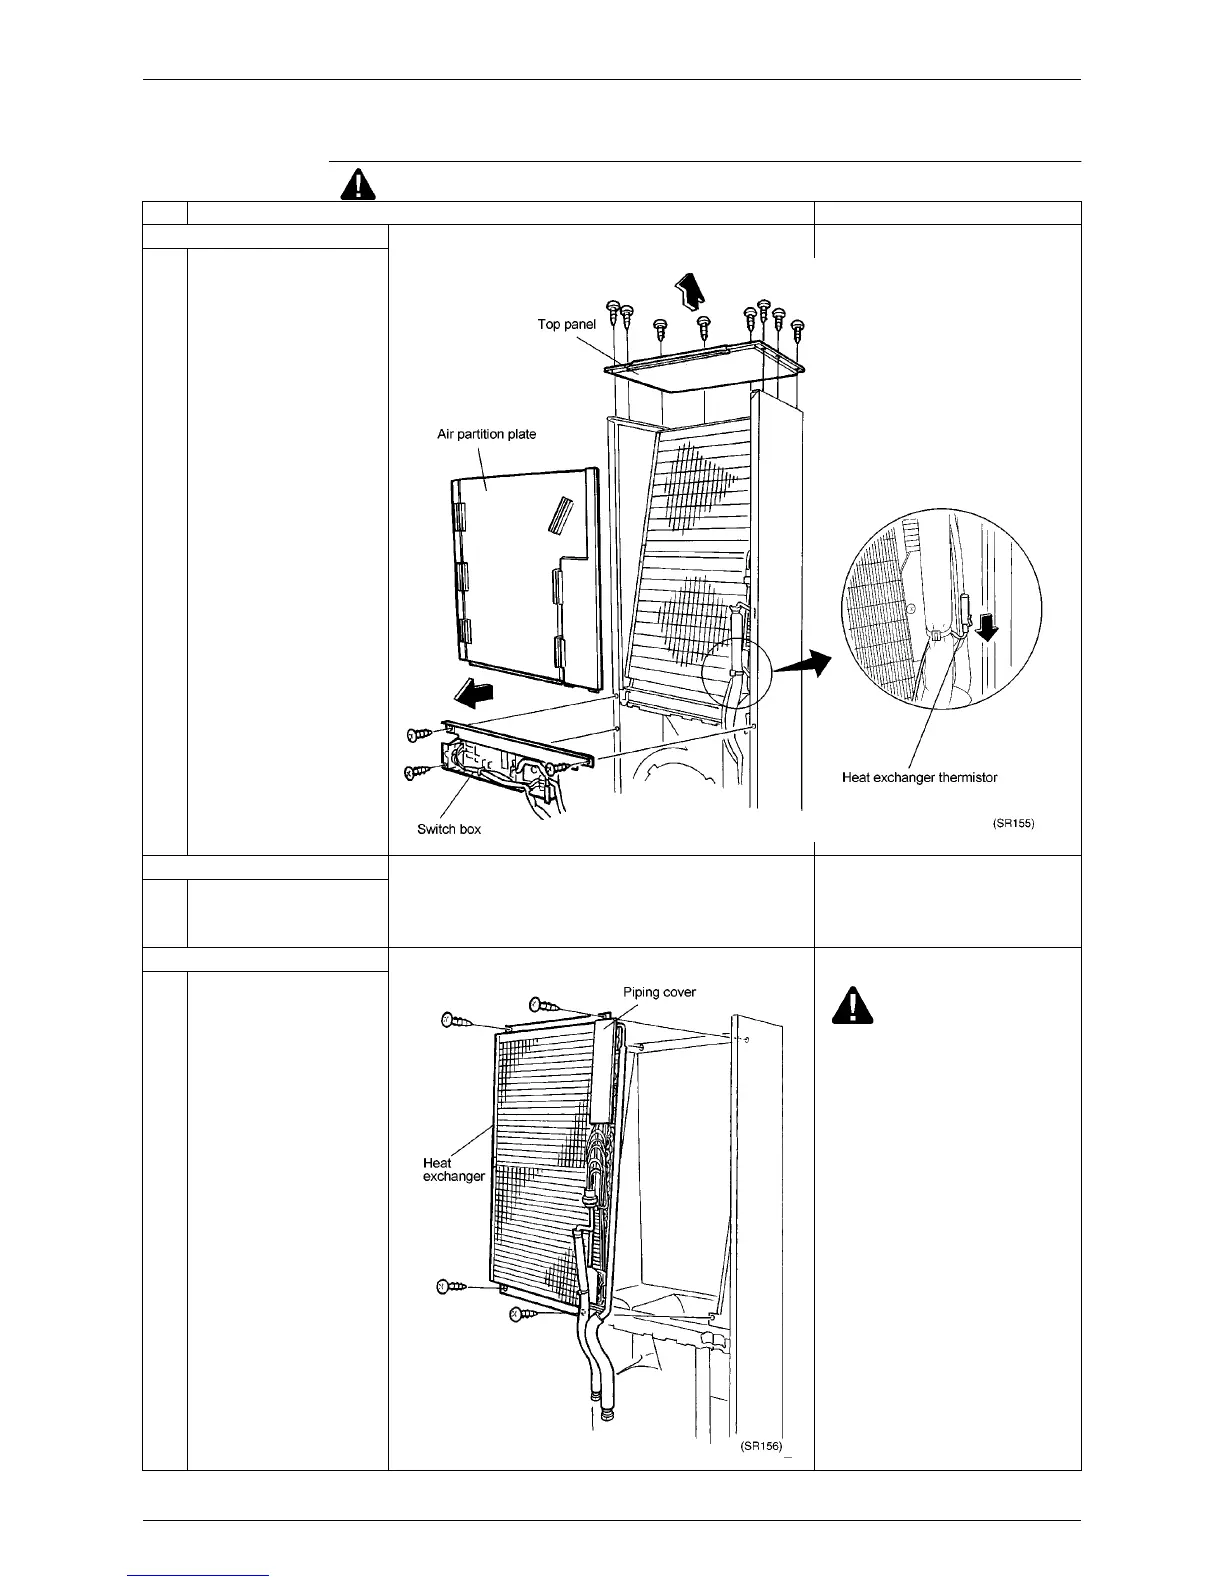
Removing switch box
1 Disconnect connector for
swing motor and one for limit
switch.
2 Remove heat exchanger
thermistor from PCB.
3 Remove three mounting
screws to dismount switch
box and air partition plate.
Removing top panel
1 Remove eight screws to
dismount top panel. (Six
screws are used for model
J56 to J80.)
Removing heat exchanger
1 Remove four screws to
dismount heat exchanger.
Caution
∗
Be sure to remove heat exchanger
before cleaning it.